PwC study: MSP strategic users gain 43-point performance premium over cost-focused peers.
A report from PricewaterhouseCoopers based on a survey of over 2,000 business leaders and took it as confirmation of our recent blog post about Why SMBs Need Managed Service Providers (MSPs). Here are some takeaways from the article:
Takeaways:
“Companies that use MSPs for strategic advantage are 1.6 times and 2.4 times more likely to be faster to market as well as more innovative than those focused solely on cost savings, according to the report.”
“Organizations utilizing managed services at a mature level use them to respond more adroitly to changing conditions and potential threats.”
“Most business and IT leaders recognize the pace of innovation is occurring faster than their internal IT teams can absorb. There is always going to be some type of skills shortage. Those skill shortages are ones that MSPs are in the best position to fill.”
If your company is looking to outperform in the marketplace, then contact us to start a partnership.
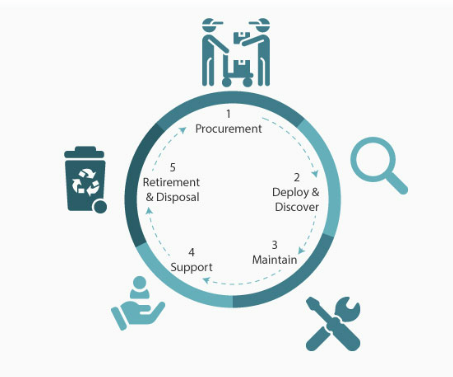
IT lifecycle dashboard tracking device age, refresh cycles, and replacement planning for SMB hardware.
In today’s fast-paced business environment, effectively managing IT equipment throughout its lifecycle has become essential. Equipment Lifecycle Management (ELM) refers to the systematic approach of acquiring, operating, maintaining, and disposing of equipment. By implementing an ELM strategy, businesses can maximize the lifespan and productivity of their equipment, while also minimizing costs and downtime. Let’s explore some of the secret benefits of equipment lifecycle management.
Cost Optimization
IT equipment can represent a significant investment for businesses. Through ELM, companies can optimize costs by planning IT equipment updates and replacements in a strategic manner. With a clear understanding of the IT equipment’s lifespan and maintenance requirements, businesses can budget for these costs well in advance, avoiding unexpected expenses that could negatively impacting their finances.
Increased Equipment Efficiency
One of the primary goals of ELM is to maximize equipment efficiency and productivity. By conducting regular inspections, maintenance, and repairs, businesses can identify and address performance issues before they become major problems. Proactively managing IT equipment ensures that it operates at optimal levels, reducing downtime and improving overall operational efficiency.
Enhanced Asset Tracking and Planning
ELM provides businesses with a comprehensive understanding of their equipment inventory. Through proper record-keeping and asset tracking systems, companies can easily identify the location, condition, and maintenance history of each piece of IT equipment. This information enables businesses to plan for IT equipment updates, replacements, or adjustments based on their lifecycle and performance, ensuring that resources are allocated efficiently.
Sustainable and Environmentally Responsible Practices
Efficient IT equipment management is not only beneficial for businesses but also for the environment. By properly maintaining and disposing of equipment, companies can significantly reduce waste generation and minimize their carbon footprint. Implementing ELM strategies, such as equipment reuse or recycling programs, aligns with sustainable business practices and demonstrates a commitment to environmental responsibility.
Effective equipment lifecycle management is crucial for businesses looking to optimize costs, improve productivity, and minimize their environmental impact. By proactively managing IT equipment throughout its lifecycle, companies can maximize its efficiency, extend its lifespan, and ensure smooth operations. Investing in IT equipment lifecycle management ultimately leads to long-term benefits and a competitive advantage in today’s business landscape.
If you haven’t already, contact us to implement an ELM strategy for your business.
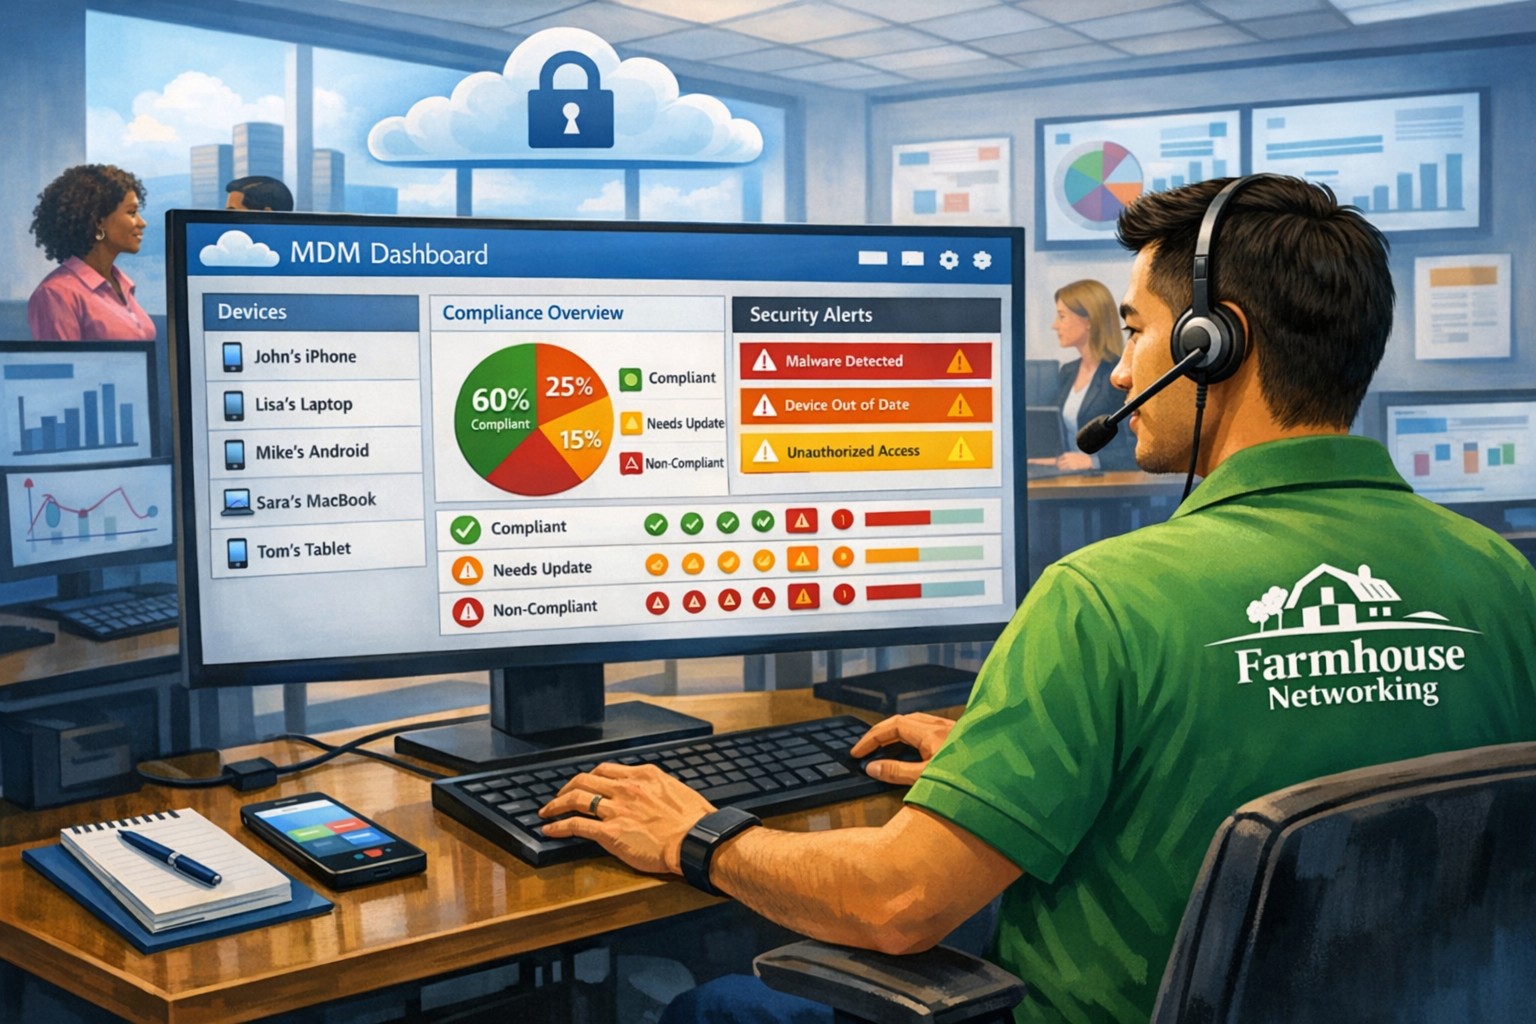
MSP console managing SMB BYOD smartphones and laptops with centralized MDM and security policies.
Small and medium-sized businesses (SMBs) face numerous challenges when it comes to managing their IT. Limited resources (both human and money), lack of expertise, and the need to focus on core business operations often make it difficult for SMBs to understand and manage technology needs. This is where Managed Service Providers (MSPs) come in. In this blog article, we will explore the reasons why SMBs should consider partnering with MSPs to enhance their IT capabilities and drive business growth.
Cost-Effective IT Solutions:
One of the primary reasons why SMBs need MSPs is the cost-effectiveness they offer. By outsourcing their IT needs to MSPs, SMBs can avoid the high costs associated with hiring and training an in-house IT team. MSPs provide a range of services, including network monitoring, data backup and recovery, cybersecurity, and software updates, all at a predictable monthly cost. This allows SMBs to allocate their resources more efficiently and focus on their core business.
Access to Expertise and Advanced Technology:
MSPs are experts in providing IT services and have a team of highly skilled professionals with expertise in variety of technology. By partnering with MSPs, SMBs gain access to the depth of knowledge and experience from IT experts who can handle complex tasks and provide strategic guidance. Additionally, MSPs stay up-to-date with the latest technology trends and can recommend and implement solutions that can help SMBs stay competitive in the market and safe from hackers.
Proactive IT Support and Maintenance:
MSPs offer proactive IT support and maintenance, which is crucial for SMBs. They monitor networks, identify potential issues, and take preventive measures to avoid downtime and disruptions. MSPs also provide regular software updates, security patches, and system maintenance, ensuring that SMBs’ IT remains secure and up-to-date. This proactive approach helps SMBs minimize the risk of costly IT failures and ensures smooth business operations.
Enhanced Data Security:
Data breaches and cyberattacks pose a significant threat to SMBs. MSPs play a vital role in safeguarding SMBs’ sensitive data and protecting them from potential security breaches. They implement robust cybersecurity measures, such as firewalls, antivirus software, and encryption, to ensure data confidentiality and integrity. MSPs can also conduct regular security audits and vulnerability assessments to identify and address any potential weaknesses in the IT infrastructure.
Scalability and Flexibility:
As SMBs grow, their IT needs evolve. MSPs offer scalable solutions that can adapt to changing business requirements. Whether it’s adding new users, expanding storage capacity, or integrating new software, MSPs can quickly and efficiently accommodate these changes. This scalability and flexibility allow SMBs to focus on their growth without worrying about the limitations of their IT infrastructure.
If your company could use the cost-effective solutions, access to expertise, proactive support, enhanced data security, and scalability that come from using a MSP, then contact us for assistance.
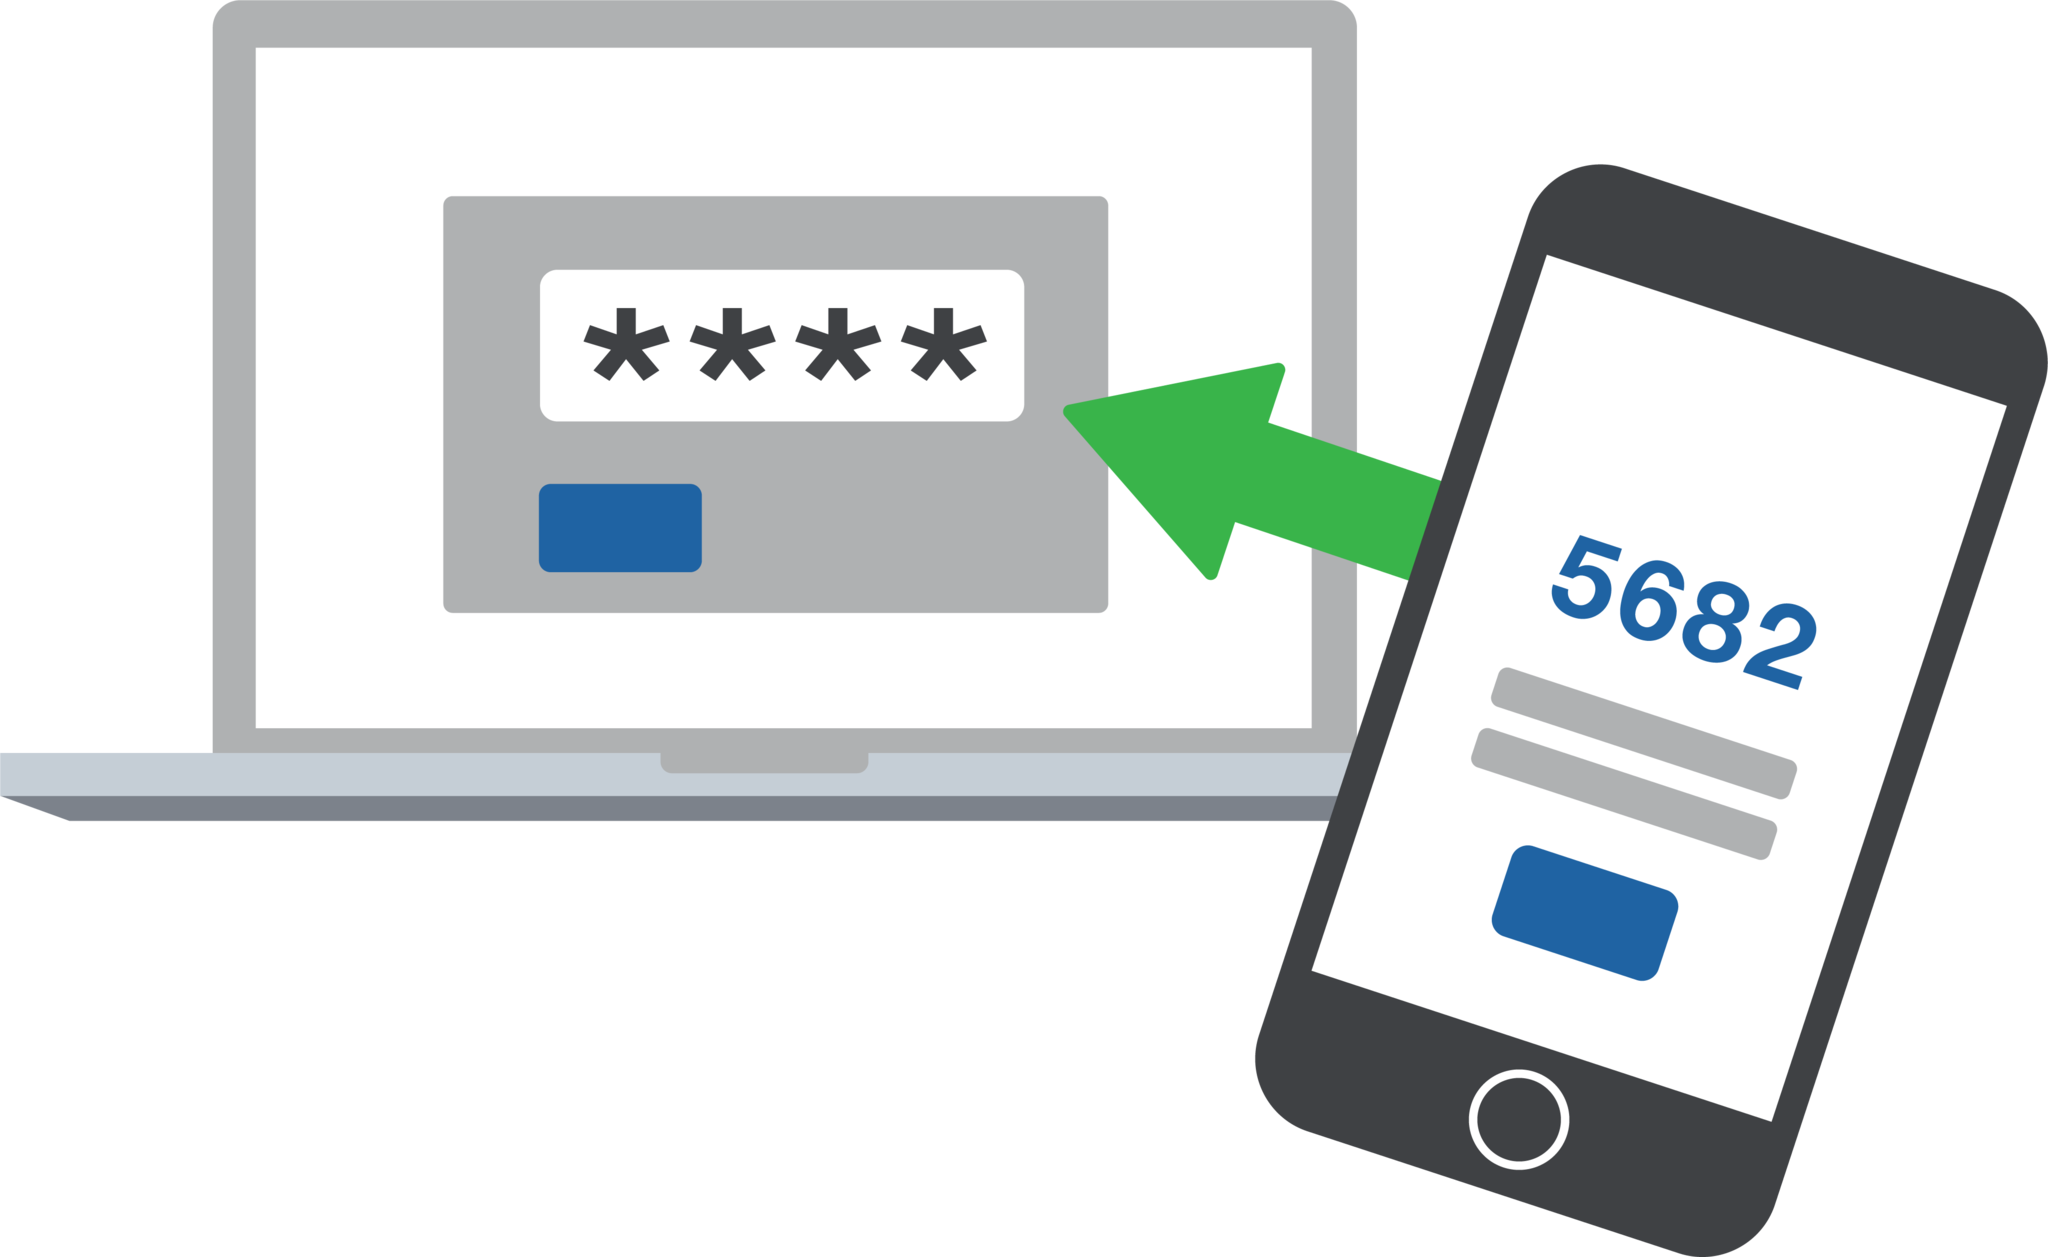
2FA dashboard displaying account protection compliance metrics and phishing defenses.
Businesses are face an increasing number of cyber threats. To protect sensitive data and prevent hackers from gaining access, implementing stronger security measures is crucial. One such measure is 2-factor authentication (2FA). Let’s look at the importance and security benefits of 2FA for businesses.
Enhanced Account Security:
2FA adds an extra layer of security to the traditional username and password login process. By requiring users to provide a second form of authentication, such as a unique code sent to their mobile device, it significantly reduces the risk of hackers from gaining access. Even if a hacker manages to obtain a user’s password, they would still need the second factor to gain access.
Mitigation of Password-related Risks:
Passwords are often the weakest link in security systems. Many users tend to reuse passwords across multiple accounts or choose weak and easily guessable ones or re-use the same password while incrementally changing a digit or two. With 2FA, even if a password is compromised, the additional authentication factor acts as a safeguard, making it significantly harder for attackers to gain access.
Protection Against Phishing Attacks:
Phishing attacks, where attackers trick users into revealing their login credentials, are a common threat to businesses. 2FA provides an additional layer of defense against such attacks. Even if a user unknowingly falls victim to a phishing attempt and enters their credentials on a fake website, the second authentication factor would prevent the attacker from accessing the account.
Compliance with Industry Regulations:
Many industries, such as finance, healthcare, government contractors, and e-commerce, are subject to strict data protection regulations. Implementing 2FA helps businesses meet compliance requirements and avoid potential penalties. It demonstrates a commitment to safeguarding sensitive customer information and builds trust with clients.
Cost-Effective Security Measure:
Implementing 2FA does not require significant financial investment. Many 2FA solutions are readily available and can be easily integrated into existing systems. Considering the potential financial and brand reputation damage caused by a security breach, the cost of implementing 2FA is minimal compared to the benefits it provides.
In an era where cyber threats are constantly evolving, businesses must prioritize security measures to protect their valuable data. 2-factor authentication offers a simple yet effective way to do so.
If your company is interested in implementing 2FA across the entire organization, then contact us for assistance.
Mimecast KnowBe4 phishing simulation risk scoring employee training dashboard
As you know, we take cybersecurity and the protection of your accounts and data very seriously. That’s why we are always striving to provide you with tools and resources to help keep you and your employees safe from cybercrime.
The most common threat we are seeing is phishing messages delivering malware or stealing credentials. Even though your company might be protected with spam filtering, there are instances where these malicious messages could still appear in your employee’s inboxes. And it’s important we both arm them with as much education and resources as possible to understand and identify these phishes.
We have a new tool that we’d love to demonstrate for your or talk more about. It’s called Catch Phish, and it’s an email analysis and training tool. It connects right to your employee’s Outlook as a clickable application on every message. When clicked, the tool quickly, but safely, scans the important details of the message to find potential threats such as suspicious links or attachments, sender details, or message details such as threatening language or deactivation scares.
This tool is included in our cybersecurity training packages and can help provide the much needed cybersecurity education to all levels of staff.
Do you have 30 minutes to talk about reducing your risks with Catch Phish and our other cybersecurity awareness training tools, then contact us for assistance.
RingCentral VoIP app within Teams interface with call messaging and video features.
We have decided to make a business change that includes no longer directly selling phone services, but instead we are moving our clients to RingCentral. They are the industry leaders in this type of service and their rates are very competitive. One of their killer features is the Teams integration
RingCentral for Teams – Embedded App
RingCentral for Teams embedded app enables calling from the Teams app to both internal extensions and external numbers. It’s the simplest way to supercharge the phone experience for both end users and IT admins without having to deploy a new app to end users. Most importantly, there’s no need for an added Microsoft calling or E5 license to capture this value. This solution is ideal for organizations that want to:
leverage RingCentral’s superior telephony while maximizing the value of their Teams investment
avoid the added cost of Microsoft’s calling license
With the RingCentral for Teams embedded app, users access an icon presented in Microsoft Teams. They can then place and receive calls, access voicemails and voicemail transcriptions, and send or receive an SMS or fax. These tools fill critical gaps in Microsoft Teams, transforming it from messaging and video meeting tool to a communications powerhouse. This approach is also a money saver, as it doesn’t require the added cost of a Teams Phone or E5 license.
If your company is currently using Microsoft Teams for communications and want to add the incredible functionality that RingCentral brings, then contact us for assistance.
Today we tell the story of a medical office’s journey to the cloud. This particular client was facing their server operating system reaching end of support (a HIPAA violation) in the near future. They had begun by looking at their electronic medical records software company’s online offering, which didn’t have all the functionality of their on-premises software and was very expensive (this is typical).
They next decided to look into moving their current on-premises software into the cloud and we were asked to help with the testing. We determined that it would be best to move the file portion of the server to SharePoint / OneDrive to increase their mobility and flexibility. We also determined that it would be best to move them away from on premises Active Directory into Azure Active Directory / Intune to allow authentication and security policies. Finally we began testing the on-premises software hosted on a server in Azure with a VPN connection to their office.
The SharePoint / OneDrive and Azure Active Directory portions went through with little issues. The server, however, was not as we had hoped. The Azure VPN connection was expensive due to it always being on and no way of turning it off outside of business hours. The performance of the SQL database that the on-premises software used was basically unusable. The other option would be to create virtual desktops on Azure for this purpose but the cost and functionality was not what the customer was hoping for.
This has lead them back to searching for an online EMR software that will meet all their requirements. This will be tough because most companies are good at some things, but not all things and compromises usually have to be made. Our hope is that this story is a lesson to other companies. The cloud may sound like the newest and best way to work, but the costs and functionality are often worse than expected.
If your company is going to use full disk encryption or has compliance requirements that you need consulting for, then contact us for assistance.
Farmhouse Networking cloud automation eliminates manual IT tasks for Oregon SMBs using Power Automate and PowerShell workflows.
Worked with a client lately to help them Automate a workflow, but you may be wondering what does that even mean. Let me explain. We all have tasks in our workday that are repetitive and consume little bite size pieces of our time. Depending on the steps needed to accomplish these tasks, they can be “delegated” to a computer process via scripting aka we automate them. In the case of the client we helped, they received emails from an eFax service which included attachments. These attachments had to be manually saved into a shared folder for the rest of the staff to access as needed. This process probably took about 30 to 60 seconds each, but multiply this by the 30+ faxes they received each day you have 15 to 30 minutes of wasted time each day (65-130 hours per year). This does not take into account the time taken to stop doing one thing, accomplish this task, and restart the original thing they were doing.
Automate to Freedom
What if we could automate this little task and keep them employee free to do other more important things? We did. They customer uses Office 365 which includes a service called Power Automate. We scripted this tool to look at incoming messages, find ones from the eFax vendor, strip out the attachment, and save it to a SharePoint folder. This can then be shared with other employees and even synced via OneDrive to their Desktops for viewing, etc. That is just the tip of the iceberg as there is so much more that can be done with this technology.
If your company wasting little bite size pieces of time in repetitive taks, then contact us for assistance.
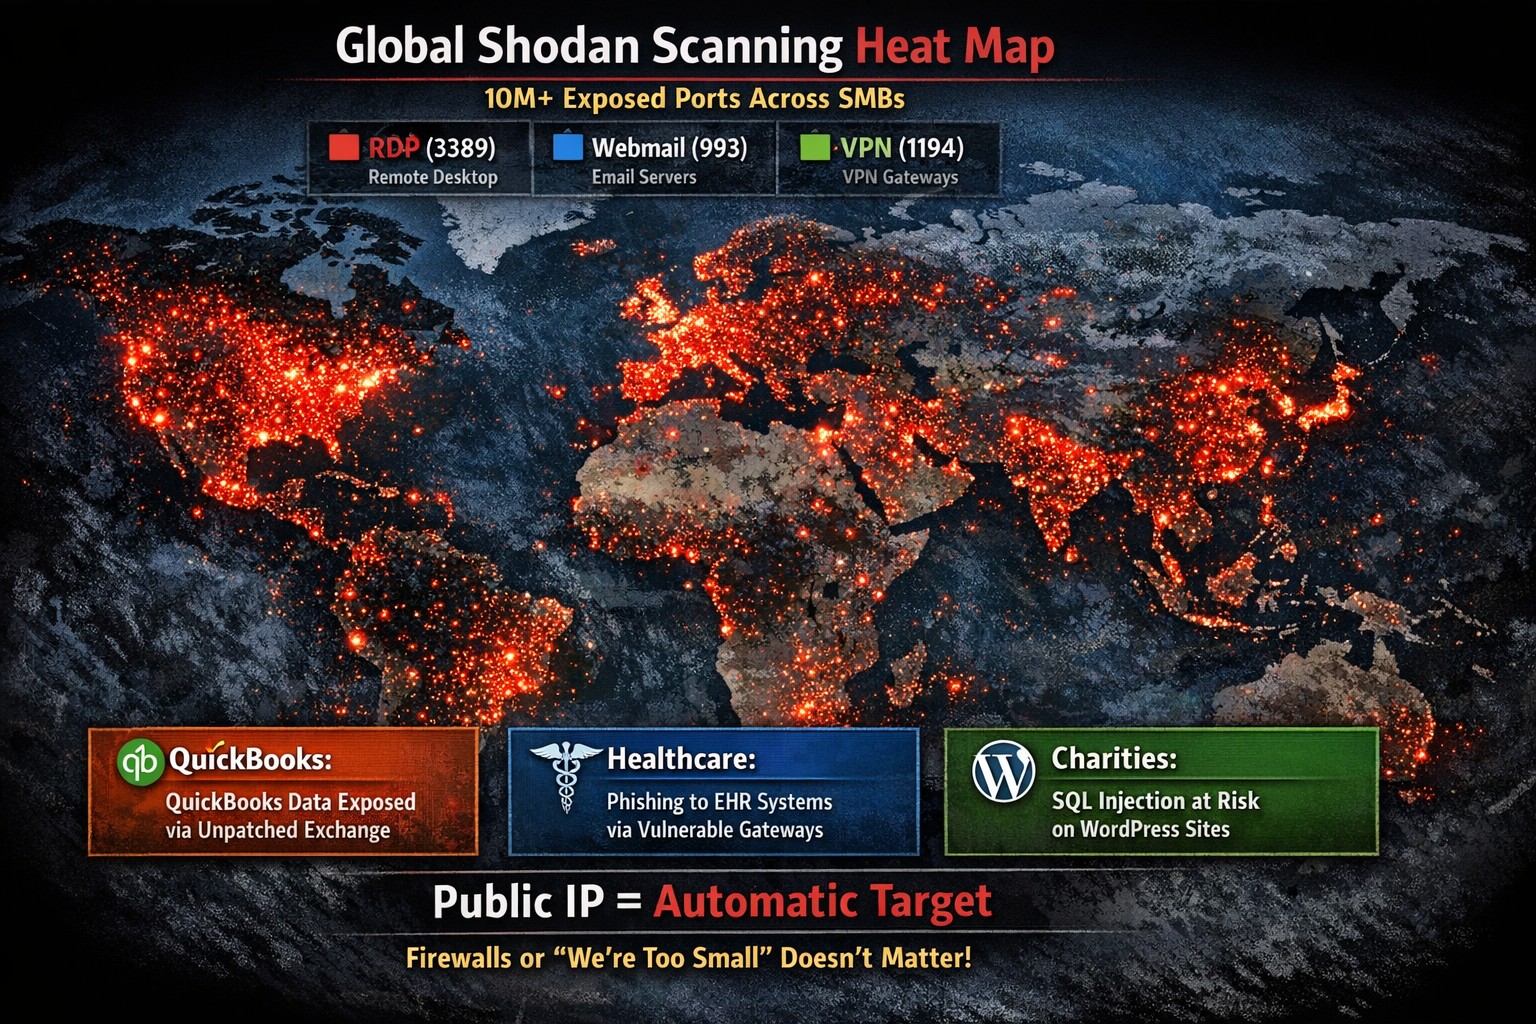
Every modern business has one thing in common – the internet.
Businesses are using computers, smart phones, tablets, etc. to connect to the internet for research, shopping, advertising, or any number of things. With a connection to the internet comes the need for routers, switches, wireless, and other network hardware to distribute internet connectivity across the company. There are malicious people on the internet that are setting traps and trying to break into companies which necessitate the use of tools like antivirus, internet filtering, spam filtering, and other protective measures. There are also people who work from their homes and need to have a way of tunneling safely into the network to use the resources there.
All of this has to be managed by someone in the company or you can contract with a managed IT service provider.
If your company needs help managing all the things connected to your internet, then contact us for assistance.
Make sure Hyper-V Host has CPUs than the combined total of CPUs for all servers being restored as these static until after the VMs are completely restored. If there is not enough CPU resources then the VMs will not boot.
Make sure Hyper-V Host has more than the combined total of RAM for all servers being restored as these settings are static until after the VMs are completely restored. If there is not enough memory then the VMs will not boot.
Create a SET NIC Team on the server (if you have multiple NICs)
Open Powershell as administrator
User the New-VMSwitch command to setup an external virtual switch to connect to for live connections
The AllowManagementOS is needed if you are using the same NIC team to access the VM host
Setup secondary Internal vSwitch to allow for testing before deploying
Setup Synology LUN targets for each VM to be restored. Make sure that they are big enough to hold all the full uncompressed size of the entire thick provisioned hard drives for the entire server.
Connect each LUN to the iSCSI Initiator on the VM Host. Make sure to bring them online, initialize them, and give them a drive letter. Synology needs this because it uses the SMB protocol to transfer the files during restore.
Make sure to allow the File and Printer Sharing app through the Windows firewall and open port 5986 to allow HTTP traffic for WinRM to allow Synology to query the Hyper-V settings.
Add the Hyper-V Host to the Active Backup for Business app.
Synology Active Backup Restore to Hyper-V
Open the Active Backup for Business app
Click on the Physical Server tab on the left
Select the server and click the Restore button
Select the point in time to restore from
Choose Restore to Microsoft Hyper-V
Choose Full Virtual Machine Restore
Change the Restore Name
Select a folder on the Hyper-V Host to place the configuration files
Select a folder on the Hyper-V Host to place each of the restore VHD files
Select a Virtual Switch on the Hyper-V Host to connect the VM to
Confirm the settings by clicking on the Done button.
After:
The VMs will boot with a single NIC and no network settings. Keep them offline and add additional NICs as needed to match the original setup. Then configure the NICs as before upon reboot. Make sure to connect to Internal Test Switch for initial steps.
Check hardware configuration of CPUs and RAM to determine if adjustments can be made. In particular, the RAM settings can be changed to startup, minimum, and maximum to allow for distribution of resources to VMs that have heavier workloads.
Boot VM to make sure it is functioning correctly. (first bootup can take upwards of 15 minutes)
Convert the VM from Gen1 to Gen2
Download Windows 10 ISO – https://www.microsoft.com/en-us/software-download/windows10
And God will generously provide all you need. Then you will always have everything you need and plenty left over to share with others. As the Scriptures say,
“They share freely and give generously to the poor. Their good deeds will be remembered forever.”
For God is the one who provides seed for the farmer and then bread to eat. In the same way, he will provide and increase your resources and then produce a great harvest of generosity in you. - 2 Corinthians 9:8-10
We use cookies to ensure that we give you the best experience on our website. If you continue to use this site we will assume that you are happy with it.