Why waiting on that hardware upgrade could cost you more the longer you put it off
As computer prices continue to climb, planning your hardware refresh now can help your business avoid paying more later.
If you’ve been telling yourself “next quarter” every time a laptop upgrade comes up, it’s time to rethink that plan. Industry analysts are now projecting one of the steepest computer price increases in years, driven by a global memory chip shortage that shows no sign of easing. For business owners who’ve been putting off replacing aging machines, the math has changed. The equipment you delay buying today will likely cost meaningfully more tomorrow.
Why prices are rising now
The root cause is a supply crunch in memory chips — the RAM and storage components inside every computer. Analysts at Gartner project soaring memory costs will cut global PC shipments by over 10% in 2026, while pushing PC prices up 17% compared to 2025 levels. Combined DRAM and solid-state drive prices are expected to surge roughly 130% by the end of the year. The driver is straightforward: massive AI data center buildouts are consuming memory chip production, leaving less supply for everyday computers and laptops.
This isn’t a short-term blip. Analysts don’t expect prices to stabilize until sometime after 2027. Some manufacturers have already begun raising prices on popular devices and reducing memory in standard configurations to manage costs. Beyond pricing, availability is tightening too — component shortages are extending lead times on replacement parts and new equipment for many buyers.
For a business owner sitting on a five- or six-year-old fleet of machines, this creates a narrow window. Replacing aging hardware now, while at least some current-generation pricing is still available, is very likely cheaper than waiting another year.
Action steps to take now
Inventory your current hardware. List every workstation and laptop with its age and current performance issues.
Identify machines nearing end of useful life — slow boot times, frequent crashes, or inability to run current software are red flags.
Get a written quote for replacement now, even if you’re not ready to buy immediately, so you have a pricing baseline.
Prioritize replacements by business risk. Machines running critical software or storing sensitive data should move to the front of the line.
Build a rolling replacement budget instead of one large annual purchase, so future price swings hit smaller batches of equipment.
Ask your IT provider about bulk purchasing or reserving inventory ahead of need, which can help lock in current pricing.
Questions business owners are asking
Should we wait to see if prices come back down? Based on current forecasts, prices are expected to stay elevated well into 2027. Waiting is more likely to cost you more than save you.
Do we need to replace everything at once? No. A phased approach — prioritizing your oldest or most critical machines first — spreads out the cost while addressing the biggest risks.
Will refurbished or off-lease equipment help? It can be a reasonable option for lower-priority machines, but it should be evaluated case by case for reliability and support.
How do we know if a machine still has useful life left? Age, performance under current workloads, and whether it can run supported software are the key indicators. An IT assessment can quantify this clearly.
How Farmhouse Networking can help
Farmhouse Networking works with business owners across Oregon, Northern California, and New Mexico to plan hardware refreshes that make financial sense. We start with a straightforward assessment of your current equipment, flag machines that are approaching risk, and help you build a realistic replacement timeline and budget — not just a shopping list. We also help source and configure new equipment so you’re not left navigating a volatile market on your own.
The bottom line
The cost of waiting is no longer hypothetical. Every quarter you delay is a quarter closer to higher prices and tighter availability. If you’ve been meaning to upgrade, now is the time to plan it — not next year.
Email us at support@farmhousenetworking.com for a free hardware and lifecycle assessment. We’ll help you understand exactly where you stand and what a smart, budget-conscious upgrade plan looks like for your business.
Why waiting for an audit notice is the most expensive compliance strategy there is
Proactive compliance planning costs far less than scrambling to fix gaps after an audit notice arrives.
Most business owners don’t think about compliance until someone forces the issue – a new client contract requiring proof of security controls, an insurance renewal asking for documentation, or worse, an audit letter. By then, the real cost isn’t the audit itself. It’s everything you didn’t do in the months or years leading up to it: the gaps that piled up, the records that don’t exist, and the scramble to fix it all under a deadline. Research consistently shows that organizations that wait until they’re forced to comply end up paying roughly two-and-a-half to three times more than those who treat compliance as an ongoing practice. That gap isn’t fines alone – it’s lost productivity, disrupted operations, and the cost of fixing things the hard way instead of the easy way.
What “Waiting” Actually Costs
Lost productivity during the scramble. When an audit notice arrives, someone has to drop everything to assemble records, policies, and proof of controls that should have already existed. That’s time not spent serving customers.
Higher remediation costs. Fixing a security gap proactively might mean a software update or a policy change. Fixing it during an active audit often means emergency vendor calls, rushed system changes, and premium pricing.
Weaker negotiating position. Auditors and regulators view a track record of good-faith effort favorably. A business with no documentation looks like it never tried – and that perception drives harsher outcomes.
Business disruption. Operations can grind to a halt while staff redirect their attention to corrective action plans, investigations, or reporting requirements.
Reputational fallout. Clients, vendors, and partners notice when a business fails an audit or discloses a breach. Rebuilding trust takes far longer than building it the first time.
Action Steps to Take Now
Inventory what you actually have. List every system, vendor, and data type your business touches. You can’t protect, or document, what you haven’t identified.
Run a basic risk assessment. Identify where sensitive data lives, who has access to it, and what would happen if it were exposed or lost.
Document your policies in writing. Verbal habits don’t count as a compliance program. Write down password requirements, data handling rules, and incident response steps.
Check your vendor agreements. Make sure any vendor handling sensitive data on your behalf has appropriate contractual protections in place.
Train your staff and keep records of it. A single untrained employee can undo your entire compliance posture. Training without documentation is nearly as risky as no training at all.
Test your backups and recovery plan. A backup you’ve never tested is a backup you don’t actually have.
Set a recurring review cadence. Quarterly or biannual reviews catch small gaps before they become big ones.
Questions Business Owners Are Likely Asking
“We’ve never had a problem. Why worry about this now?” Most compliance failures aren’t discovered until something else goes wrong – a breach, a complaint, or a routine review triggered by a client or insurer. The absence of a problem so far isn’t the same as the absence of risk.
“Isn’t this what our IT vendor is already handling?” Possibly, but it’s worth confirming directly. Compliance documentation, policy writing, and risk assessments are distinct from day-to-day IT support, and gaps often hide in that space between the two.
“How much time does this realistically take?” A basic risk assessment and documentation cleanup can often be completed in a few weeks. Waiting until an audit forces the same work into days, with far less room for error.
“What’s the actual return on doing this now instead of later?” Beyond avoiding fines, proactive compliance tends to reduce insurance premiums, speed up vendor and client onboarding, and protect the business from disruption that has nothing to do with regulators – like a ransomware attack or a lost laptop.
How Farmhouse Networking Can Help
Farmhouse Networking works with business owners to close compliance gaps before they become expensive problems – not after. That means risk assessments that actually identify where your exposure lives, documentation that holds up under scrutiny, employee training programs with the paper trail to prove it, and ongoing monitoring so nothing slips through the cracks between reviews. Instead of a one-time scramble, you get a system that keeps working in the background, year-round.
The Bottom Line
Compliance isn’t a deadline – it’s a discipline. The businesses that treat it that way spend less, sleep better, and never have to explain to a client, an insurer, or a regulator why the paperwork doesn’t exist. If you’re not sure where your gaps are, that’s the best possible reason to find out now, while you still have the luxury of time.
Don’t wait for an audit notice to find out where you stand. Email support@farmhousenetworking.com and let’s talk about what a proactive compliance check would look like for your business.
Upgrading your device is exciting. Losing access to every business account is not. Here’s what every business owner needs to know before they make the switch.
Switching to a new phone without preparing your MFA can lock you out of every business account. A little preparation before the switch prevents hours of downtime.
email. The system asks for an authentication code. You open the authenticator app. The accounts are gone. Now you’re locked out.
This happens to business owners every day. Multi-factor authentication (MFA) is one of the most effective security tools available – but it’s bound to the device it was set up on. When that device changes, access can disappear instantly unless you prepare in advance.
Here’s exactly what happens, why it matters, and what to do about it.
Why MFA Breaks When You Switch Phones
Authenticator apps like Microsoft Authenticator, Google Authenticator, and Duo Mobile generate time-sensitive codes that are tied to your specific device. The codes work because the app and the service share a secret key established during setup. When you swap phones without transferring that key, the connection breaks.
The result: you cannot complete login, even with the correct password. If your old phone is already wiped or gone, and you have no backup method configured, recovery can take hours, or longer, and usually requires IT intervention.
For a business, that’s more than an inconvenience. It’s a potential compliance issue, a productivity disruption, and in some cases, a security risk if employees start using workarounds.
Action Steps Before You Switch Phones
These steps apply to you, your staff, and anyone who uses MFA to access business systems.
Inventory every account protected by MFA. Email, cloud storage, accounting software, practice management platforms, banking portals – list them all. You cannot protect what you haven’t identified.
Check your authenticator app’s backup settings. Microsoft Authenticator supports cloud backup. Google Authenticator added backup functionality in 2023. Enable it before you wipe or trade in your old device.
Register a backup MFA method. Most platforms allow you to add a secondary method – a different phone number, a hardware key, or an email-based code. Do this now, not after a problem occurs.
Save recovery codes. During initial MFA setup, most services generate one-time recovery codes. Store these in a password manager or a secure, offline location. These are your safety net if everything else fails.
Do not wipe your old phone until the new one is fully verified. Set up the authenticator app on the new device, confirm every account logs in successfully, then decommission the old device.
Notify your IT provider before the switch. If you use a managed IT service, your provider can verify admin-level access to reset MFA on critical accounts if something goes wrong during the transition.
Remove your old device from your account settings. After the switch is complete, log into your security settings for each platform and delete the old device. Leaving it registered is an unnecessary security exposure.
Q&A: What Your Employees (and Clients) Might Ask
Q: Can I just reinstall the authenticator app on my new phone? A: Installing the app is only the first step. You still need to re-link each account, either by restoring from a cloud backup or by re-scanning QR codes through each platform’s security settings. Without prior backup configuration, you’ll need your IT administrator to reset access.
Q: What if I already switched phones and I’m locked out? A: Contact your IT administrator immediately. They can reset your MFA registration at the admin level, which clears the old device and allows you to set up a new one. Do not attempt to bypass MFA – doing so may violate your organization’s security policies.
Q: Is it safe to use text message codes instead of an authenticator app? A: SMS-based codes are better than no MFA, but they’re the weakest option. They’re vulnerable to SIM-swapping attacks, where a criminal hijacks your phone number. An authenticator app is more secure and worth the minor setup effort.
Q: Do I need to do anything with my business accounts specifically? A: Yes. Business accounts managed through Microsoft 365, Google Workspace, or other platforms often have centralized MFA settings controlled by your IT administrator. Those accounts may require admin-assisted recovery if the authenticator app is lost. This is another reason to have a managed IT partner involved before the phone switch.
How Farmhouse Networking Can Help
MFA transitions are a routine part of what we manage for our clients. When one of your employees gets a new phone, we can audit their MFA registrations, verify backup methods are in place, guide them through the device transfer, and reset access at the admin level if something goes wrong.
We also help businesses build a documented MFA policy – so every employee follows a consistent, tested process when devices change, instead of figuring it out under pressure when they’re locked out.
If you don’t currently have backup MFA methods configured across your team, that’s a gap worth closing now.
Ready to Stop Worrying About MFA Lockouts?
Email us at support@farmhousenetworking.com and let’s make sure your team is set up to handle device changes without the drama. One conversation now can prevent hours of lost access later.o handle device changes without the drama. One conversation now can prevent hours of lost access later.
A new attack method bypasses MFA and uses Microsoft’s own login system against you. Every business owner using Microsoft 365 needs to read this.
This login screen asks for an email address only, illustrating how attackers can use familiar Microsoft 365-style sign-in pages to bypass passwords.
Most small business owners believe that a strong password and multi-factor authentication make their Microsoft 365 accounts secure. That assumption is now being exploited at scale. Attackers are targeting Microsoft 365 users with device code authorization phishing – a technique that fools users into approving access tokens, bypassing multi-factor authentication protection entirely.
Campaigns using this method have surged since September 2025, representing a significant shift from limited, targeted attacks to widespread exploitation. Both organized criminal groups and nation-state actors are now using it. If your business runs on Microsoft 365, and most do, you need to act.
How the Attack Works
Microsoft has a login feature designed for devices like smart TVs and printers that can’t display a normal login screen. Instead of typing credentials on the device, a user visits a Microsoft page on their phone or computer and enters a short code. It’s a legitimate, trusted system.
Attackers exploit that trust. They initiate the device login flow themselves, then send your employee an email designed to get them to visit Microsoft’s real login page and enter the code – completing the attacker’s authentication instead of their own.
Your employee does everything right. They visit a real Microsoft website. They complete their MFA. They never hand over their password. And the attacker now has full access to your Microsoft 365 environment.
Action Steps for Your Business
Take these steps now with your IT team or provider:
Block device code flow in Microsoft Entra Conditional Access. This is the strongest mitigation available and can be deployed in report-only mode first to assess impact before full rollout. Most small businesses don’t use this feature and have no reason to leave it enabled.
Audit your Microsoft 365 OAuth app permissions. Review which third-party applications have access to your tenant and remove anything unauthorized.
Train your team on this specific attack. Standard phishing training won’t cover it. The key message is simple: if you receive a request to enter a code on a Microsoft login page that you didn’t initiate, stop and report it.
Review sign-in logs for your Microsoft 365 accounts. Unusual locations, unfamiliar devices, and off-hours logins are indicators of compromise.
Check for email forwarding rules set up without your knowledge. This is a common post-compromise action attackers use to quietly collect your outgoing email.
Review your cyber liability coverage. Confirm that account takeover scenarios are covered and understand what your response obligations are.
Q&A: What Your Clients or Partners May Ask
“How did this happen if you had MFA turned on?” This attack bypasses both traditional credential theft defenses and multi-factor authentication controls. MFA was never designed to protect against this type of authentication abuse.
“Could my information have been accessed?” If a business email account is compromised, any data in that account – client correspondence, contracts, financial information – is potentially accessible to the attacker.
“Is this being fixed by Microsoft?” Microsoft has released tools to block it, but those tools require configuration. Microsoft has been rolling out a managed Conditional Access policy aimed at blocking device code flow authentication, but it requires an administrator to enable and configure it. It doesn’t happen automatically.
“Should I be worried about my own accounts?” If you share Microsoft 365 services with a vendor or partner whose account is compromised, there’s risk of lateral movement. Security is a supply chain concern, not just an internal one.
How Farmhouse Networking Can Help
Farmhouse Networking reviews and configures Microsoft Entra Conditional Access policies to block device code phishing, audits your Microsoft 365 environment for existing unauthorized access, trains your staff on this and other current attack types, and monitors your accounts ongoing. We work with small and mid-sized businesses across Oregon, Northern California, and New Mexico – and we explain everything in plain language without the IT jargon.
Take the Next Step
Email support@farmhousenetworking.com today and ask for a Microsoft 365 security review. We’ll tell you whether this attack vector is currently open in your environment and what it takes to close it.
Continuing education isn’t just for licensed professionals — it’s the most underused competitive advantage in small business
Business owners who invest in ongoing learning stay ahead of industry changes and better serve their clients.
Ask most small business owners how they stay current in their industry, and you’ll get a variation of the same answer: they read the occasional article, attend a conference when they can, and otherwise learn by doing.
That approach works — until it doesn’t.
Industries change. Regulations shift. Client expectations evolve. New competitors arrive with tools and knowledge that didn’t exist three years ago. The small business owners who fall behind are rarely the ones who made a bad decision. They’re the ones who stopped making decisions at all, because they stopped learning what their options were.
Continuing education for business owners is not about going back to school. It’s about staying deliberately current in your industry, your craft, your compliance obligations, and the technology your business depends on. It’s about being the person in the room who actually knows what’s happening in their field — not the one nodding along.
Action Steps for Business Owners and Their IT Teams
Identify the professional associations and certifying bodies that govern your industry and confirm what continuing education or recertification requirements apply to you or your licensed staff.
Build a structured learning calendar — one that includes time for courses, industry publications, relevant conferences, and peer networking. Treat it as a business expense, because it is one.
Look for CPE, CEU, or certification programs that align directly with where your industry is heading. AI, automation, regulatory changes, and client technology expectations are reshaping most sectors right now.
When professional development introduces new tools or workflows to your business, involve your IT provider early. Technology changes made without IT planning create security gaps, compatibility problems, and support headaches.
Encourage key staff to pursue continuing education in their functional areas — operations, finance, customer service, or technical disciplines. Your team’s knowledge is a direct asset to your clients.
Document what you and your staff have learned. In industries with licensing requirements, this protects you during audits. In industries without them, it differentiates you from competitors who cannot demonstrate the same commitment.
Review your technology stack alongside your continuing education cycle. New industry knowledge often reveals where your current tools are falling short.
Connect with local business resources — chambers of commerce, SCORE, Small Business Development Centers — for low-cost or no-cost professional development that is often highly practical and locally relevant.
Questions Your Clients or Prospects Might Ask
“What makes you different from your competitors?” Demonstrated commitment to staying current — through credentials, certifications, and relevant training — is a concrete and credible differentiator in almost every market.
“Are you keeping up with changes in the industry?” Clients in regulated or fast-moving sectors ask this more than most business owners expect. The answer should be specific, not generic.
“Do you work with businesses like mine?” Industry-specific continuing education lets you answer yes with evidence. It signals that your advice is informed by real sector knowledge, not general business intuition.
“How do you stay ahead of the technology changes in your field?” This question is becoming more common as clients see technology reshaping what good service looks like. A learning culture within your business is a strong and honest answer.
How Farmhouse Networking Can Help
Professional development drives change — new tools, new workflows, new approaches to serving clients. Farmhouse Networking helps small and mid-sized businesses make sure their IT infrastructure keeps pace with what their owners and teams are learning. When a course introduces a new cloud platform, when a certification requires new software, or when industry changes shift how your business operates, we make sure the technology side is ready to support it. We handle IT so you can focus on growing.
The best investment in your business is the knowledge behind it. Email support@farmhousenetworking.com and let’s make sure your technology is as current as you are.
What Every Small Business Owner Needs to Know Before June 3 — Even If You’re Not a Bank
The SEC’s updated Regulation S-P sets a new standard for data protection that every small business owner needs to understand — not just financial firms. Is your incident response plan ready?
A practical guide to the new cybersecurity standard that financial regulators are enforcing — and that your customers, partners, and insurers are already expecting.
Why June 3 Should Be on Your Radar
On June 3, 2026, smaller SEC-regulated financial institutions, investment advisers, broker-dealers, and similar firms, hit their final compliance deadline under the SEC’s updated Regulation S-P. After 20+ years without a major update, the SEC overhauled how these businesses must protect customer data, respond to breaches, and oversee their technology vendors.
So why does this matter to you as a small business owner outside the financial sector?
Because the requirements the SEC is now enforcing represent the new normal for data protection across all industries. Your cyber liability insurance carrier already asks about these controls. Your enterprise clients are putting them in vendor agreements. Your customers assume you have them. And regulators in healthcare, retail, and professional services are moving in the same direction.
This is your roadmap – not just for compliance, but for running a business that customers can trust.
What Regulation S-P Requires (and What It Means for You)
The six pillars of the SEC’s updated data protection framework – applicable in spirit to every business handling customer information:
Incident Response Program – A written, tested plan for what happens when you’re breached. Not if. When.
30-Day Breach Notification – Customers must be notified quickly. Waiting weeks or months is no longer acceptable to regulators or the public.
Vendor Oversight – If a third-party vendor can access your customer data, you are responsible for their security practices.
Secure Data Disposal – Customer information must be destroyed securely when no longer needed.
Written Recordkeeping – You need to be able to prove you have a program, not just claim it.
Practical Action Steps for Your Business
For You, the Business Owner
Identify what sensitive customer data you hold, credit cards, SSNs, health information, financial records, and where it lives.
Review your cyber liability insurance policy for coverage gaps and required controls.
Audit your vendor relationships: which ones can access your customer data, and do they have security obligations in writing?
Designate someone, internal or external, responsible for cybersecurity decisions and incident response.
Draft a customer breach notification letter template now, before you need it.
For Your IT Department or Provider
Perform a full security assessment covering endpoints, cloud accounts, email, and network access.
Implement multi-factor authentication on every system – this alone stops 99% of credential-based attacks.
Establish and test an encrypted, off-site backup routine.
Write and test an Incident Response Plan – including who to call (legal, insurance, IT forensics) and in what order.
Update vendor contracts to include explicit security requirements and breach notification timelines.
Implement a data retention and secure disposal policy.
Document your security controls in writing – for insurance audits, client questionnaires, and regulatory inquiries.
Questions Your Customers and Partners May Ask
Q: How do you protect my personal information when I do business with you?
A: We use encrypted storage, access controls that limit who can view customer data, and multi-factor authentication for all staff. We also have a written security policy and an incident response plan in place.
Q: What happens if you experience a data breach? Will I be told?
A: Yes. If your information is involved in a breach, we are committed to notifying you promptly – within 30 days of discovering the incident. We have a documented notification process ready.
Q: Our company requires vendors to meet certain cybersecurity standards. Do you comply?
A: We have a written security program, documented controls, and an incident response plan. We’re happy to provide documentation and answer your vendor security questionnaire.
Q: I heard new SEC rules are tightening cybersecurity requirements. Should I be worried about businesses I work with?
A: It’s a fair question. The SEC’s updated Regulation S-P has raised the bar for financial firms, and similar standards are spreading across industries. We’ve proactively aligned our security practices with this framework — and we work with Farmhouse Networking to maintain and demonstrate compliance.
How Farmhouse Networking Helps Small Businesses
Farmhouse Networking is a Managed IT Services provider built for small and mid-sized businesses that take data protection seriously but don’t have an in-house IT team. We make enterprise-grade security practical and affordable:
Security Assessments – We evaluate your current posture and give you a prioritized action plan, not a list of scary jargon.
Incident Response Planning – We write your IRP, help you test it, and make sure your team knows what to do under pressure.
Vendor Security Reviews – We assess the tools and platforms you rely on and flag gaps in your vendor agreements.
MFA, Encryption, and Endpoint Protection – Deployed correctly, documented thoroughly.
Compliance Documentation – We produce the written records that satisfy insurance carriers, enterprise clients, and regulators.
Ongoing Managed IT – We become your IT department, watching your systems so you can run your business.
Ready to Get Compliant? Let Farmhouse Networking Help.
Don’t wait for a breach to take cybersecurity seriously. Email us today for a free SMB security assessment: support@farmhousenetworking.com
What Every Small Business Owner Should Know About Accounting Software and GAAP
Choosing the right accounting method and software is one of the most important decisions a small business owner can make — especially when loans, audits, or growth are on the horizon.
The software you chose when you started may not be the right fit for where your business is going – and your IT setup is part of the equation.
Most small business owners choose QuickBooks because someone recommended it, or because it was the obvious option. It’s reliable, widely used, and gets the job done for basic bookkeeping. But as your business grows, the question isn’t whether QuickBooks works – it’s whether it’s working well enough for your specific situation.
The answer depends largely on one thing: how your business handles revenue recognition, and whether your financials need to meet GAAP standards.
QuickBooks and GAAP: Understanding the Difference
QuickBooks defaults to cash-basis accounting, which records income when you receive payment and expenses when you pay them. This works well for simple operations and gives you a clear view of your cash position. It’s also how most small businesses file taxes.
Generally Accepted Accounting Principles (GAAP) typically requires accrual-basis accounting, where revenue is recorded when it’s earned and expenses when they’re incurred, regardless of when money changes hands. This produces a more accurate long-term picture of your business’s financial health.
For most small businesses under $25 million in annual revenue, cash-basis accounting is perfectly legal and practical. But if you plan to seek a business loan, bring on investors, take on a business partner, prepare for a sale, or operate in a regulated industry, GAAP-compliant accrual-basis financials will likely be required. QuickBooks can produce accrual-basis reports, but it requires proper configuration and disciplined bookkeeping to do so accurately.
QuickBooks is a general-purpose tool. Depending on your industry, a purpose-built alternative may serve you better: The right choice depends on your size, complexity, industry compliance requirements, and how your financial data needs to flow between systems.
Practical Action Steps for You and Your IT Team
Identify your accounting method. Confirm whether your books are cash or accrual basis and whether that matches what your CPA recommends for your situation.
Review your reporting needs. Ask yourself: could you produce a GAAP-compliant set of financials today if a bank or investor asked for one? If not, that’s worth addressing.
Audit your software integrations. List every system that connects to your accounting software — payroll, CRM, e-commerce, inventory — and verify those connections are working accurately and securely.
Secure your financial data. Confirm that your accounting platform uses encrypted connections, requires strong passwords, and supports multi-factor authentication for all users.
Set up and test your backups. Automated, offsite backups of your financial data should be tested periodically. A backup you’ve never restored is a backup you can’t trust.
Limit access to financial systems. Only the people who need access to your accounting data should have it. Set role-based permissions and review them regularly.
Plan before you migrate. If you decide to switch platforms, involve your CPA and your IT provider from the beginning. Migrations done without a clear plan often result in data gaps, reporting errors, or security exposures.
Keep your software updated. Accounting software vulnerabilities are real attack vectors. Make sure updates and patches are applied promptly.
Questions Your Clients, Lenders, or Partners May Ask — and How to Answer Them
Are your financials GAAP-compliant? Our books are maintained on an accrual basis in coordination with our CPA. We can produce GAAP-compliant financial statements when needed.
How secure is your financial data? We use encrypted accounting software with multi-factor authentication, limited user access, and automated offsite backups.
What happens if your accounting system goes down? We have business continuity measures in place, including current backups and IT support to restore access quickly. We don’t rely on a single point of failure.
Are you considering switching accounting platforms? Any platform change we make would be planned carefully with input from our CPA and IT provider to avoid disruption to our reporting or data integrity.
How Farmhouse Networking Supports Your Business
Your accounting software is only as reliable as the IT environment it runs in. A slow network, an unpatched system, weak access controls, or a missed backup can turn a small accounting problem into a big one — fast.
Farmhouse Networking helps small and mid-sized businesses build and maintain the IT infrastructure that supports their financial systems. That includes network security and reliability, multi-factor authentication setup, automated backup and disaster recovery, user access management, and coordination with software vendors when issues arise. We’re not accountants — but we make sure the technology your accountant depends on is solid.
Take the Next Step
If you’re not confident your accounting setup and the IT behind it are in good shape, we’re here to help.
Email us at support@farmhousenetworking.com to schedule a free IT assessment. We’ll review your current environment and tell you exactly what’s working, what’s at risk, and what to do about it — in plain English, no jargon.
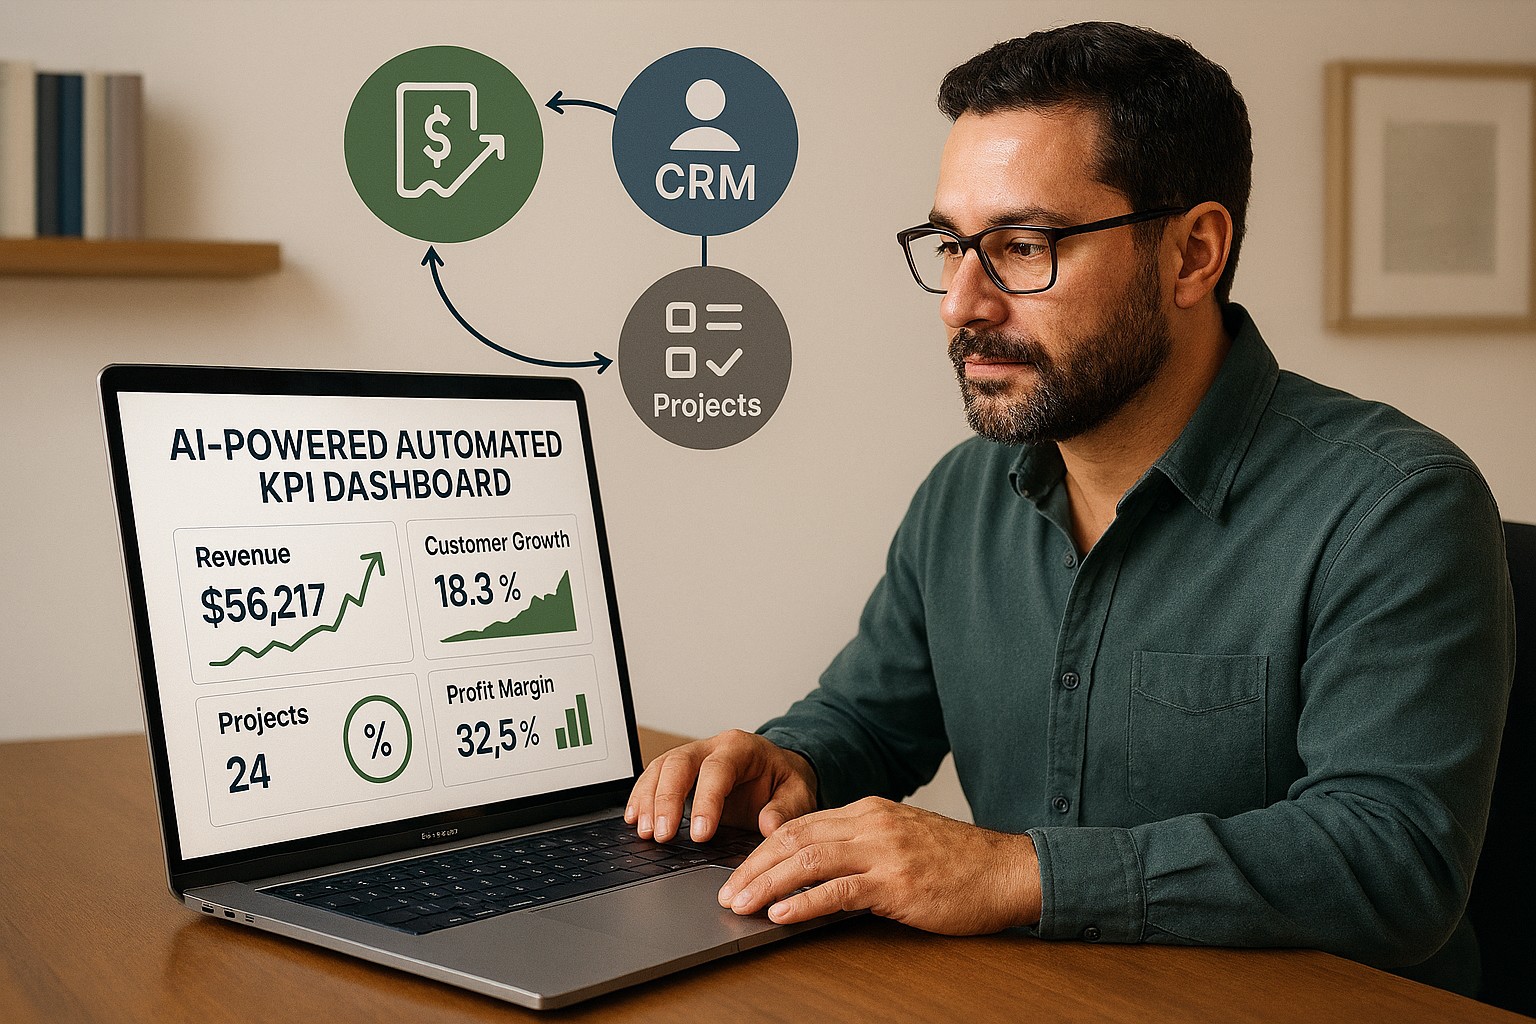
How AI and workflow automation let SMBs track real performance in real time — by turning the software you already use into a live intelligence system.
When your business software is connected and automated, your performance data works for you — in real time, without manual reporting.
Most small business owners make decisions based on incomplete information. Not because the data does not exist — it does. It’s sitting in your accounting software, your CRM, your project management tool, your inventory system, your scheduling platform, and half a dozen other applications your team uses every day.
The problem is that nobody has connected those systems. So instead of a clear, current view of your business performance, you get fragmented snapshots — last month’s financials here, a manual spreadsheet there, a gut feeling filling in the rest.
AI-powered workflow automation closes that gap. By connecting your line-of-business (LOB) applications and letting AI automatically harvest and analyze your key performance indicators (KPIs), you get a real-time picture of how your business is actually performing — without adding staff, without manual reporting, and without waiting until the end of the month.
What This Actually Means for Your Business
When your LOB applications are connected and your KPIs are being harvested automatically, you might open Monday morning to a dashboard showing: revenue versus target week-to-date, outstanding receivables by age, your five largest at-risk accounts, staff utilization rates, and inventory levels approaching reorder thresholds.
That dashboard was built by your systems, overnight, while you were not working. When a number moves outside its normal range, you receive an alert — before it becomes a crisis.
This is not technology reserved for large enterprises. The tools that make this possible are now accessible, affordable, and increasingly straightforward to implement for businesses of any size.
Practical Action Steps for You and Your IT Team
Step 1: List every software platform your business uses. Accounting, CRM, inventory, scheduling, project management, payroll, point of sale — document all of it. These are your data sources.
Step 2: Decide what your most important KPIs are. Revenue, gross margin, accounts receivable aging, customer acquisition cost, employee utilization, inventory turnover — agree on the ten numbers that, if you tracked them weekly, would help you make better decisions.
Step 3: Check your platforms’ integration capabilities. Most modern business software supports API connections or data exports. Your IT provider should assess what’s possible with your current tools before recommending anything new.
Step 4: Choose an automation and reporting platform. Tools like Microsoft Power Automate, Zapier, and Make connect thousands of business applications. Microsoft Power BI or similar tools turn that data into visual dashboards. Your IT provider can recommend the right fit for your size and stack.
Step 5: Configure your data pipelines. Have your IT provider build the automated connections between your platforms so that data flows into your reporting environment on a scheduled or real-time basis — without anyone manually exporting spreadsheets.
Step 6: Set up threshold alerts. Define the KPI boundaries that should trigger a notification — a receivable aging past 45 days, a sales pipeline dropping below a minimum, or inventory falling to reorder level. AI-driven alerting means you act on problems before they compound.
Step 7: Build a review habit. Dashboards create value when business owners and managers use them consistently. Set a weekly 20-minute review of your KPI dashboard as a fixed part of your management routine.
Questions You or Your Team Might Ask
“Is our business data safe passing between systems automatically?” Yes — when properly configured. Your IT provider should use encrypted, authenticated connections between platforms and ensure that access is controlled by role. Data security should be a stated requirement from day one.
“Do we need to replace our existing software?” No. Workflow automation connects the tools you already use. The goal is to make your existing stack smarter, not to start over.
“How long does it take to set this up?” A basic KPI dashboard connecting three to four applications can typically be implemented in two to four weeks. More complex environments take longer but are built in logical phases.
“What does it cost?” It depends on your complexity and existing platforms. Many of the core automation tools are available on subscription plans that are affordable for small businesses. Your IT provider should walk you through the realistic cost before any commitment is made.
How Farmhouse Networking Can Help
Farmhouse Networking helps small and mid-sized businesses build connected technology environments that make real-time KPI tracking practical and sustainable. We assess your current application stack, identify integration opportunities, configure secure data flows, and build dashboards that give you the clarity to lead your business with confidence.
We handle everything in-house — no outsourcing — and we focus on practical solutions that fit your size and budget. Our clients tell us we fix problems other IT firms cannot, and we answer the phone when they call.
You Should Know How Your Business Is Performing Right Now — Not Last Month
If your business decisions are based on delayed, manual, or fragmented data, your competitors who have automated this have an edge you can close.
Email us at support@farmhousenetworking.com to schedule a free consultation. We’ll take a look at your current systems, identify your best opportunities for automation and KPI visibility, and give you a clear picture of what’s possible — and what it will take to get there.
You don’t have to be a Fortune 500 company to be a target. You just have to be open for business.
Cybercriminals no longer need technical skills to target your business — Fraud-as-a-Service puts sophisticated attack tools in anyone’s hands.
You’ve heard of Software-as-a-Service. Now meet its criminal counterpart.
Fraud-as-a-Service (FaaS) is a booming underground economy where cybercriminals sell ready-made attack tools, stolen credentials, phishing kits, and ransomware packages to anyone willing to pay a subscription fee. No technical skill required. No barriers to entry. Just a dark web account and criminal intent.
This new economy lowers the barrier for entry and accelerates the pace of attacks. Even young and inexperienced fraudsters can access sophisticated tools that can be deployed with minimal technical knowledge. The result? A surge in attacks aimed squarely at small and mid-sized businesses — businesses exactly like yours.
In 2025, the FBI received over one million cybercrime complaints for the first time ever. Cyber-enabled fraud accounted for $17.7 billion in total losses. And small businesses are absorbing a disproportionate share of the damage.
Why Your Business Is the Target
Large corporations have security teams, compliance officers, and dedicated budgets. You have a team wearing multiple hats and a firewall that hasn’t been updated since the last administration.
Criminals who used to target only large enterprises now see small businesses as easier prey — because many don’t think they’re targets and often lack the protections to defend themselves.
FaaS attacks against SMBs typically arrive as:
Business Email Compromise (BEC): A convincing email, apparently from your bank or a vendor, redirects a payment to a criminal’s account.
Phishing kits: Pre-built fake login pages that steal employee credentials in seconds.
Ransomware subscriptions: Criminals rent ransomware, deploy it against your files, and split the ransom with the developer.
AI-generated deepfakes: Voice or video impersonations of you or your staff, used to authorize fraudulent transfers.
Business Email Compromise alone generated over $3 billion in losses in 2025.
Practical Action Steps for You and Your IT Team
Enable Multi-Factor Authentication (MFA) on everything — email, banking portals, cloud tools, and remote access. This one step blocks the majority of credential-based attacks.
Conduct a phishing simulation and security awareness training with all staff at least twice per year.
Verify all payment change requests by phone using a known number — never by replying to the email that requested the change.
Audit your email environment for misconfigured permissions, stale accounts, and unusual forwarding rules.
Review and restrict vendor and third-party access to your systems on a quarterly basis.
Maintain tested, offline data backups so ransomware cannot encrypt your only copy.
Create an incident response plan — a written document that tells your team exactly what to do if an attack succeeds.
Questions Your Clients May Ask You
“How do I know my data is safe with you?” You should be able to describe exactly where client data is stored, who has access, and what protections are in place. If you can’t answer this with confidence, it’s time to find out.
“Has your business ever experienced a data breach?” Transparency builds trust. If the answer is yes, explain what happened and what changed afterward.
“What would happen to my files if you got hit with ransomware?” Your answer should include a clear backup and recovery plan with a defined recovery time.
“Do your employees know how to recognize a phishing attempt?” This should be a confident yes — backed by regular training, not just a one-time onboarding video.
How Farmhouse Networking Helps
Farmhouse Networking helps SMBs build the defenses that FaaS criminals count on you not having. From setting up MFA and email authentication, to proactive monitoring, security awareness training, and incident response planning — we make enterprise-grade protection practical for businesses your size.
Ready to Stop Being an Easy Target?
Email us at support@farmhousenetworking.com to schedule a free security consultation. We’ll show you exactly where you’re exposed — and how to fix it before someone else finds out first.
That AI tool looked affordable in the demo. Here’s what most small business owners discover after the first real invoice.
You signed up for a sleek AI tool. The demo was impressive. The monthly price seemed reasonable. Then three months later you’re staring at a vendor bill that’s twice what you expected, your team is still confused about how to use the software, and you’re not sure who owns the data you’ve been feeding into it.
If that sounds familiar, you’re not alone. According to a 2025 Fortune analysis, the advertised price of AI automation represents only 20–40% of the true first-year cost for most small businesses. The rest hides in plain sight — buried in data preparation, staff training, integration fees, security gaps, and consumption-based pricing that scales faster than your revenue does.
AI tools promise to save you money. But are they quietly spending it instead? Here’s what every business owner needs to know before the next invoice arrives.
What the Brochure Doesn’t Tell You: The 6 Hidden Costs of AI
1. Data Cleanup Costs: Before AI can do anything useful, it needs clean, structured data. Most businesses discover their records have duplicate entries, inconsistent formatting, or files locked in formats the AI can’t read. Getting data “AI-ready” commonly costs $1,000–$10,000 and is rarely mentioned upfront.
2. Consumption-Based Billing Surprises: Many AI tools — including Microsoft Copilot, ChatGPT, and Salesforce Agentforce — charge by usage (tokens, conversations, or seat upgrades). A 2025 Zylo survey found 78% of IT leaders reported unexpected charges from consumption-based AI pricing. The more your team uses the tool, the higher the bill climbs, often mid-contract.
3. Integration Expenses: Plugging an AI tool into your existing systems — your accounting software, CRM, email platform, or operations tools — typically costs 30–50% of your total AI budget on top of licensing fees. Legacy systems make this worse, adding another 30–50% to integration costs.
4. The Productivity Dip (The J-Curve): Staff productivity typically drops 15–25% for 3–6 months after an AI tool is introduced. Workflows change. People need training. Mistakes happen. This “J-curve” is a real cost that hits your output before the benefits kick in.
5. Ongoing Maintenance and Monitoring: AI tools don’t run themselves. They need updates, performance monitoring, and occasional retraining. Industry estimates put annual AI maintenance at 15–30% of the original implementation cost — every year.
6. Security and Compliance Gaps: When employees use unsanctioned AI tools — what experts call “shadow AI” — your data goes places you haven’t approved. This creates real liability, especially if you handle any customer financial, health, or personal data.
What You and Your IT Team Should Do Now
Audit every AI tool currently in use — sanctioned or not. Shadow AI is a real and growing problem.
Review your vendor contracts for consumption-based pricing clauses and usage caps.
Assess your data quality before adding any new AI tool. Budget time and money for cleanup.
Map out how each AI tool connects to your existing systems and what it costs to integrate.
Train your team with structured onboarding — not just a login link.
Set a usage policy that defines which AI tools are approved and what data can be shared with them.
Schedule quarterly AI cost reviews so billing surprises don’t compound.
Work with your IT provider to conduct a security review of all AI platforms you’ve adopted.
Questions Your Clients or Team May Ask You
Q: Is it really that expensive? The tool only costs $30 a month.
A: The license is just the entry fee. Once you add integration, training, data cleanup, and monitoring, that $30/month tool commonly becomes $300–$500/month in real total cost. Budgeting for only the license is the most common AI financial mistake small businesses make.
Q: Can’t we just let employees figure it out on their own?
A: Research shows that organizations with unstructured AI adoption see double the training costs and far lower ROI. Worse, employees who figure it out on their own often use unapproved tools that create security and compliance exposure.
Q: What happens if we don’t address the security side?
A: Unsanctioned AI usage has been linked to data breaches that add an average of $200,000 to breach costs, according to IBM’s 2025 Cost of a Data Breach report. For a small business, that’s potentially company-ending exposure.
Q: How do we know if our AI investment is actually paying off?
A: You need to measure specific KPIs before and after AI adoption — things like hours saved per week, error rates, and customer resolution times. Without baseline data, ROI is invisible.
How Farmhouse Networking Can Help
Farmhouse Networking specializes in helping SMBs navigate exactly these kinds of IT cost pitfalls. Our local team can help you:
Conduct a full AI tool audit to identify shadow AI and hidden spend across your organization.
Review your vendor contracts and consumption-based pricing to protect you from billing surprises.
Assess data readiness so you’re not paying for expensive data cleanup after the fact.
Build a secure AI governance policy so your team knows what’s approved, what’s not, and why.
Provide proactive IT monitoring that catches cost and security issues before they become crises.
Ready to Find Out What AI Is Really Costing You?
Don’t wait for the surprise invoice. Send us a message and we’ll schedule a free AI cost and security review for your business. We’ll show you exactly where you stand — no obligation, no jargon, no pressure. Email us today: support@farmhousenetworking.com
And God will generously provide all you need. Then you will always have everything you need and plenty left over to share with others. As the Scriptures say,
“They share freely and give generously to the poor. Their good deeds will be remembered forever.”
For God is the one who provides seed for the farmer and then bread to eat. In the same way, he will provide and increase your resources and then produce a great harvest of generosity in you. - 2 Corinthians 9:8-10
We use cookies to ensure that we give you the best experience on our website. If you continue to use this site we will assume that you are happy with it.