Key network monitoring tools every small business needs for optimal performance
As a business owner, you know reputation and customer trust are everything. But cybercriminals don’t discriminate by size—small and midsize businesses (SMBs) are increasingly the targets of ransomware and data theft. CIS Critical Security Control 13 gives you a practical way to stay ahead of attackers and protect your company’s future.
Practical Action Steps for SMBs:
Enable real-time network monitoring: Know immediately if your systems are under attack.
Centralize your logs: Aggregate data to detect issues before they escalate.
Set threshold-based alerts: Don’t wait until damage is visible to respond.
Review reports regularly: Make monitoring part of monthly executive/IT reviews.
Q&A for SMBs:
“Aren’t we too small for hackers to notice?” No—SMBs are now among the most targeted because criminals assume defenses are weak.
“Do I need an in-house IT team for this?” Not necessarily—outsourced experts can cost-effectively handle monitoring for you.
How Farmhouse Networking Helps: Farmhouse Networking provides SMBs with managed network monitoring, advanced alerts, and proactive defense strategies. We scale solutions to fit your size, budget, and growth goals.
Don’t leave your business exposed. Email Farmhouse Networking today and start building stronger defenses for lasting success.
Small and medium-sized businesses (SMBs) are increasingly adopting cloud technologies to streamline operations, improve scalability, and reduce costs. However, with this shift comes a growing risk of cyberattacks targeting cloud environments. For SMBs, which often lack extensive IT resources, these threats can be devastating. Enter Security Information and Event Management (SIEM) solutions—a powerful tool that can help SMBs safeguard their cloud infrastructure.
Why SMBs Are Vulnerable to Cloud Attacks
SMBs face unique challenges when it comes to cybersecurity:
Limited IT Resources: Many SMBs lack dedicated security teams or the expertise to monitor and respond to threats.
Budget Constraints: Investing in enterprise-grade security tools can be prohibitively expensive.
Sophisticated Threats: Cybercriminals are increasingly targeting SMBs, knowing they may have weaker defenses compared to larger enterprises.
Cloud environments add another layer of complexity, as they introduce new vulnerabilities such as misconfigured settings, unauthorized access, and data breaches. Without proper monitoring and response mechanisms in place, these risks can spiral out of control.
How a SIEM Solution Protects Your Cloud Environment
A SIEM solution offers a centralized platform for monitoring, detecting, and responding to cybersecurity threats in real time. Here’s how it specifically benefits SMBs:
Centralized Threat Monitoring: SIEM consolidates security data from various sources—cloud applications, firewalls, endpoint devices, and more—into a single dashboard. This holistic view allows SMBs to monitor their entire cloud environment efficiently.
Early Detection of Threats: By analyzing data in real time and applying advanced correlation rules, a SIEM detects suspicious activities such as unauthorized logins or unusual data transfers. Early detection helps SMBs act swiftly before an attack escalates.
Automated Incident Response: Many SIEM solutions offer automated responses to mitigate threats immediately. For example, they can isolate compromised systems or block malicious IP addresses without human intervention. This is particularly valuable for SMBs with lean IT teams.
Simplified Compliance: Meeting regulatory requirements like GDPR or HIPAA can be daunting for SMBs. A SIEM simplifies this by automating compliance reporting and maintaining detailed audit logs. This not only ensures legal compliance but also builds customer trust.
Cost-Effective Security: Cloud-based SIEM solutions are particularly well-suited for SMBs because they reduce the need for expensive on-premises infrastructure. Subscription-based models make enterprise-level security accessible without breaking the bank.
Scalability: As your business grows, so do your cybersecurity needs. Modern SIEM solutions are highly scalable, allowing SMBs to adapt their security posture without overhauling their existing systems.
Choosing the Right SIEM Solution for Your Business
When selecting a SIEM solution for your SMB, consider the following:
Ease of Use: Opt for a user-friendly interface that doesn’t require extensive training.
Cloud Compatibility: Ensure the solution integrates seamlessly with your existing cloud infrastructure.
Automation Features: Look for automated threat detection and response capabilities.
Cost Transparency: Choose a provider with predictable pricing models to avoid unexpected costs.
Cybersecurity is no longer optional—it’s essential for protecting your business’s reputation and bottom line. A robust SIEM solution is your first line of defense against attacks on your cloud environment.
Don’t wait until it’s too late! Contact us today to learn how our tailored SIEM solutions can safeguard your business from evolving cyber threats. Let’s secure your future together!
Farmhouse Networking virtualizes small office servers reducing hardware footprint while improving uptime and disaster recovery for Oregon SMBs.
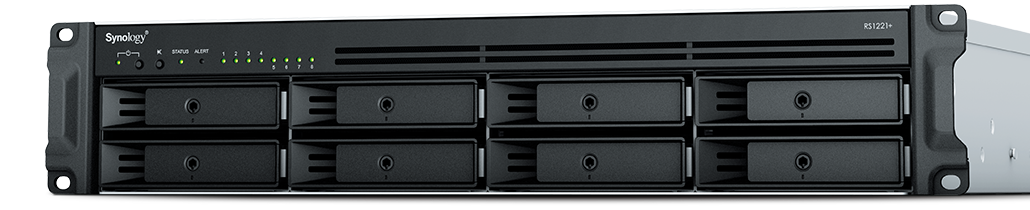
Had a client recently who had a smaller office network (they have up to 6 concurrent users) with a server to process orders from their website using a software called StoneEdge. This software is SQL-based database with a Microsoft Access front-end. It was time to upgrade their server to new hardware and cost was definitely an issue based on their size and order volume. In this case we chose to use a Synology device to act as the virtual machine host and create a new virtual server on the host. Here are some details:
4x Seagate 4TB IronWolf Pro 7200 rpm SATA III 3.5″ Internal NAS HDD
Picked the Synology based on the expandability of RAM to 32 GB, the capability to use cache drives, and storage growth over time. It also has a 4-core 2.2 Ghz Ryzen processor which was plenty based on their old servers CPU usage.
Basics of Setup
Assembled parts
Installed Synology OS
Setup HDDs in Synology SHR2 RAID
Added M.2 drives as cache
Installed the Virtual Machine Manager app
Created a VM with the max CPU available and max Memory available
Uploaded the ISO for the server OS
Installed the server OS
Setup the StoneEdge application
Migrated data
This build did not increase performance dramatically, but it did allow them to spend about half the cost of a full server to accomplish the same purpose. It also reduced costs by using the Synology for backup of the server locally and into S3 storage in the cloud for redundancy.
If your company is looking to move their servers to a virtual environment or into the cloud, then contact usto start the process
Convert PPP payroll protection into permanent IT infrastructure gains
A bill in Congress has been brewing since October 2020 and finally passed in December 2020. Representative David Scott introduced H.R.8620 which is stated to:
“To permit payments for certain business software or cloud computing services as allowable uses of a loan made under the Paycheck Protection Program of the Small Business Administration.”
What PPP can do for you
This bill was an amendment to the Small Business Act that changes the definition of how PPP loan moneys can be used. The changes are as follows:
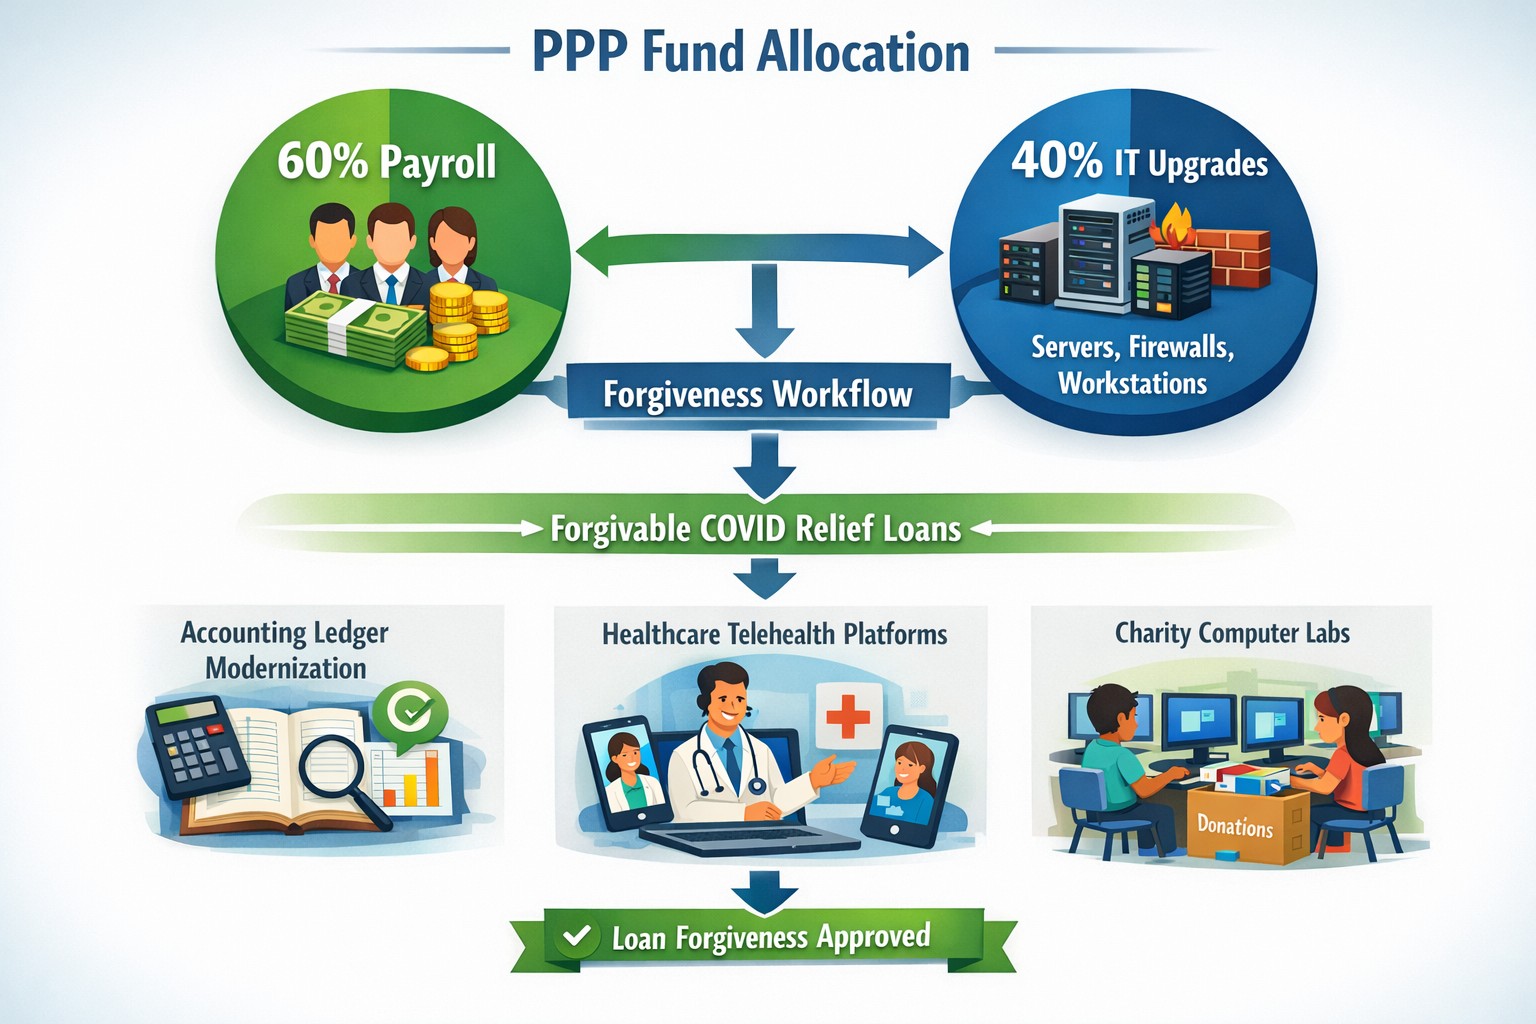
“the term ‘covered operations expenditure’ means a payment for any business software or cloud computing service that facilitates business operations, product or service delivery, the processing, payment, or tracking of payroll expenses, human resources, sales and billing functions, or accounting or tracking of supplies, inventory, records and expenses”
So what does this mean for your business? That you can apply for the PPP funds then use them to upgrade your out-of-date software that runs your company or use the funds to move your business into the cloud. There has never been a better time or excuse to discuss the possibilities of moving your business to the cloud and implementing those upgrades that have waited so long. By doing so you will position your company better for the Work From Home trend and be prepared for business expansion once the pandemic is over.
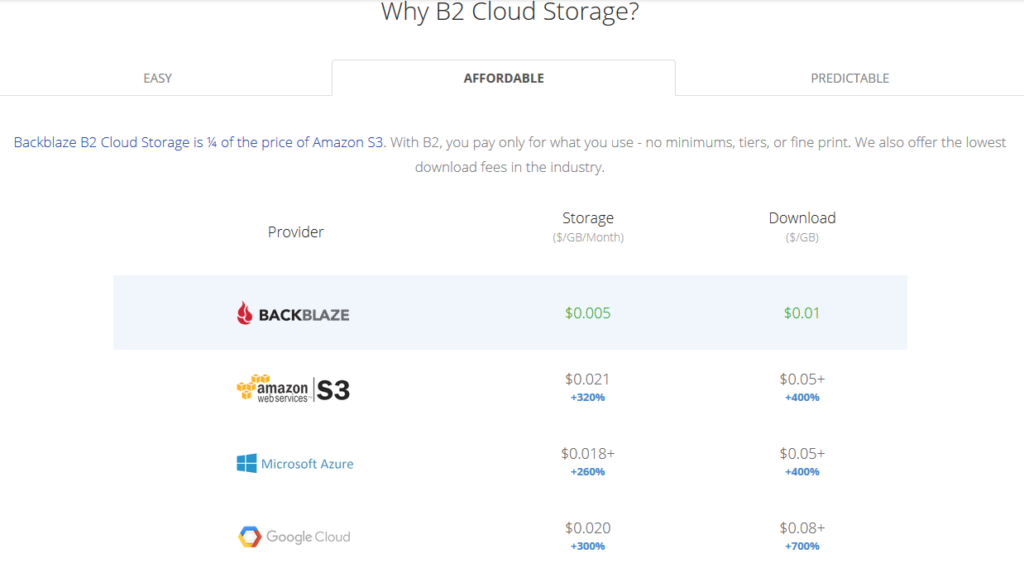
All someone has to do is look at the pricing model above to see why Backblaze is a no brainer for long term storage (not to mention the first 10GB of storage is free. With its recent inclusion as a destination for web server’s WHM backup, Farmhouse Networking has been recommending our hosting provider customers to make the switch from AWS Glacier. Here is the steps to make the switch:
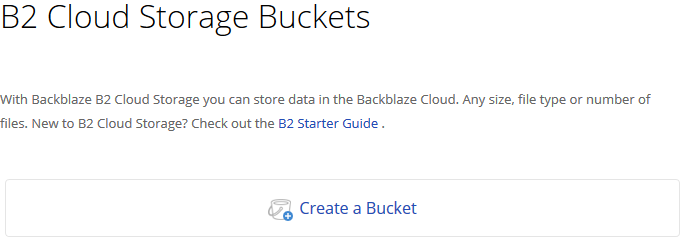
Setup Backblaze Buckets
Login to Backblaze account
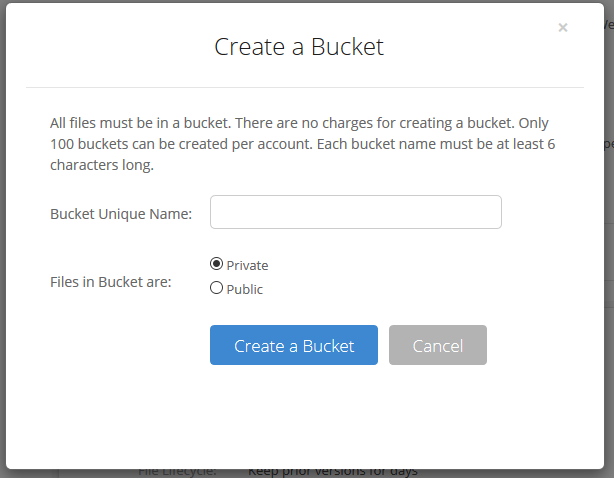
Click on the Create Bucket button in the B2 Cloud Storage Buckets section
3. Give the Bucket a name and keep the bucket private for the backups. Click on the Create a Bucket button.
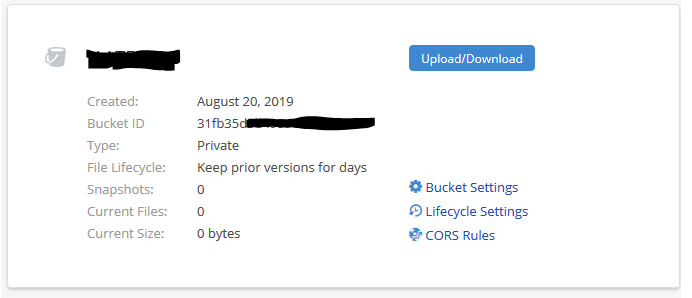
4. Copy down your Backblaze Bucket name and Backblaze Bucket ID
Setup Backblaze Application Key
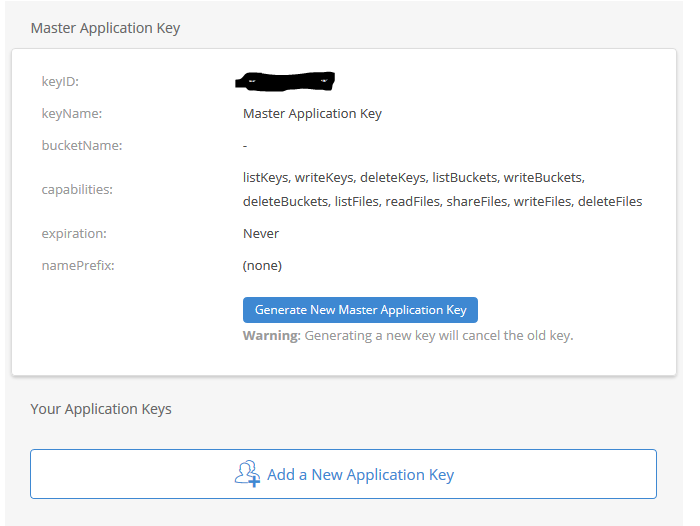
Click on the App Keys section
Click on Add a New Application Key
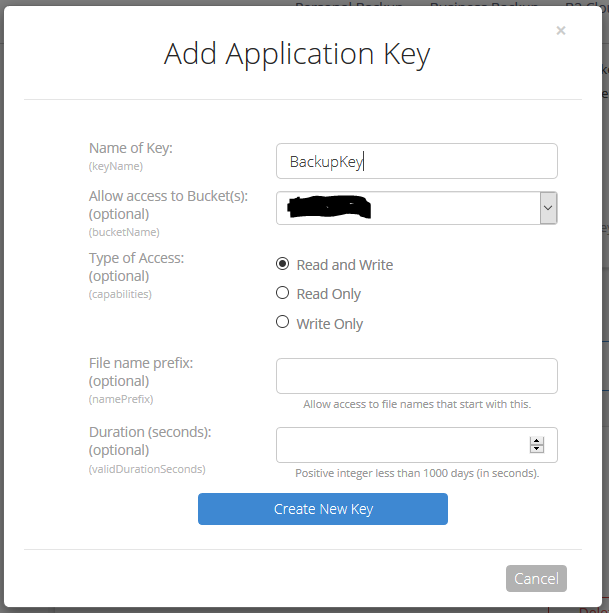
3. Give the Backblaze Application Key a name, chose the newly created bucket from the list and make sure to leave the Type of Access as “Read and Write”. Click the Create Key button.
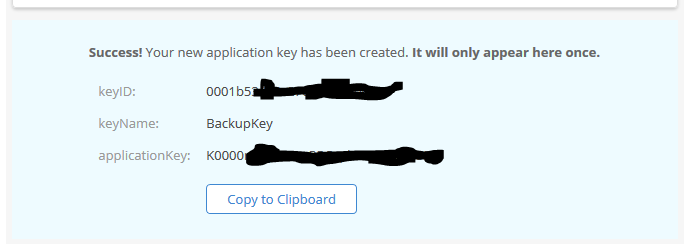
4. Make sure to copy down the Backblaze Application keyID and Backblaze Application applicationKey. This will be the only time they are both shown. If you lose the Backblaze Application applicationKey then you will have to delete the current one and create a new one.
Setup WHM Backup to Backblaze
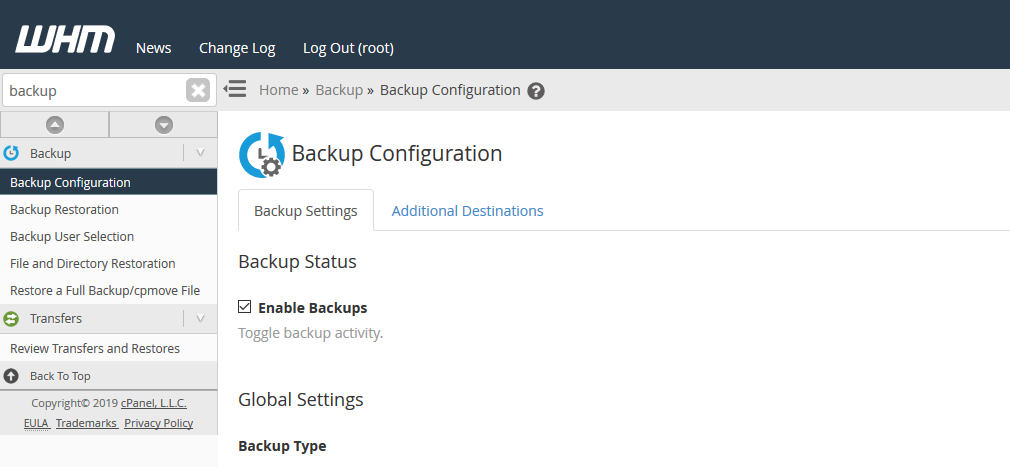
Connect to WHM as root user and choose Backup Configuration from the menu. The specific WHM backup settings are not discussed here, but feel free to contact us for advise on how to do so.
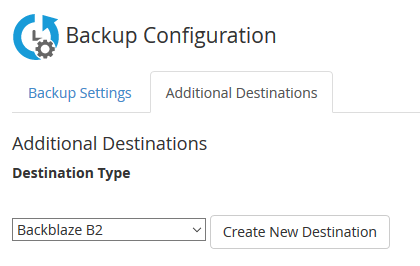
2. Click on Additional Destinations. Chose Backblaze B2 from the Destination Type and click on the Create New Destination button.
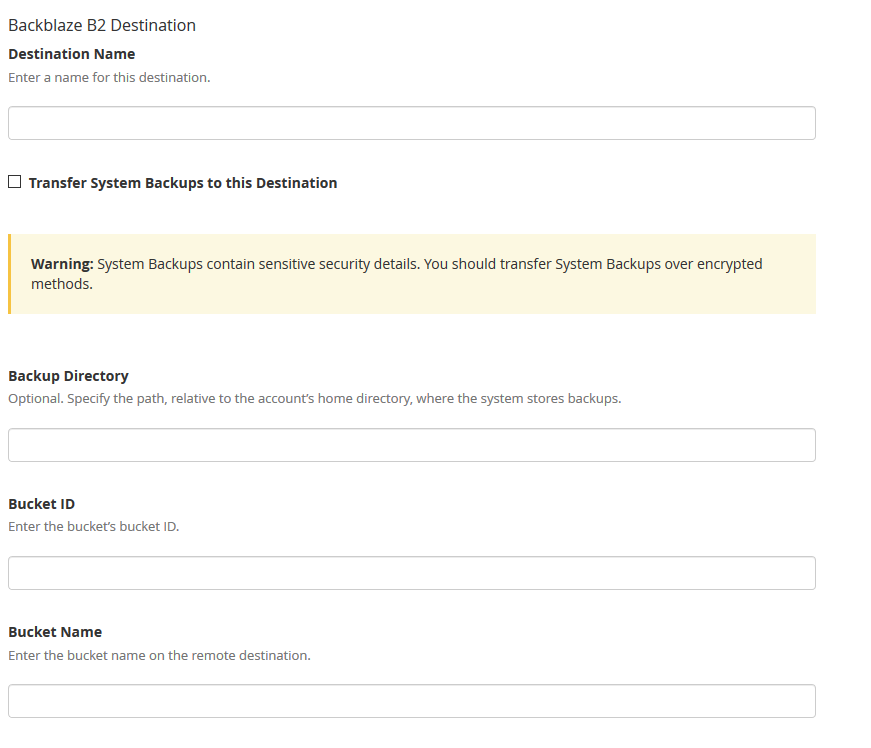
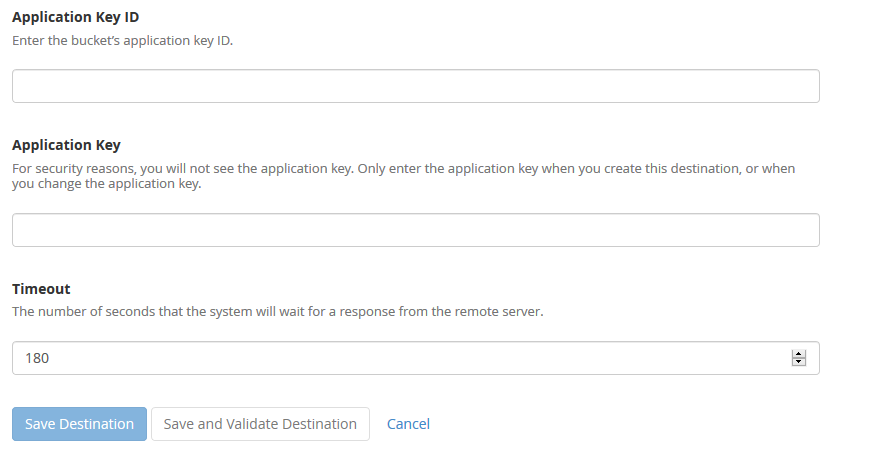
3. Enter in a backup name. Click on the “System Backups” if that is desired. Leave the Backup Directory blank. Enter in the Backblaze Bucket ID and Backblaze Bucket Name copied down earlier. Enter in the Backblaze Application Key ID and Backblaze Application Key. Click on the Save and Validate Destination button.
Make sure to disable your old AWS Glacier backup destination. All backups on Glacier should be set to auto delete according to a lifecycle, but if not then wait 120 days from creation to remove them to avoid any penalties. Speaking of lifecycles, it is a good idea to change the lifecycle settings on the Backblaze bucket to auto delete after a determined number of days since they do charge for total storage utilized.
If your company is would like to discuss the layers of security you have in place, then contact us for assistance.
Amazon AWS S3 Storage to the rescue again with native support in WebHost Manager (WHM) to backup directly to S3. WHM AWS S3 Glacier backup is easy to setup and works like a charm. Included in this post are the standard settings that I use for all WHM backups.
WHM AWS S3 Glacier Backup Setup
Login to WHM and run a quick search for backup at the top left of the navigation pane
Click on “Backup Configuration” to begin setup
Under “Backup Status” choose “Enabled”, under “Backup Type” choose “Compressed” to save on bandwidth and leave the timeouts at their defaults
Under “Scheduling and Retention” choose to do a backup each day of the week and keep them for 30 days
Under “Files” choose to disable “Backup Suspended Accounts”, choose to enable “Backup Access Logs”, choose to enable “Backup Bandwidth Data”, choose to disable “Use Local DNS” and put a check next to “Backup System Files” to allow for full restores if needed
Under “Databases” choose both “Per Account and Entire MySQL Directory”, under “Default Backup Directory” type in:
/backup
Leave the “Retain backups in default directory” unchecked and disable “Mount Backup Drive as Needed”
Under “Additional Destinations” choose Amazon S3 from the drop down list and click on the “Create new destination button”
Assuming there is already a bucket and user created in AWS for this purpose – give the destination a name, check the box next to “Transfer System Backups to Destination”, type in the name of a folder in the bucket under “Folder” that will be created and used, type in the name of the “Bucket”, type in the “Access Key ID” and “Secret Access Key” then change the timeout to 60 seconds
Click on the “Save and Validate Destination” button to make sure all settings are correct
Finally click on the “Save Configuration” at the bottom to complete the WHM AWS S3 Glacier Backup setup.
Your WHM AWS S3 Glacier Backup has now been setup and with proper setup of S3 Storage there will be automatic archival too. If your company is using Amazon Web Services or S3 Storage for backup and need help getting it setup properly, then contact us for assistance.
I am growing to love Amazon Web Services (AWS) S3 Storage. The AWS S3 Bucket Lifecycle feature is great for those using S3 buckets for backups. The lifecycle can be applied to the whole bucket or individual folders based on rules then set for auto archival or deletion based on those same rules. This post assumes that the bucket to be used for backups has already been created. For help setting up a new bucket read the AWS Documentation for a walk through of this simple process.
Configuring AWS S3 Bucket Lifecycle Archiving
Log into the AWS console and click into the S3 console
Click on the magnifying glass next to the S3 bucket being used for backup
On the right side of the screen, scroll down the list of properties to the Lifecycle item and expand it
Click on the “Add Rule” next to the green plus symbol
For backups, it is best to choose the whole bucket option in the “Apply this Rule to:” section of the wizard then click “Configure Rule” button
For the “Actions on Object” section choose the “Archive to the Glacier Storage Class” option with the “Days after object’s creation date” set to 7 days to automatically archive to S3 Glacier after a week. Choose the “Permanently Delete” option with the “Days after object’s creation date” set to 120 days to automatically delete from S3 Glacier after 4 months. Click on the “Review” button to continue.
Give the rule a name and click on the “Create and Activate Rule” button to finish the rule creation process
Make sure to click on the “Save” button to have the newly created rules saved.
Your AWS S3 Bucket Lifecycle has now been setup for automatic archival. If your company is using Amazon Web Services or S3 Storage for backup and need help getting it setup properly, then contact us for assistance. Look for the next post that will show how to setup WHM for backup to S3 Storage.
Working with Amazon Web Service (AWS) S3 Storage requires a user account, so it is natural to create a specific AWS S3 Glacier backup user account when connecting an outside service or device for backup purposes. This post will detail how to create a user that has full rights to a specific bucket on S3 and Glacier Storage so that backup files can be created or edited from an outside source.
Now it is time to connect the backup service or device using the AWS S3 Glacier Backup user with the “Access Key ID” and “Secret Access Key” recorded earlier. If your company is using Amazon Web Services or S3 Storage for backup and need help getting it setup properly, then contact us for assistance. Look for the next couple posts that will show how to setup a S3 bucket for automatic archival and how to setup WHM for backup to S3 Storage.
Had a web hosting client who wanted to find the offending large files that were costing them, so decided to check Amazon S3 bucket size and individual file size. Found out that the best way to do this was via the AWS Command Line interface, so downloaded it from here and used the instructions here to add the Access Key ID, Secret Access Key and Default Region to the AWS Command Line for secure connection.
Check Amazon S3 Bucket Size
Open the standard Command Line then change directory by typing the following:
cd %ProgramFiles%\Amazon\AWSCLI\
Type in the following to check file sizes on a whole bucket:
aws s3 ls –summarize –human-readable –recursive s3://[bucket-name]/
Or type in the following to check file sizes on a particular directory:
aws s3 ls –summarize –human-readable –recursive s3://[bucket-name]/[directory]
This was a huge help to finding the large files and directories with a simple Check Amazon S3 Bucket Size command in the AWS Command Line. If your company is using Amazon AWS S3 Storage for cloud storage or need help getting the cloud storage setup, then contact us for assistance.
The most basic task needed to get started with AWS is to have a user account, so it is natural to create a specific user account when accessing AWS Command Line Interface (CLI) for a specific purpose. This post will detail how to create a user that has read-only rights to S3 and Glacier Storage so that bucket content size can be determined. The details of how to install the AWS Command Line Interface can be found here and details of the setup are in linked documents from there.
Type in the username desired and leave the checkbox “Generate an access key for each user” checked then click the “Create” button at the bottom.
On this screen make sure to record the “Access Key ID” and “Secret Access Key” that will be needed when setting up AWS CLI software.
Click on the “close” link twice to exit.
Click on the username of the user just created, then click on the “Attach Policy” button to give the user proper rights.
Select “AmazonS3ReadOnlyAccess” and “AmazonGlacierReadOnlyAccess” from the list, then click on the “Attach Policy” button.
Once connected to the AWS Command Line Interface software commands can be run to check bucket content size which will be covered in an alternate post. If your company is using Amazon Web Services or S3 Storage and need help getting it setup properly, then contact us for assistance.
And God will generously provide all you need. Then you will always have everything you need and plenty left over to share with others. As the Scriptures say,
“They share freely and give generously to the poor. Their good deeds will be remembered forever.”
For God is the one who provides seed for the farmer and then bread to eat. In the same way, he will provide and increase your resources and then produce a great harvest of generosity in you. - 2 Corinthians 9:8-10
We use cookies to ensure that we give you the best experience on our website. If you continue to use this site we will assume that you are happy with it.