Had a local medial office want to move their current server into the cloud and because they are already an Office 365 customer, I chose to use Azure for their Virtual Machine. I helped them setup Azure to Araknis IPSec VPN to connect their headquarters to the hosted server. This tutorial will go into detail about the creation of this tunnel starting with the Microsoft Azure side first using Resource Manager. It will be using the following parameters:
- VNet Name: TestNetwork
- Address Space: 10.10.0.0/16
- Subnets:
- Primary: 10.10.10.0/24
- GatewaySubnet: 10.10.0.0/24
- Resource Group: TestResourceGroup
- Location: West US
- DNS Server: Azure Default
- Gateway Name: TestVPNGateway
- Public IP: TestVPNGatewayIP
- VPN Type: Route-based
- Connection Type: Site-to-site (IPsec)
- Gateway Type: VPN
- Local Network Gateway Name: TestSite
- Local Subnet: 10.20.20.0/24
- Connection Name: VPNtoTestSite
Configure an Azure VPN gateway
This part takes the longest, so it should be done first:
- Click on the “+” icon at the top left hand side of the Resource Manager, then search for “Virtual Network Gateway” and click on the “Create” button.
- Give the Virtual Network Gateway a name
- Select matching Region to where Azure resources are located
- Leave Gateway & VPN type the defaults
- Choose a SKU <- These have changed since the article was created, so my “standard” now is WpnGw1 with Active / Active turned off (this is a good balance of performance and cost)
- Choose or create a local network (not covered here, but must contain Gateway Subnet) that matches internal resources
- Choose or create a Public IP Address
- Leave the remaining values as their defaults and then click the “Create” button. (Please note the reminder that this takes 45 minutes to create!)

Configure an Azure Local Network Gateway
This is a reference to your on-premise network so that subnets can pass traffic:
- Click on the “+” icon at the top left hand side of the Resource Manager, then search for “Local Network Gateway” and click on the “Create” button.
- Give the Local Network Gateway a name
- Select matching Region to where Azure resources are located
- Specify the external IP address of the local on-premise site
- Specify the on-premise address space (subnet)
- Leave the remaining values as their defaults and then click the “Create” button.

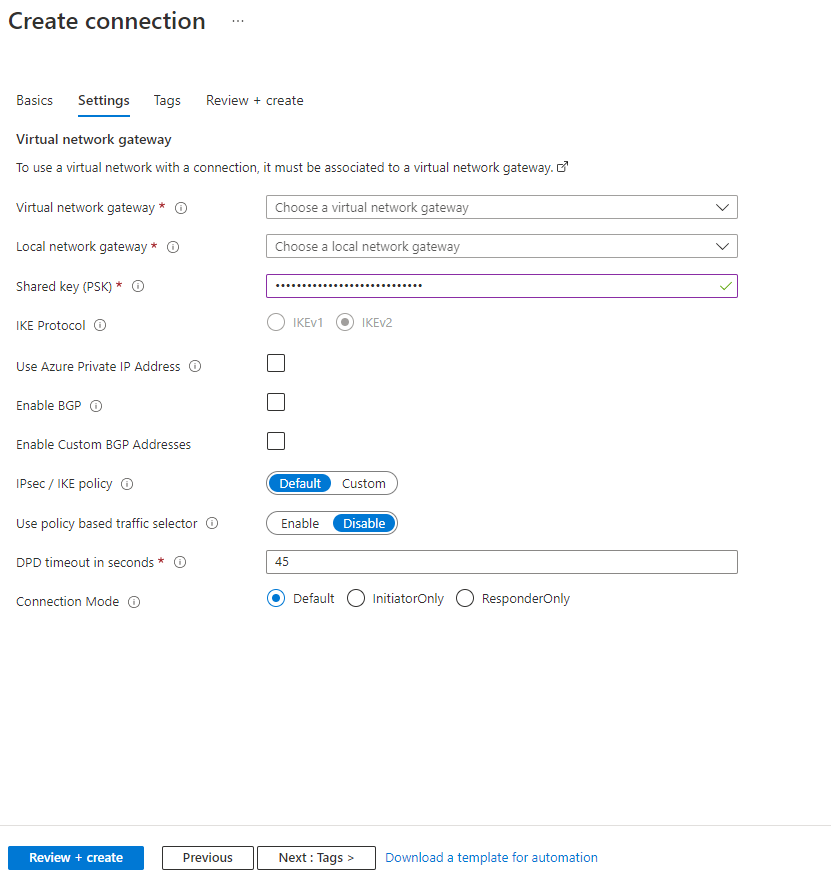
Configure an Azure VPN Connection
This will create the tunnel from Azure to the on-premise site:
- Click on the “+” icon at the top left hand side of the Resource Manager, then search for “Connection” and click on the “Create” button.
- Choose “Site-to-site (IPSec)” as the connection type
- Give the Connection a name
- Select matching Region to where Azure resources are located
- Leave the remaining values as their defaults and then click the “OK” button. On the summary screen click on the “OK” button to create the connection.

- Choose the newly created Virtual Network Gateway
- Choose the newly created Local Network Gateway
- Specify a shared key
- Leave the remaining values as their defaults and click the “Create” button.
This completes the setup of the Azure side of the VPN tunnel. Now to work on the Ubiquiti USG side.
Configuring an Araknis IPSec VPN Network
- Connect to Araknis router (need at least a 310 for this to work)
- Click on Advanced > VPN
- Scroll down to IPSec and click add new tunnel
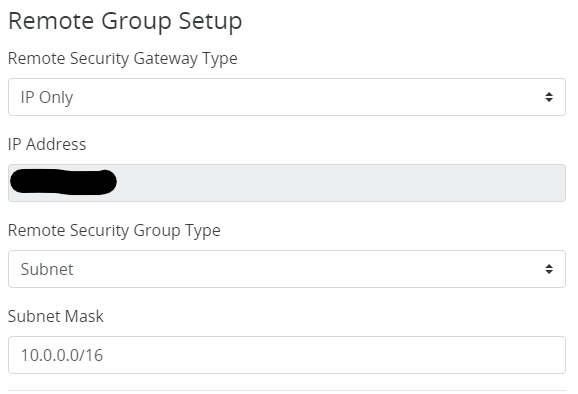
- Fill in the Remote IP address of the Azure VPN Gateway
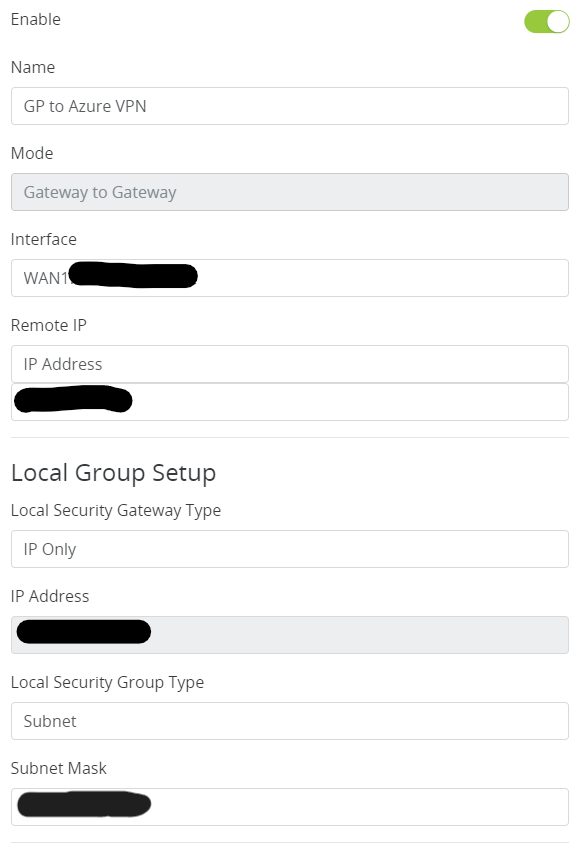
- Fill in the Remote Subnet Mask
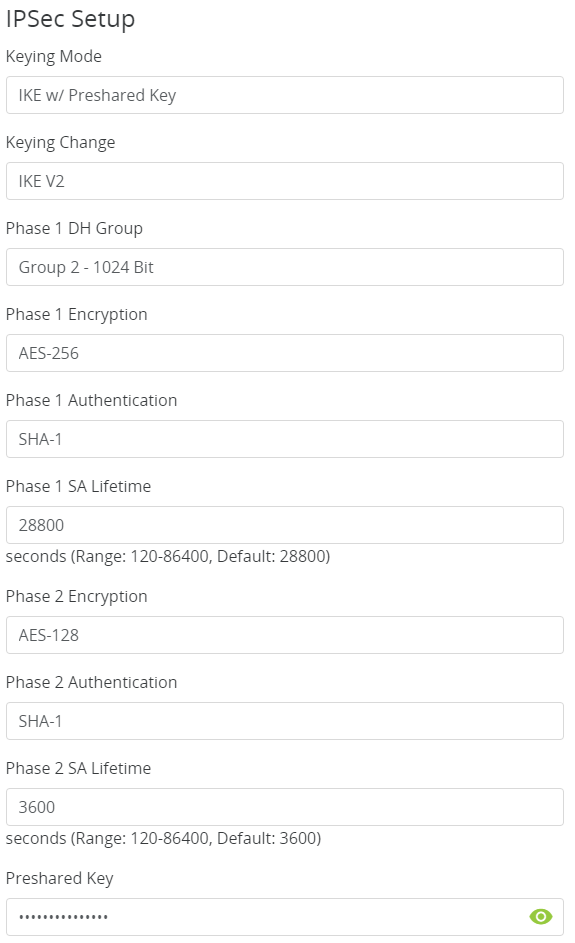
- Make the following changes to IPSec Setup
That is all there is to it. If your company is currently using either Microsoft Azure or Araknis routers and would like a VPN created, then contact us for assistance.
While working with a new client, we discovered that you can setup this VPN in its own Resource Group that is separate from the Resource Group that your VM is in. This is done by Network Peering which can be setup according to this article:
https://learn.microsoft.com/en-us/azure/vpn-gateway/vpn-gateway-peering-gateway-transit