Real-world fix for server disappearance using co-managed IT proactive monitoring
Today’s story highlights how we helped a Co-Managed client resolve a perplexing issue with their network. Random workstations were losing connection to the server at inconsistent intervals throughout the day. Despite the on-site technician’s best efforts, the root cause remained elusive, so they called us in to investigate.
We began by examining the suspected source of the problem: the server. Tracing all network cables from the server to the connected switches, we discovered a secondary failover server designed to take over in case of primary server failure. However, both servers had multiple network connections that weren’t properly configured. We corrected this setup, confident it would resolve the issue. Yet, the very next day, we received reports that the problem persisted.
In response, the on-site technician replaced the main server with the failover server, configuring it with the same name and IP address as the original. Unfortunately, this didn’t fix the issue, so we were called back for further investigation.
Drawing on our experience with similar cases, we suspected an IP address conflict. Specifically, two devices might have been assigned the same IP—one set statically and the other dynamically via DHCP. To test this theory, we asked the on-site tech to power down the server.
Our hunch was correct. A misconfigured network allowed an iPhone on the guest wireless network to obtain the same IP address as the server, causing both devices to compete for network traffic. We resolved the issue by isolating the guest wireless network from the main network, ensuring no overlap could occur.
With this fix in place, our client’s network has been running smoothly, allowing them to return to business as usual.
Uncover the Ghosts in Your Network! Contact Farmhouse Networking today to solve your IT mysteries and get back to business seamlessly. Don’t let hidden issues slow you down—schedule your consultation now!
This is the seventh in a series that document the Tier 3 / Co-Managed IT work we did to setup a wireless test bed for a Linux based scientific device. The testing environment included two different wireless network hardware types (Ubiquiti and Cisco). There was also a Synology device used for various purposes including hosting the Ubiquiti controller inside a Kubernetes container, providing certificate services, providing LDAP authentication, and providing RADIUS authentication. Each article will detail a separate piece of the project. This article shows the basic setup of Ubiquiti Controller for PSK and RADIUS authentication from wireless devices.
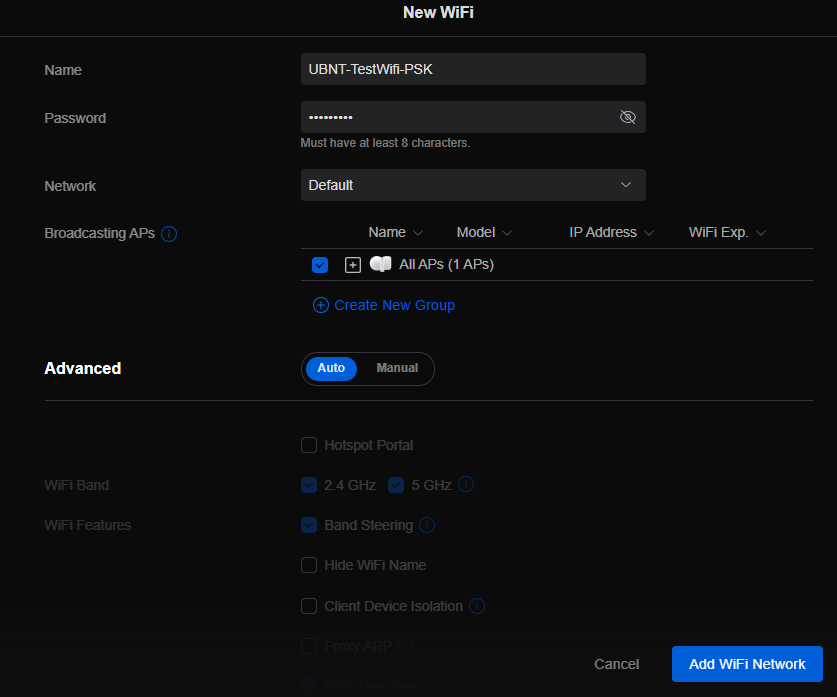
Setup Ubiquiti Wireless Network with PSK
Login to Ubiquiti controller previously created – Here
Click on Setting gear icon at bottom left
Make sure you are on Wifi tab and click Create New link
Set network BSSID
Create Password
Click Add Wifi Network button
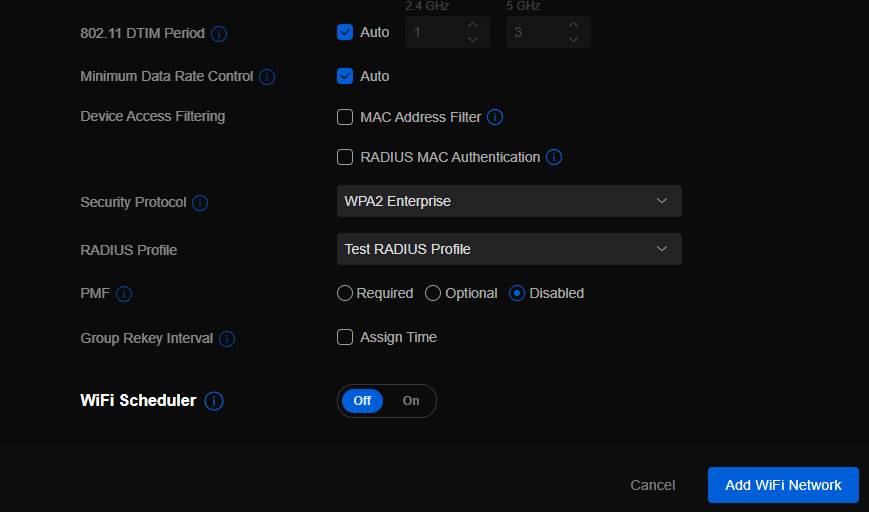
UniFi SSID advanced security settings with RADIUS profile and PPSK configuration.
Setup Ubiquiti Wireless Network with RADIUS
Login to Ubiquiti controller previously created – Here
Click on Setting gear icon at bottom left
Click on Profiles
Click on Radius Tab
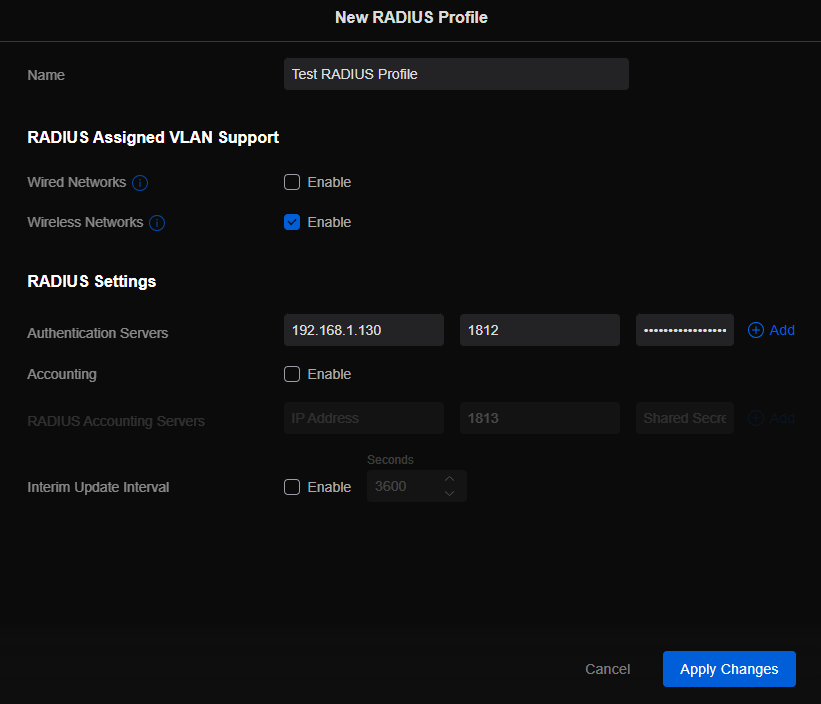
Click on Create New link
Give the Profile a name
Enter RADIUS server IP address as Authentication Server
Enter RADIUS shared secret
Click Add
Click Apply Changes
Click on Wifi Tab
Click on Create New link
Set network BSSID
Change Advanced to Manual
Set Security Protocol – WPA2 Enterprise
Select new RADIUS Profile
Click Add Wifi Network
If your company has highly customized setup requirements that you need consulting for, then contact us for assistance.
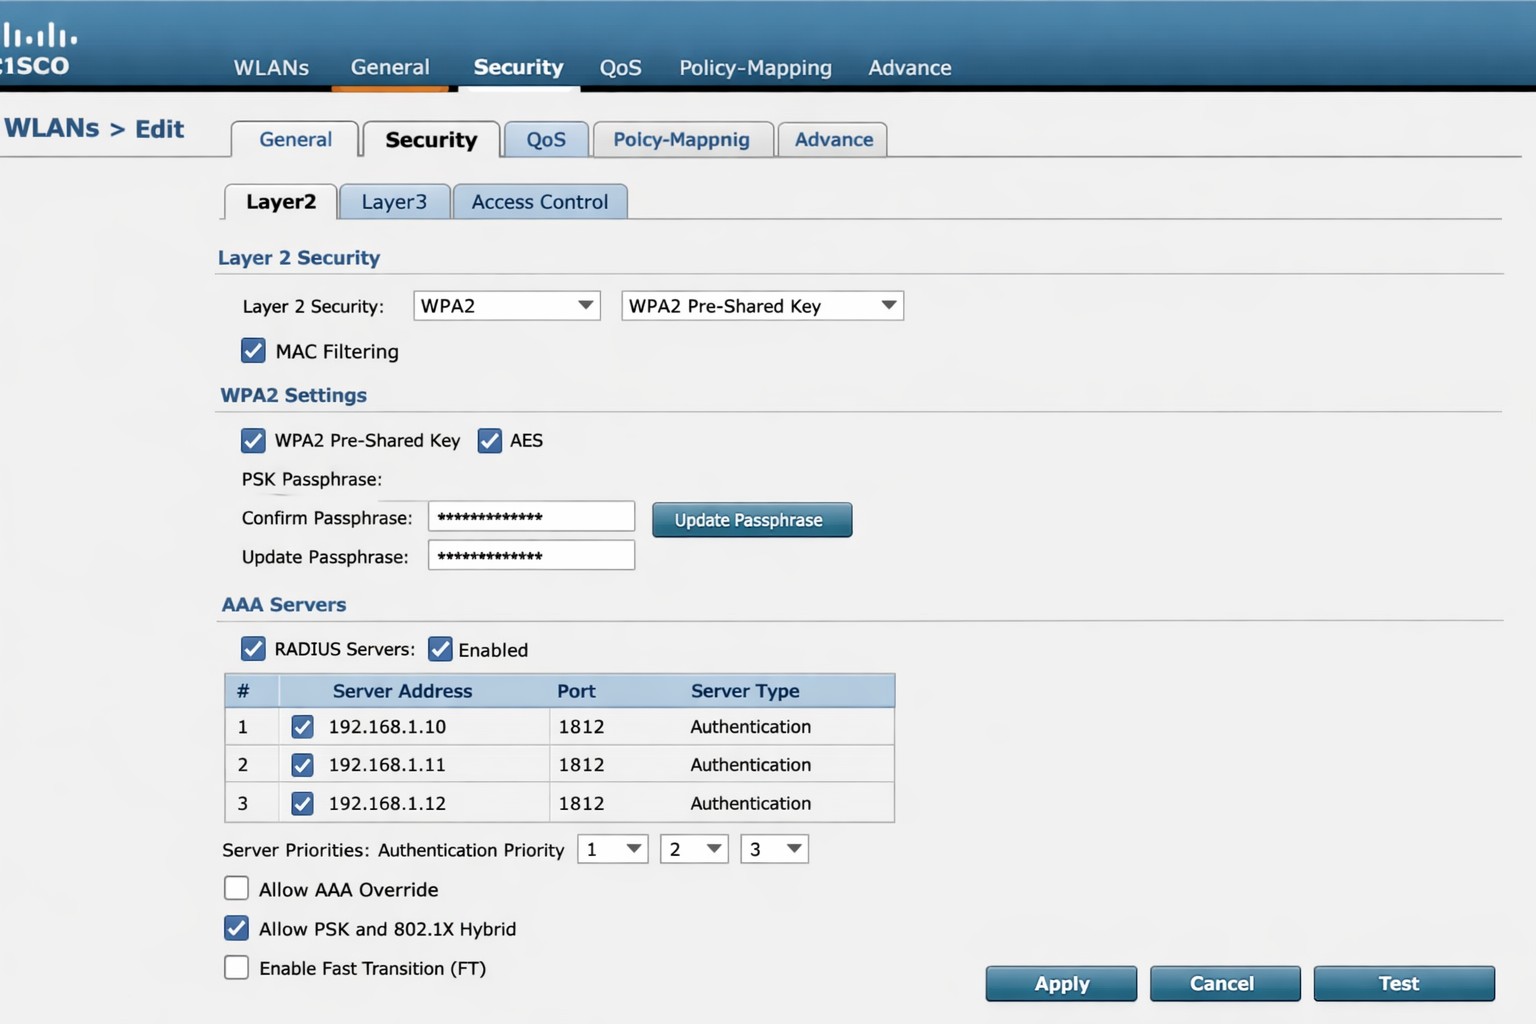
Cisco WLC WLAN configuration enabling PSK with RADIUS backend authentication.
This is the sixth in a series that document the Tier 3 / Co-Managed IT work we did to setup a wireless test bed for a Linux based scientific device. The testing environment included two different wireless network hardware types (Ubiquiti and Cisco). There was also a Synology device used for various purposes including hosting the Ubiquiti controller inside a Kubernetes container, providing certificate services, providing LDAP authentication, and providing RADIUS authentication. Each article will detail a separate piece of the project. This article shows the basic setup of Cisco Wireless Controller for PSK and RADIUS authentication from wireless devices.
Setup Cisco Wireless Network with PSK
Login to Cisco Wireless Controller
Click on WLANs tab at top
Click on GO next to Create New drop down
Create Profile Name & SSID
Click Apply
Click Enabled next to Status
Click Apply
Click on Security tab
Uncheck 802.1x
Check PSK
Enter Pre-Shared Key next to PSK format
Click Apply
Click Save Configuration at the top
Setup Cisco Wireless Network with RADIUS
Log into Cisco Wireless Controller
Click on Security tab at top
Click on Authentication under RADIUS on left hand side
Change both Acct Call Station ID Type to IP Address
Click Apply
Click on New
Add RADIUS server IP address
Add Shared Secret
Uncheck management
Click Apply
Click on WLANs tab at top
Edit WLAN 1
Click on Security tab
Click on AAA Servers tab
Change Server 1 to the one entered on RADIUS Authentication page
Click Apply
Click on Layer 2 tab
Change Authentication type to 802.11x
Click Apply
Click Save Configuration at the top
If your company has highly customized setup requirements that you need consulting for, then contact us for assistance.
This is the fifth in a series that documents the Tier 3 / Co-Managed IT work we did to setup a wireless test bed for a Linux based scientific device. The testing environment included two different wireless network hardware types (Ubiquiti and Cisco). There was also a Synology device used for various purposes including hosting the Ubiquiti controller inside a Kubernetes container, providing certificate services, providing LDAP authentication, and providing RADIUS authentication. Each article will detail a separate piece of the project. This article shows the setup Synology RADIUS server & certificates.
Setup RADIUS Server
Login to Synology
Open Package Center
Install RADIUS Server app
Open RADIUS Server package
Uncheck local users
Check LDAP users
Click Apply
Click on Clients on left hand side
Click on Add
Create Name
Create Shared Secret
Enter IP address of Cisco WLAN controller
Click on Add
Create Name
Create Shared Secret
Enter IP address of Ubiquiti Controller
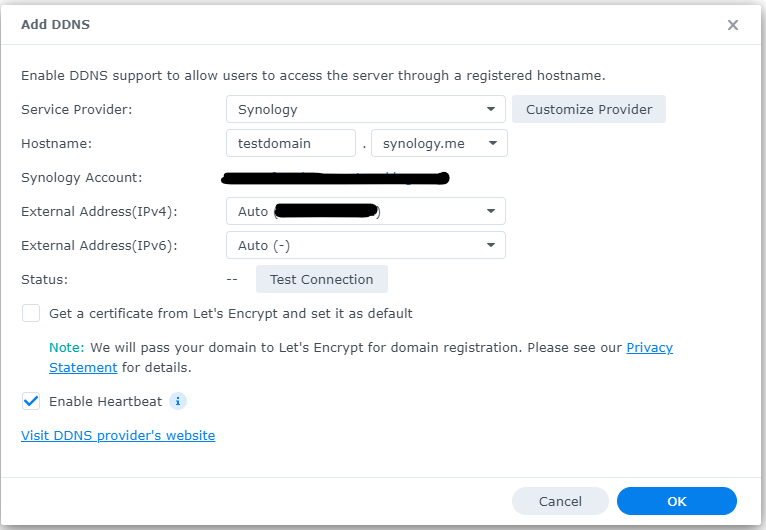
Configure RADIUS Certificates
Open Control Panel
Click on External Access
Click on DDNS tab
Click Add
Choose Synology as service provider
Add hostname
Click Test Connection
Click OK
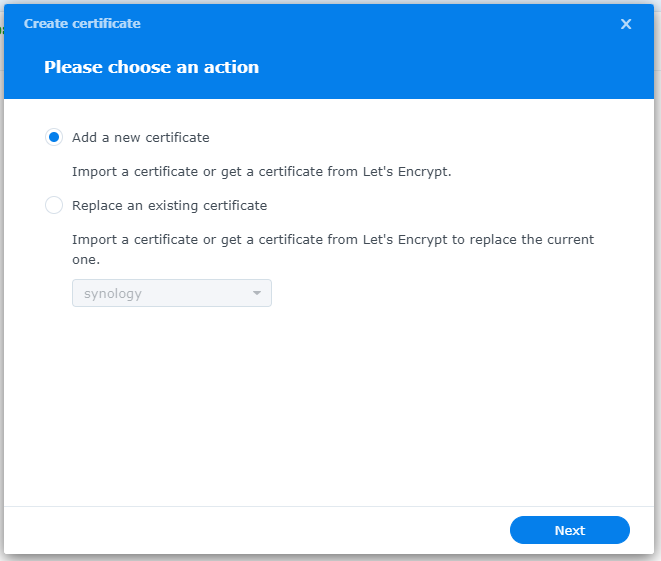
Click on Security on left hand side
Click on the Certificate tab
Click on Add
Add new certificate
Click Next
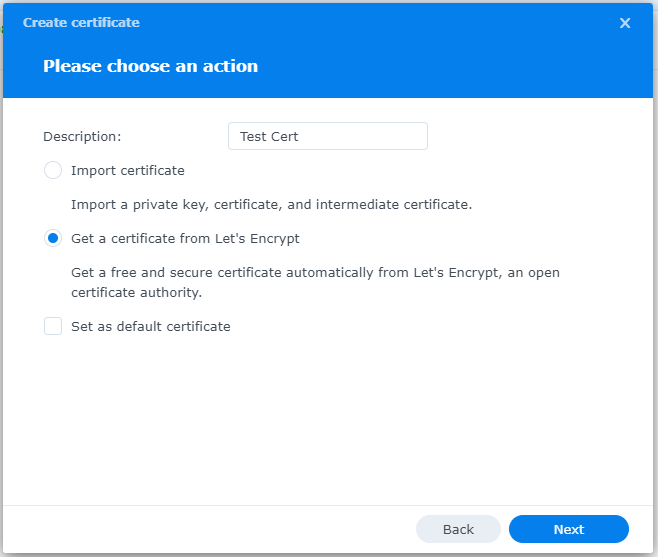
Create description
Get a certificate from Let’s Encrypt
Click Next
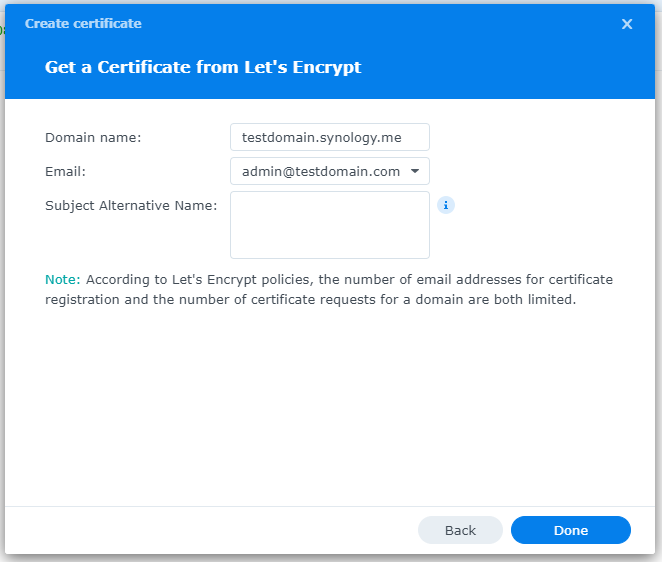
Add needed certificate information
Click Done
Click Settings button and choose appropriate RADIUS server certificate
If your company has highly customized setup requirements that you need consulting for, then contact us for assistance.
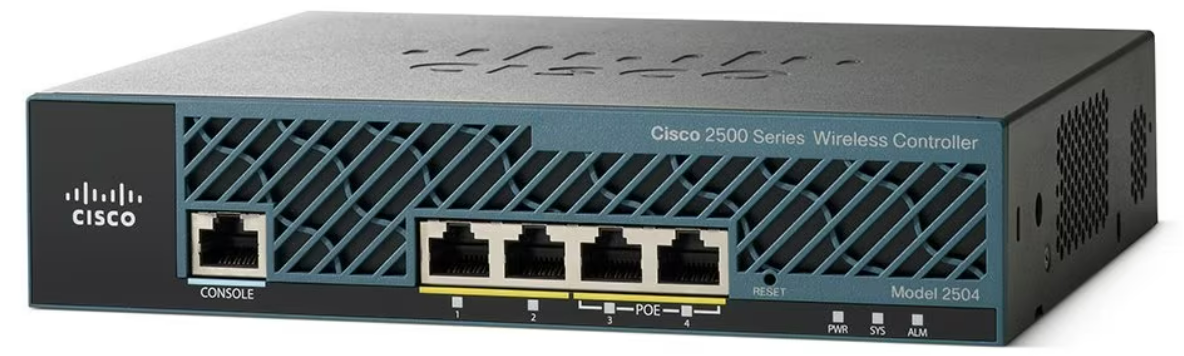
Cisco wireless controller setup wizard with SSID and management VLAN configuration.
This is the first in a series that document the Tier 3 / Co-Managed IT work we did to setup a wireless test bed for a Linux based scientific device. The testing environment included two different wireless network hardware types (Ubiquiti and Cisco). There was also a Synology device used for various purposes including hosting the Ubiquiti controller inside a Kubernetes container, providing certificate services, providing LDAP authentication, and providing RADIUS authentication. Each article will detail a separate piece of the project. This article shows the basic setup of Cisco Wireless Controller.
Setup of Cisco Wireless Controller
Plug -in ethernet of Computer to port 2 on controller
Boot controller and wait for SYS light to go solid
Open web browser to http://192.168.1.1
Create admin username
Create password
Fill in the needed information:
System nameManagement IP Subnet MaskDefault Gateway
Click Next
Fill in temporary information for wireless
Network BSSIDCreate PassphraseEnter local DHCP server address
Click Next
Click Apply and wait for reboot
Click on Commands tab
Click on Set Time on the left-hand menu
Change needed values
Click Set Date and Time
Click Save Configuration at the top
If your company has highly customized setup requirements that you need consulting for, then contact us for assistance.
Farmhouse Networking’s zero trust security model prevents lateral movement
This is the ninth in a series about the concept of Zero Trust, which means in the IT sense that you trust nothing and always verify everything surrounding and connected to your network. Today’s discussion will be on Network Security.
Network Security
Network Security is having the proper hardware and configuration of that hardware in place to protect the business network. This configuration includes segmenting network traffic to keep specific types of traffic, like guest devices, separate from traffic of business devices. It also includes keeping outsiders out of the network and detecting when they have breached security measures. Here are some questions to ask:
Do you have a business class router / firewall?
Do you have business class switches and access points that support segmentation?
Is your network configured to segment business traffic from guest traffic?
Are devices like VoIP phones and network cameras on their own network?
Is geo-location blocking turned on for non-essential countries?
Is network traffic being analyzed for suspicious activity?
Do you filter internet traffic?
Can your network detect and respond to a breach?
If your company is wanting to lock down network security, then contact us for assistance.
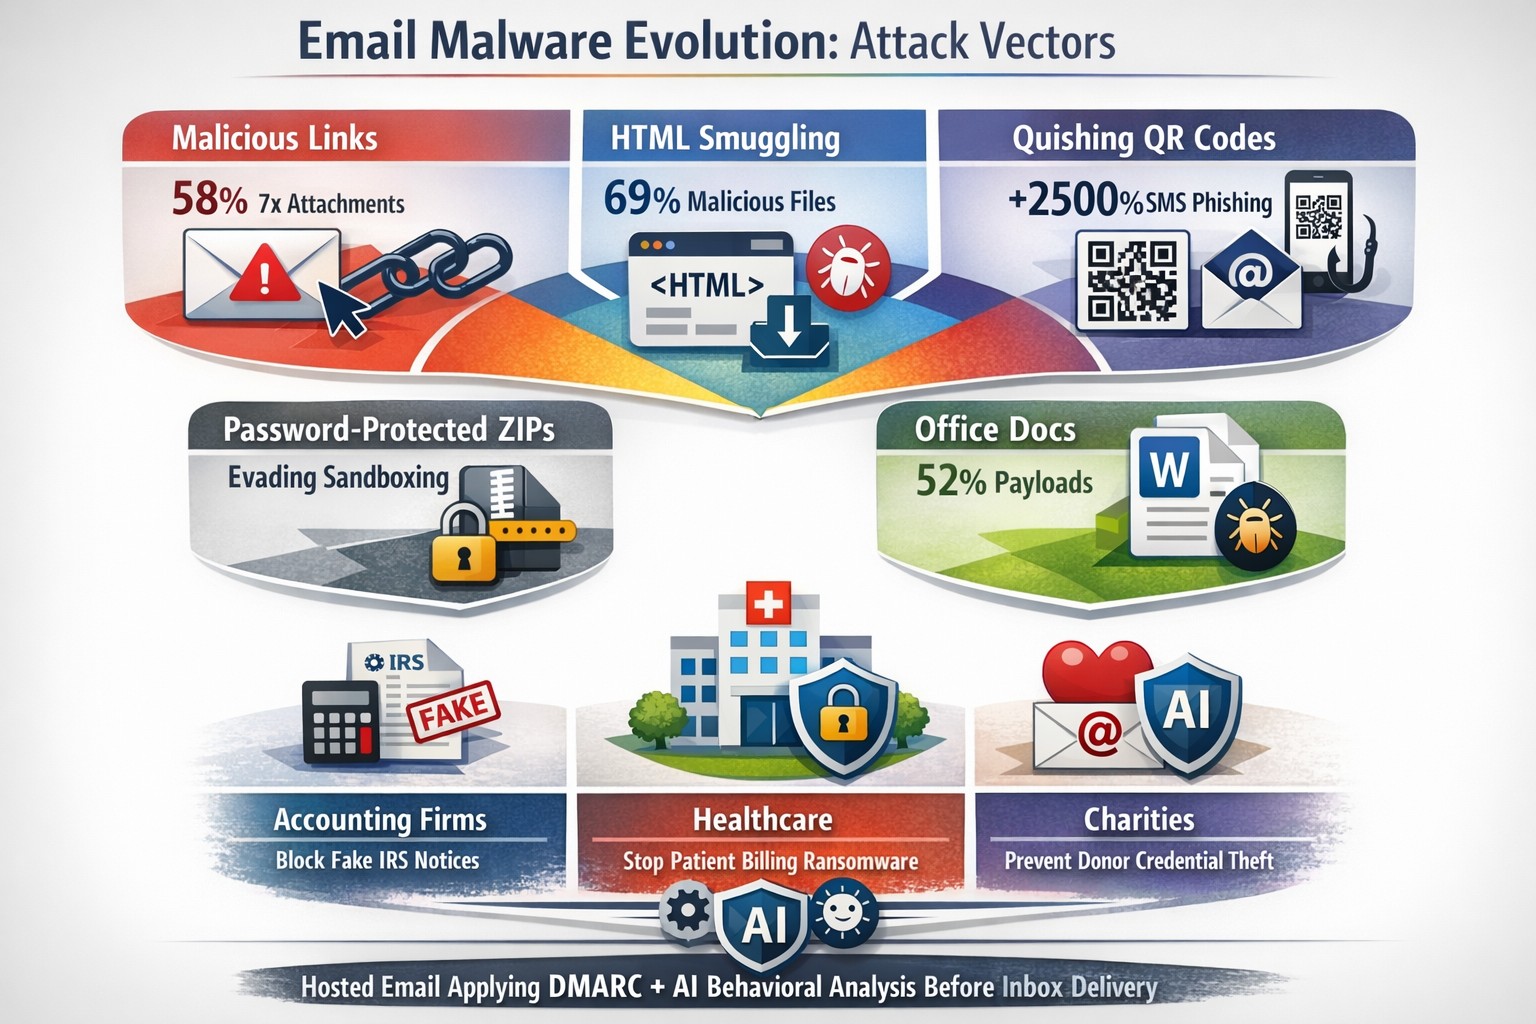
Read a recent study on the origins of malicious software aka malware. Here are the highlights:
Current Malware Statistics
29% – Malware is previously unknown to security vendors due to the continued efforts of malware creators to hide the software or make it undetectable.
88% – Malware is delivered to people’s inboxes and some of it bypassing normal SPAM filters.
8.8 Days – Time before regular antivirus vendors have discovered the malware and added it to their lists for detection.
$50 – The cost of a pre-fabricated malware kit that can be bought currently on the dark web.
“The most common type of malicious attachments were: documents (Word – 31%), archive files (ZIP & RAR – 28%), spreadsheets (Excel – 19%) and executable files (EXE – 17%).”
What can be done?
A multi-tiered approach to security remains the best solution:
Moving from traditional antivirus to Enhanced Detection & Response (EDR) software to go beyond lists of know infections to behavior tracking of software
Moving from traditional SPAM filters to Email Advanced Threat Protection which scans each email and opens each attachment to see if there is any malicious activity cause by them
Moving from traditional router to a business class firewall with Intrusion Prevention System to monitor traffic for suspicious activity
Employee training is also key to keep your staff aware of immerging trends and threats
If your company is looking to enhance your network security posture, then contact us for assistance.
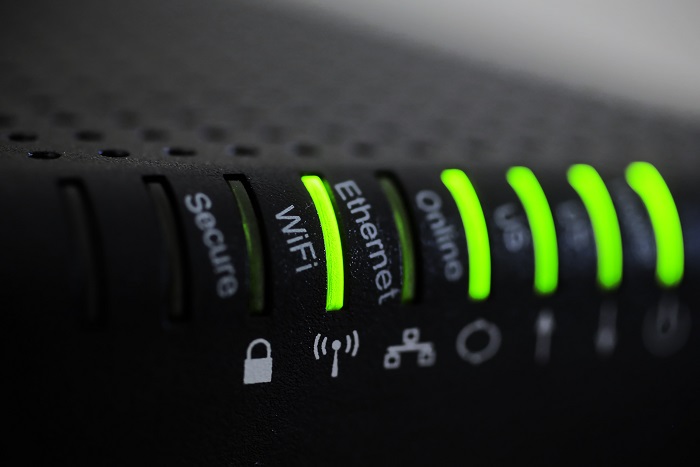
Reliable retail routers powering WFH for B2B professionals
This blog post is more about the use of retail routers at the office than at home, just to make that clear from the beginning. We would also recommend non-retail routers at home, but that is not feasible for everyone.
What is a retail router?
This is a phrase I am coining to describe any router that is generally available from your local retailers like Staples, Walmart, etc or delivered as part of the internet service from your local provider. They include brand names like ASUS, D-Link, Linksys, and Netgear. They range in price from $30 for the extreme low end to $450 for a gaming router. These routers are built for home and small office networks that have very few users or devices connected at any given time. They may include some features that sound “business-like” such as Virtual Private Network (VPN), Stateful Packet Inspection (SPI), VLAN, and Quality of Service (QoS) – remember though that these are also only able to support a minimum number of users and devices connected at any given time. If you try to use a retail router to run your business network then you will find that performance will be severely degraded and these features will not work as advertised.
There is also the issue of security. These routers are rarely if ever updated even when new vulnerabilities are found. This makes them ineligible for PCI or HIPAA compliance situations.
Is there a non-retail router?
So what to do about this situation? Time to call your trusted IT services provider who will be able to get you a non-retail router, but that begs the question – what is a non-retail router?
These routers are built by network professionals who design the hardware to perform under the pressures of the office environment and to handle the work from home remote workload. These routers include brands like Cisco, Juniper, Ubiquiti, and Araknis. They range in price from $150 for an office of up to 5 people to $10,000 for a high traffic company with hundreds of users. These routers handle VPN, SPI, VLAN, QoS, and many other services all at once with ease. Security is baked into these routers with the best ones having the ability to be managed from the cloud. They provide consistent access to all connected users and devices at all times. Your trusted IT services provider will work with you to “right size” the router to your business needs.
If your company is going to have full time work from home employees and is concerned about their ability to perform, then contact us for assistance.
Recently had to convert Cisco 3700 AP from Controller managed to Autonomous when I client separated from their parent company and bought out the IT equipment (that was a very costly mistake – if converting from corporate to small business invest in business grade IT equipment as it is much cheaper, by thousands of dollars). I researched online and found several posts about using the “archive sw-download” method on the AP, but those didn’t work with the TAR file that I was downloading from Cisco. I found another means of doing this by resetting the AP to factory defaults which allowed me to login via the console port and switching to manual boot.
Reset AP to Default
Remove power from the AP
Hold down the MODE button
Plug back in power
Wait 30 seconds then release the MODE button
Configure AP to Manual Boot
You should now be able to login with the “enable” command using the password Cisco
Type in the following command:
debug capwap con cli
conf t
boot manual
reload
Use TFTP to update firmware
Download / Install a TFTP server software of your choice.
Move Firmware TAR file into server directory
Once the AP finishes the manual boot process the prompt with be ap:
Type in the following commands:
set IP_ADDR <IP Address on same subnet as TFTP server>
set NETMASK <Subnet Mask on same subnet at TFTP server>
set DEFAULT_ROUTER <IP Address of default gateway>
ether_init
tftp_init
tar -xtract tftp://<IP Address of TFTP Server>/<Name of firmware TAR file> flash:
use “dir flash:” and cd to find directory name and firmware file name, then issue the last commands:
set BOOT flash:/<Directory name>/<File name>
boot
The AP will reboot with the new firmware and be ready to access a new configuration. This method works great as long as the TFTP extraction of the TAR file completes successfully.
If you need any help gaining access to your Cisco network gear or with configuring your Cisco equipment, then contact us for support.
Consumer routers = compliance nightmares for business networks
Even though we recently sent out another email newsletter about this topic, we have to keep raising this issue as the work from home remains a regular occurrence. A German think tank analyzed 127 popular home routers with the majority having at least one flaw (D-Link, Netgear, ASUS, Linksys, TP-Link and Zyxel were affected by 53 critical-rated vulnerabilities each). The biggest problem is that most (91%) are built on top of an old version of Linux operating system and their makers rarely publish updates.
There are several solutions that we can discuss to secure your work from home networks, so contact us for assistance.
And God will generously provide all you need. Then you will always have everything you need and plenty left over to share with others. As the Scriptures say,
“They share freely and give generously to the poor. Their good deeds will be remembered forever.”
For God is the one who provides seed for the farmer and then bread to eat. In the same way, he will provide and increase your resources and then produce a great harvest of generosity in you. - 2 Corinthians 9:8-10
We use cookies to ensure that we give you the best experience on our website. If you continue to use this site we will assume that you are happy with it.