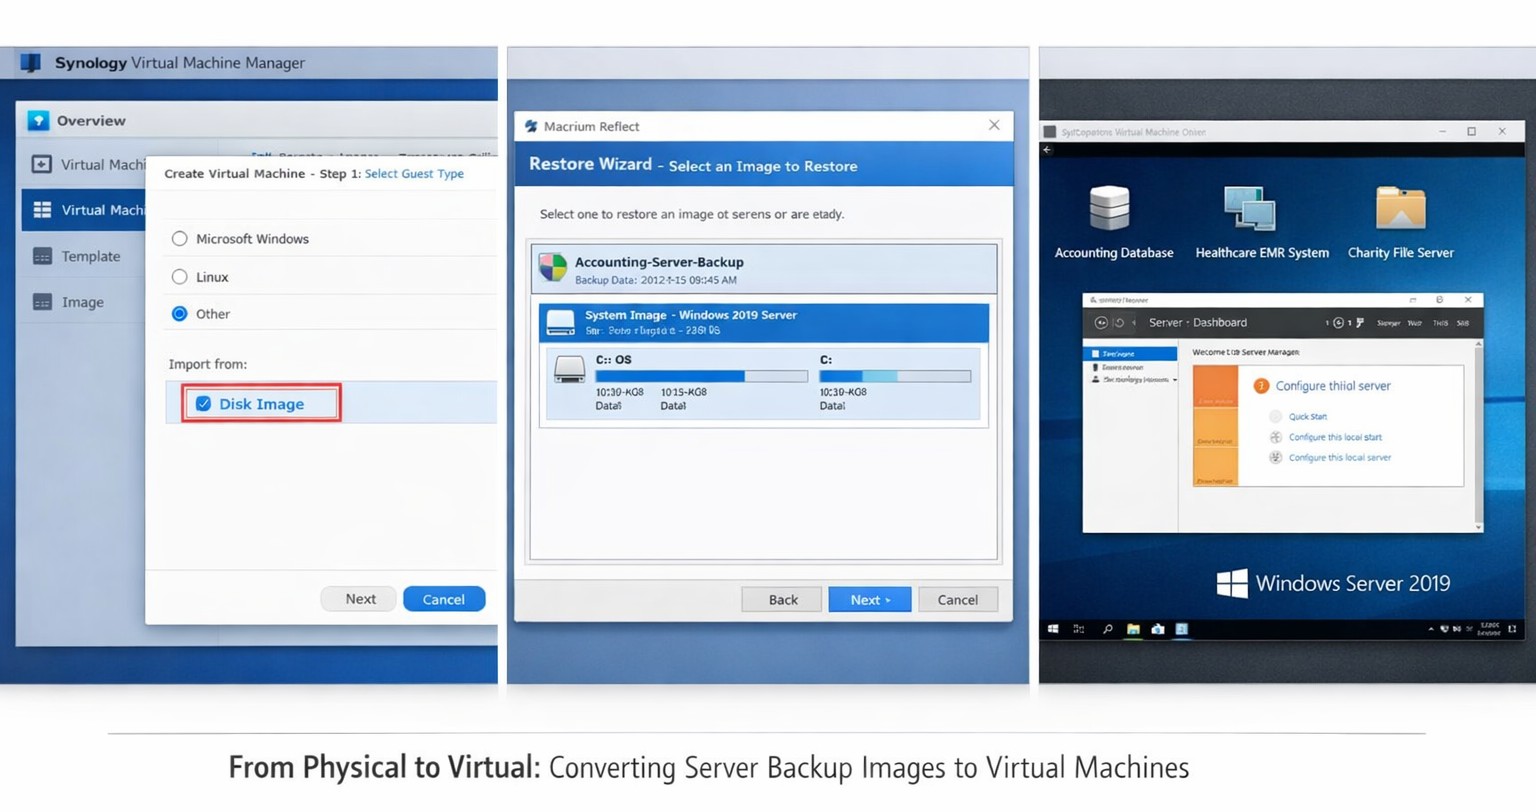
Macrium images restore seamlessly to Synology VMs for rapid virtualization
This was a strange one, but I have done it now more than once for a Tier 3 / Co-Managed IT client. They use the Macrium Reflect software to do image backups of client servers. They are looking to virtualize these servers going forward and wanted to know if it was possible to restore from Macrium Reflect to a Synology VM. Here is the process that we found to make it work:
Assumptions
We assume that you already have a Synology device setup and functioning properly.
We assume that you already installed the Virtual Machine Manager app on the Synology
We assume you already went through the initial setup wizard of the Virtual Machine Manager app
We assume that you have been backing up the server and have a valid image backup file
We assume you know the network path to these backup files
We assume you already know (and possess on the Synology) the required amount of CPU, Memory, and HDD space.
Process
Create Macrium Reflect bootable Rescue media
Open Macrium Reflect
Click on the Restore tab
Open Other Tasks on the left hand side
Choose Create bootable Rescue media
Browse to where the current backups are stored and save it there (this makes finding everything easier later)
Click Build (You may need to install some pre-requisites to make this possible, but Macrium Reflect with prompt you for it)
Create Virtual Machine
Open the Synology Virtual Machine Manager app
Click on Image
Click on the Add button
Find the Macrium Reflect Rescue media and add it to local storage
Click on Virtual Machine on the left
Click the Create button
Choose the Microsoft Windows option (if appropriate)
Select the proper storage amount
Give it a name, CPU, Memory (as needed)
Give it the needed storage amount(s)
Leave it connected to the default network
Download the Synology Guest Tools if needed.
Select Macrium Reflect Rescue media for the ISO file for bootup
Do not start the automatically
Edit the VM and change it to start from the CD ROM
Power it on
Restore from backup
Connect to the VM
Wait for Macrium Reflect Rescue media to boot (this can take awhile)
Click on the blue computer icon at the bottom
Click on the Map Network Drive icon
Type in need information and click OK
Go back to the Macrium Reflect window
Click on Browse for an image or backup file to restore
Find the appropriate file in the newly mapped network drive
Click on Restore Image
Select the target drive(s)
Click Next, Finished
Wait for restore to complete (this will take a long time)
Prepare restored image
Once completed, click on the ReDeploy restored image to new hardware
Add drivers if needed
Accept any drivers it finds
Accept the default options
Finish the wizard by closing
Power off the VM
Edit the VM Storage to make the disk a SATA controller instead
Edit the VM Others to make the BIOS UEFI
Edit the VM Network to Not Connected
Power on the VM
Login and install the Synology Guest Tools from the attached CD-ROM drive
Power off the VM
Edit the VM Network to use the default connection
Power on the VM if you are ready to deploy
If your company is looking to virtualize your servers or take them to the cloud, then contact us to setup migration evaluation.
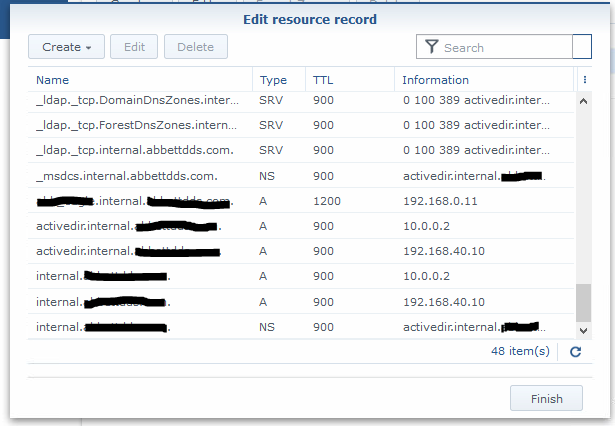
Got a email from one of our co-managed IT / Tier3 / managed RMM clients that was having issues with DNS resolution. The network consists of a Synology NAS acting as Domain Controller / DNS Server and a VM on the Synology that runs the clients main application. Several of the workstations were having an issue where they could not browse to the IP address (\\192.168.0.11\sharename)of the application server at one time and could not browse to the UNC path (\\servername\sharename) of the same server on another day. First tried setting the external forwarders to Google DNS and the Forward Policy to Forward First, but the problem resurfaced. So we dug deeper into the DNS settings and found the following:
Stale DNS records break Synology name resolution—simple record cleanup fixes it
If you look closely the IP address of the server is 192.168.0.11 and the records for DNS servers associated with the domain above and below it point to servers outside the subnet of the application server (10.0.0.2). Upon further investigation this DNS server address was blocked by the firewall because it was an old IP address scheme that was no longer in use. The current good DNS server IP addresses are 192.168.40.10 and 192.168.0.10.
Turns out the stale DNS records were the problem. Made the needed changes to the DNS records and things are working great.
If your company needs a little extra help running the IT department, then contact us to setup a co-managed IT evaluation.
Cloud eliminates hardware costs, enables instant business scaling
Give your business freedom from hardware constraints with the agility and functionality of cloud computing.
Cloud requires no upfront costs, which makes it an operating expense rather than a capital expense. Your business will benefit from predictable monthly payments that cover software licenses, updates, support and daily backups. Cloud technologies provide greater flexibility as your business only pays for what it uses and can easily scale up and down to meet demand.
Moving to the cloud enables your business to no longer pay to power on-premises servers or to maintain the environment. This significantly reduces energy bills.
Finally, for those concerned with security, cloud data centers employ security measures far beyond what most SMBs can afford. Your company data is much safer in the cloud than on a server in their office.
Move your business to the cloud ahead of Office 2010 and Windows 7 End of Support!
If your company is looking to make the move to cloud, then contact us for assistance.
Not sure if you have seen the same but it seems that techs who do server replacement work are using Distributed File System (DFS) to sync the file shares between two servers. This is overkill in my opinion and I recently found a simple lightweight file sync tool called Backvp2 from Switzerland. Now I setup similar shares on the new server then run this software from the new server. Configuring the target and destination are super easy and the syncing happens flawlessly. If there are issues with sync it has handy error codes that made troubleshooting file permission issues simple in a recent migration. I highly recommend it for all techs.
Seamless Active Directory integration transforms Synology NAS into domain controller
Recently provided some assistance to a local IT company that exclusively uses Synology devices instead of servers for their clients. They approached us to create Group Policy objects based on this new feature of the Synology. The Synology Active Directory Server app is based on the Samba 4 Protocol, here are some details of available features:
Support for Windows RSAT
Support for TLS domain controller certification
Support for custom NetBIOS domain names
DNS auto registration
Support for single domain controllers
Account & Privileges
Group membership and policies
Roaming user profiles
Account single sign-on
Home folder support
Security & Access Control
Kerberos-based authentication
Password reset via email
Password strength policies
Account lockout policies
Domain Clients
Microsoft Windows 7 and above
Linux
Take Aways
Here are some basic take-aways from our experience creating these Group Policy Objects (GPO) on the Synology Active Directory Server.
Need to install Remote Server Administration Tools (RSAT) on the most up-to-date desktop or server OS version in the organization to allow for best compatibility with all earlier OSs when creating GPOs
Need to modify Synology Active Directory Server control panel Domain Options to allow Domain Admins to have admin access – without this you will get Access Denied every time a GPO is attempted to be added
Windows Servers, Active Directory and domains are not dead, they are just becoming a “Container” which makes them much cheaper for small businesses to adopt.
If your company is utilizing a Synology Network Attached Storage device and would like the functionality of an Active Directory domain, then contact us for assistance.
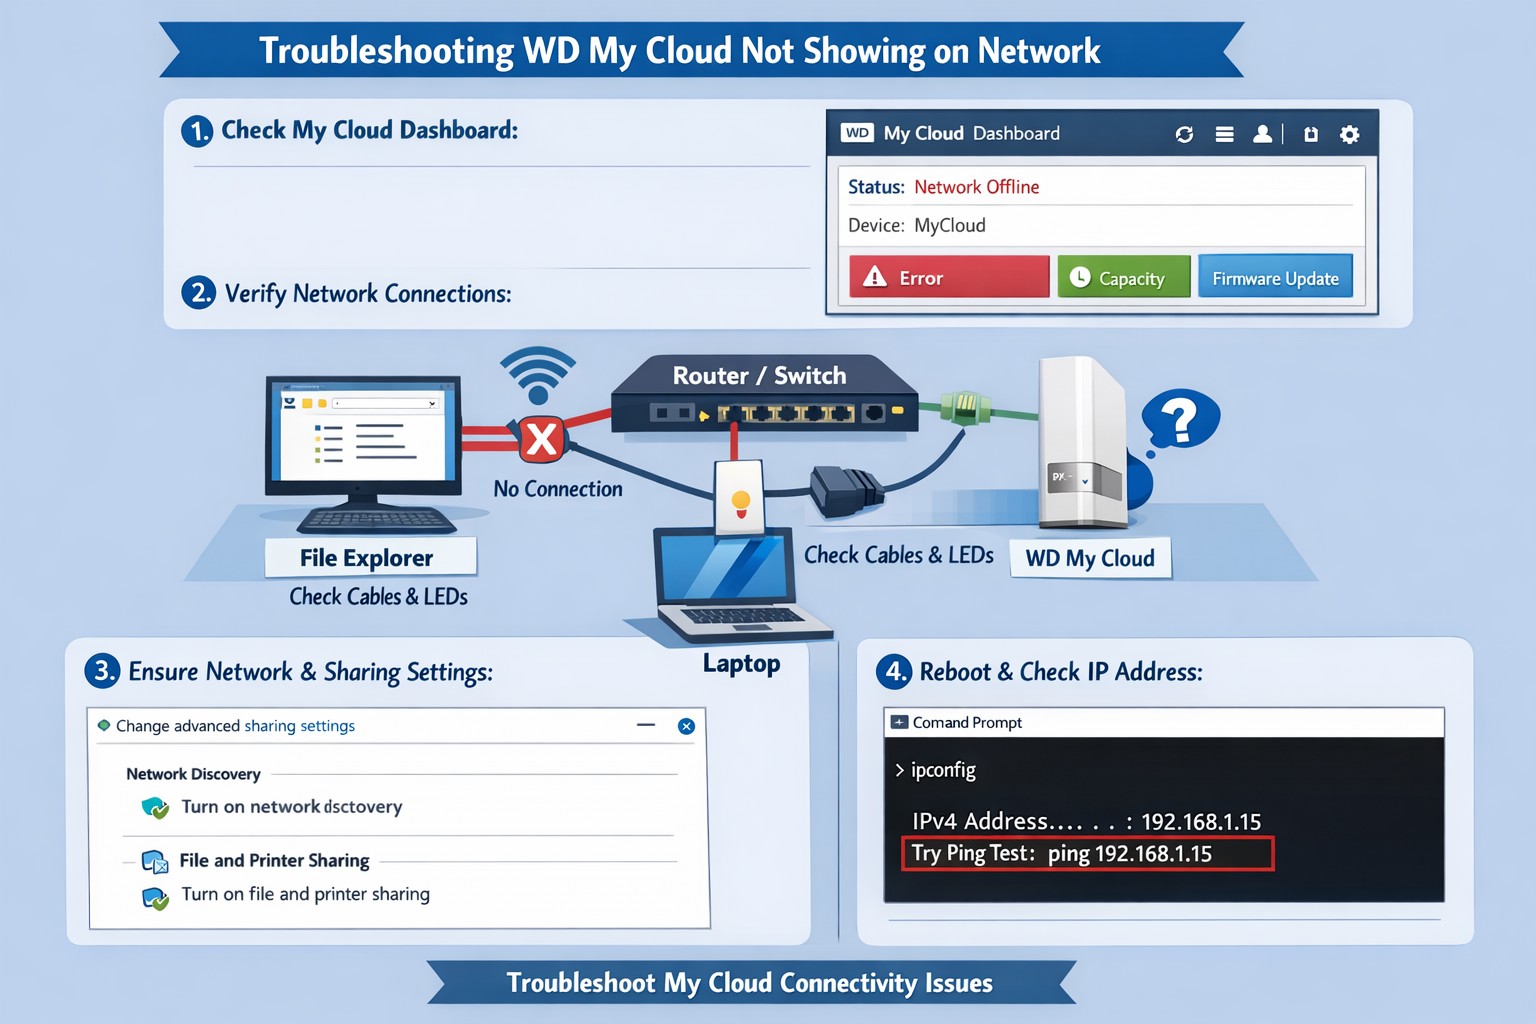
Recently took over an account from another tech and was informed by the client that their Western Digital MyCloud drive was unreachable and they had not been able to access their files shared their with the computers in the office for some time. Since the MyCloud is just a simplified Network Attached Storage (NAS) device for the home / SMB market, I decided to go onsite and find out what was causing the issue.
How to find a missing MyCloud
I first investigated the shortcuts that were sitting on the desktop to figure out what was going wrong with the drive or if there were some bread crumbs as to where it was previously. Found one called Dashboard which pointed to an IP address on their current subnet that went nowhere – this was likely the former IP address of the device. Found a shortcut to the “Public” folder which pointed to an IP address that was on another subnet than theirs – this was likely from a setup before another network change and had not been removed since then. Found another shortcut to the “Public” folder which pointed to the same IP address on their current network as the Dashboard shortcut, so this confirmed that this was the last known IP address.
Ran a network scan using my personal favorite, SoftPerfect Network Scanner, to discover what was on the current subnet and if the MyCloud was still functional at another IP address. Found that the IP address for the device had changed to another similar address, so figured that it was getting its IP address from DHCP and when the old address lease ran out it just grabbed another one from the router. Checked the router and found that indeed the DHCP table contained the IP address for the device, so added a DHCP reservation to the router for that devices MAC address mapping it to the old IP address to make the broken shortcuts work again. Tested opening the dashboard and “Public” folders successfully which thankfully still had all of their information intact.
The final thing to do was to correctly set permissions within the device for each of the users and corresponding user folders within the device to allow them to connect and “backup” their documents to the device like they were used to. Although I would not recommend using this type of device to any of my clients, it was good to get this company backup up and running successfully. If your company is using Western Digital MyCloud drive for shared file access or are considering adding file shares to your network, then contact us for assistance.
And God will generously provide all you need. Then you will always have everything you need and plenty left over to share with others. As the Scriptures say,
“They share freely and give generously to the poor. Their good deeds will be remembered forever.”
For God is the one who provides seed for the farmer and then bread to eat. In the same way, he will provide and increase your resources and then produce a great harvest of generosity in you. - 2 Corinthians 9:8-10
We use cookies to ensure that we give you the best experience on our website. If you continue to use this site we will assume that you are happy with it.