Small business security strengthened with CIS account management controls
Small business owners face evolving security threats and regulatory obligations. Implementing CIS Account Management Control is key to protecting data, assets, and reputation.
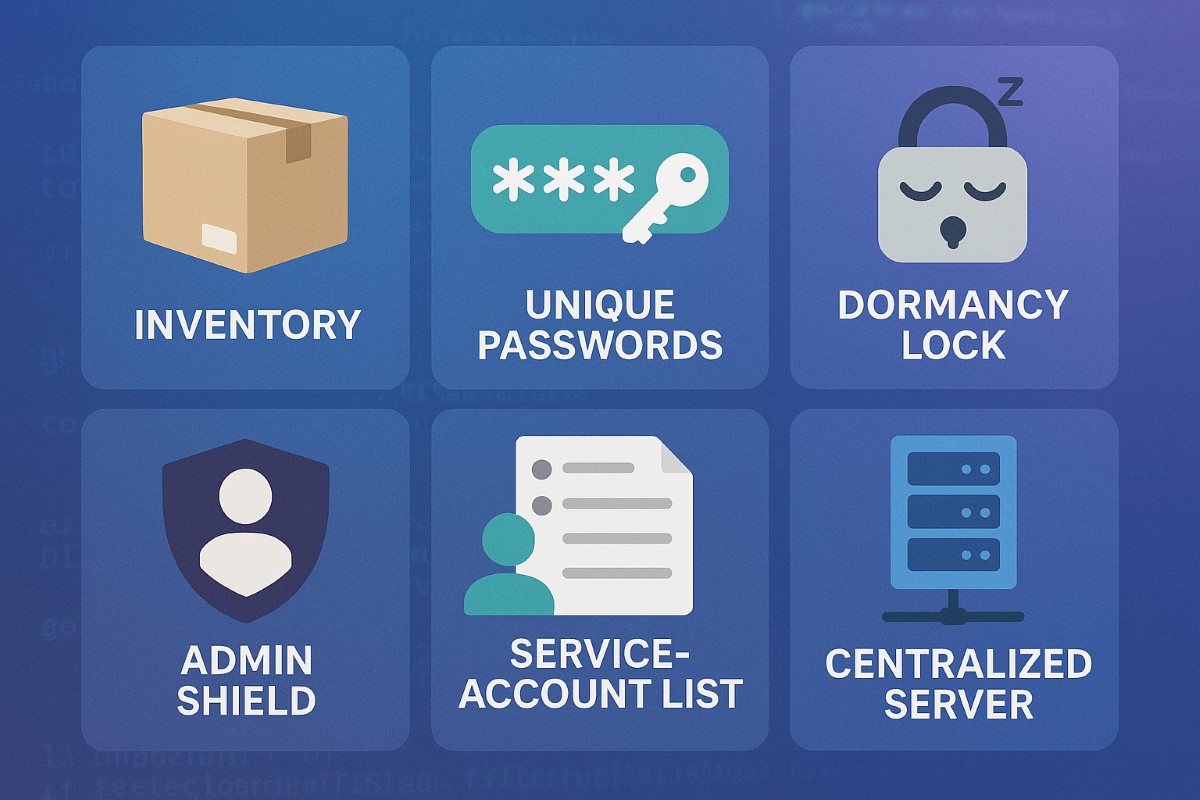
Practical Steps for SMBs
Catalog All User and Service Accounts: Record names, departments, and account activity for every user and automated process.
Use Strong and Unique Passwords: Demand complex passwords, rotate them annually, and use MFA whenever possible.
Disable Dormant Accounts: Purge inactive accounts every 45 days for better security hygiene.
Limit and Monitor Admin Privileges: Assign admin roles sparingly and monitor usage.
Centralize Account Oversight: Deploy a directory or identity manager for simplified user management and audit trails.
Questions & Answers
Q: What’s the biggest risk of poor account management? A: Unauthorized access can lead to financial loss, data breach, or legal liability—CIS controls dramatically reduce this risk.
Q: Does this require expensive software? A: Many tools, such as Microsoft Active Directory, are affordable and scalable for SMBs. CIS controls guide you in choosing solutions that fit your needs.
How Farmhouse Networking Helps
Farmhouse Networking guides SMBs through creating robust account management policies, deploying affordable directory services, and training your team for optimal cyber hygiene.
Call to Action
Start protecting your business today—email support@farmhousenetworking.com to learn how CIS controls can boost your cybersecurity.
Why SMBs Need Smart Network Infrastructure Management
Optimizing SMB network infrastructure for stronger, scalable business networks
For small and midsize business owners, every minute of uptime counts. A slow or vulnerable network isn’t just frustrating—it costs productivity, damages customer trust, and drains revenue. Network Infrastructure Management, guided by CIS (Center for Internet Security) standards, is the key to keeping your technology reliable, secure, and scalable.
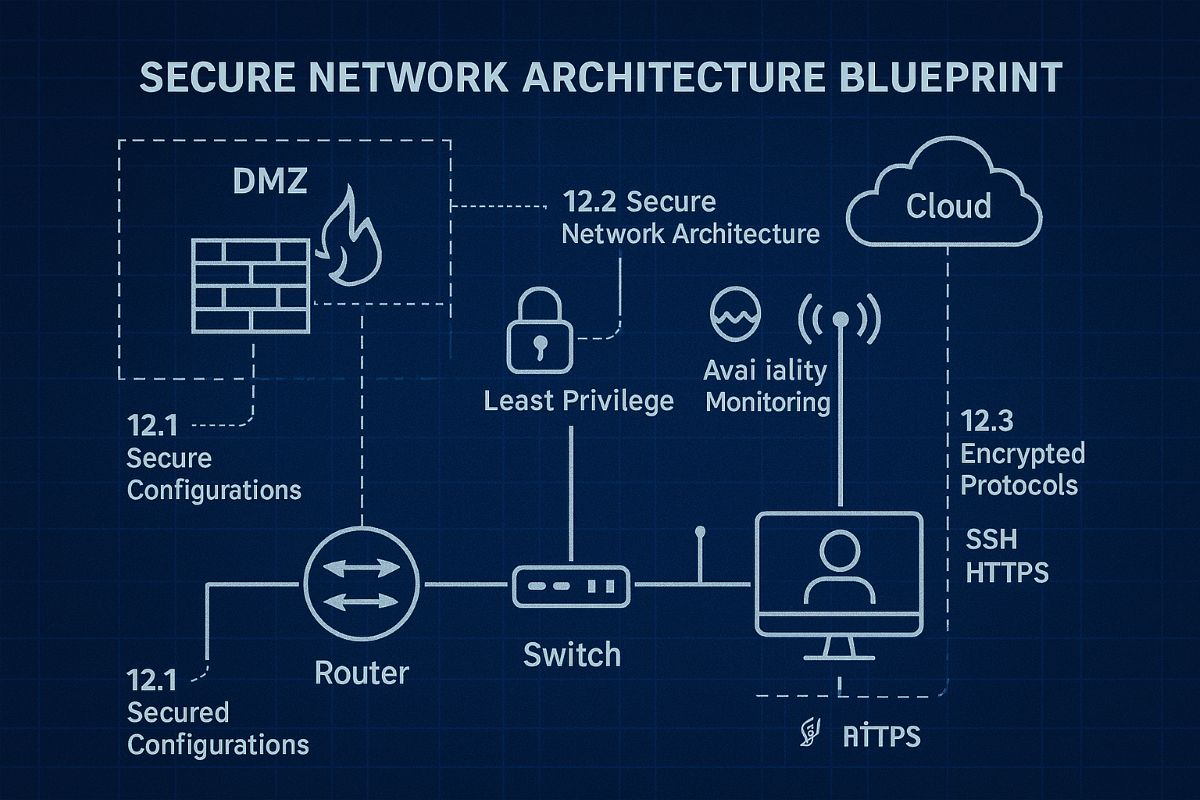
Practical Action Steps
Audit Your Current Network: Compare your systems to CIS-recommended controls to uncover risks.
Secure Data Flows: Implement firewalls, intrusion detection, and CIS baseline configurations.
Plan for Growth: Ensure your infrastructure supports cloud, remote work, and future expansion.
Continuous Monitoring: Use real-time alerts to prevent disruption before it happens.
Employee Awareness: Provide staff training on cybersecurity aligned with CIS best practices.
Client Q&A
“Do CIS standards apply to smaller companies?” – Absolutely; they’re designed to scale to all business sizes.
“Will I need to overhaul my whole network?” – Not necessarily. Often, a phased approach is more cost-effective.
“What if I already have an IT person?” – Farmhouse Networking’s role is to extend their expertise, not replace it.
How Farmhouse Networking Helps We align your systems with CIS benchmarks, secure your infrastructure, and monitor it constantly. That means less downtime, stronger client trust, and more bandwidth for business growth.
Call to Action Ready to protect your network and grow confidently? Email us today at support@farmhousenetworking.com to learn how Farmhouse Networking can keep your systems strong and compliant.
This is the forth in a series that documents the Tier 3 / Co-Managed IT work we did to setup a wireless test bed for a Linux based scientific device. The testing environment included two different wireless network hardware types (Ubiquiti and Cisco). There was also a Synology device used for various purposes including hosting the Ubiquiti controller inside a Kubernetes container, providing certificate services, providing LDAP authentication, and providing RADIUS authentication. Each article will detail a separate piece of the project. This article shows the setup Synology LDAP server & certificates.
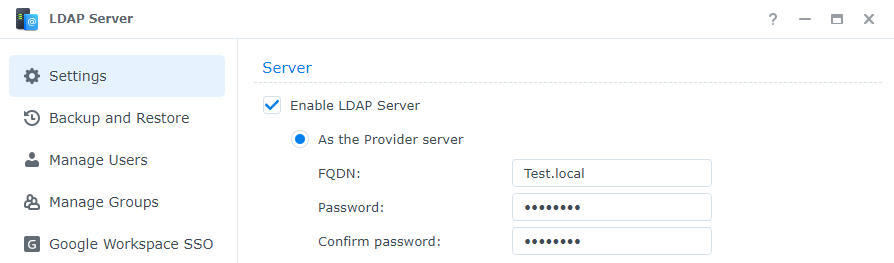
Setup LDAP Server
Login to Synology
Open Package Center
Install LDAP Server app
Open LDAP Server package
Enable LDAP Server
Create FQDN (something like Test.local)
Create password
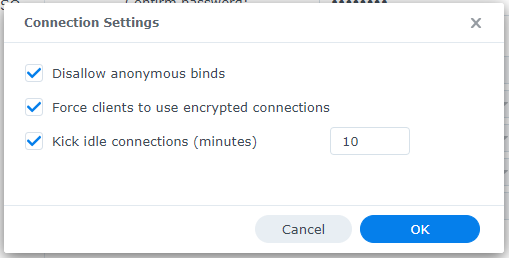
Change Connection Settings
Disallow anonymous binds
Force clients to use encrypted connections
Change timeout to 10 minutes
Click OK
Click Apply
Click on Manage Groups
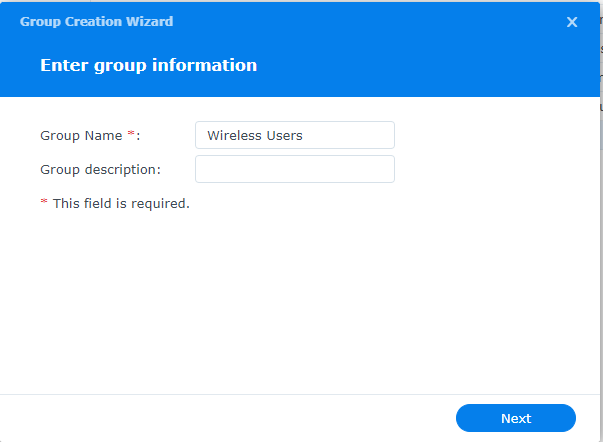
Click on Create
Give the Group a name
Click Next
Click Done
Click on Manage Users
Click on Create
Give the User a name
Add user email if appropriate
Create password
Click Next
Check mark next to new group previously created
Click Next x2
Click Done
Connect Synology to LDAP Server
Open Control Panel
Click on Domain / LDAP on left hand side
Click Join
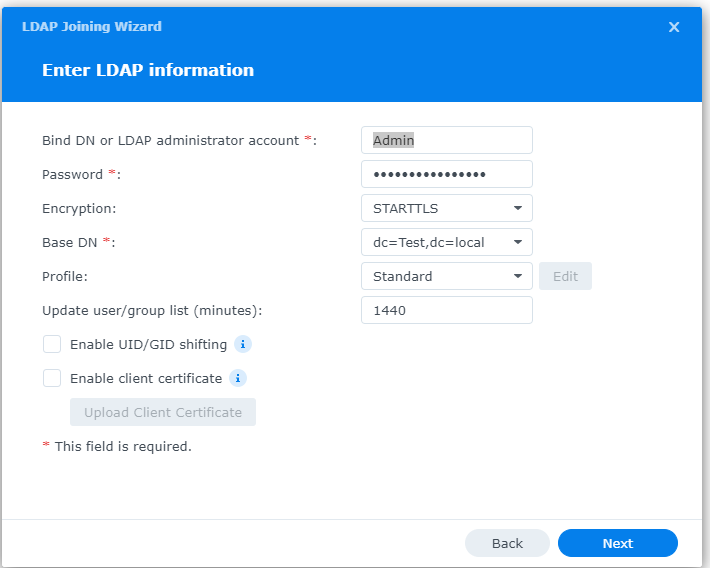
Enter IP address of Synology
Enter Admin username / password
Choose STARTTLS encryption
Copy Base DN from LDAP Server app Settings tab
Click Next
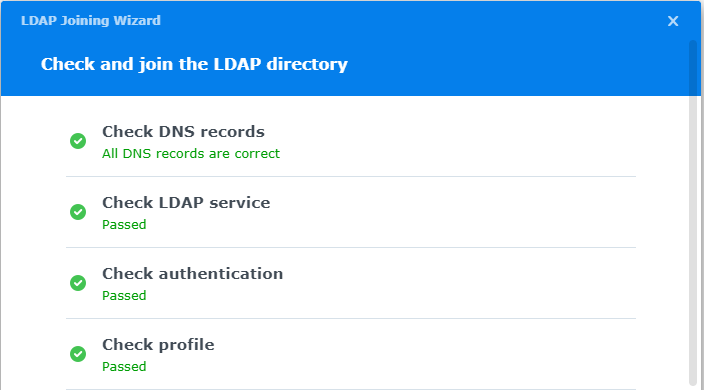
Connection parameters will be check (fix any issues)
Configure LDAP Certificates
Open Control Panel
Click on External Access
Click on DDNS tab
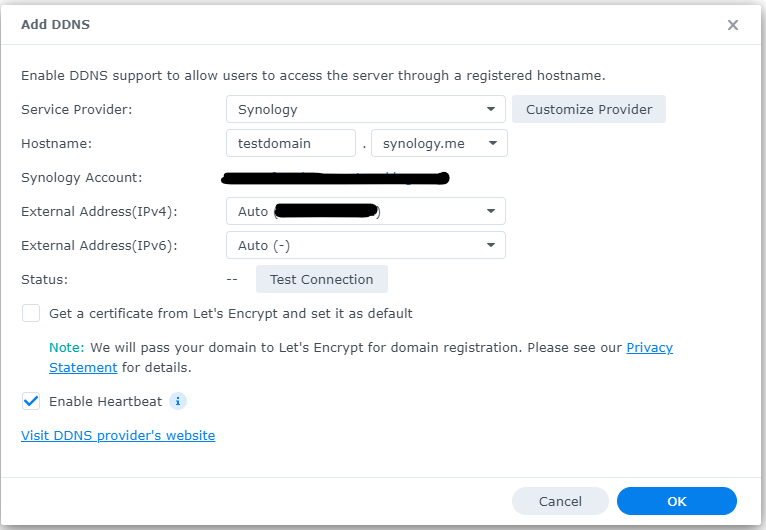
Click Add
Choose Synology as service provider
Add hostname
Click Test Connection
Click OK
Click on Security on left hand side
Click on the Certificate tab
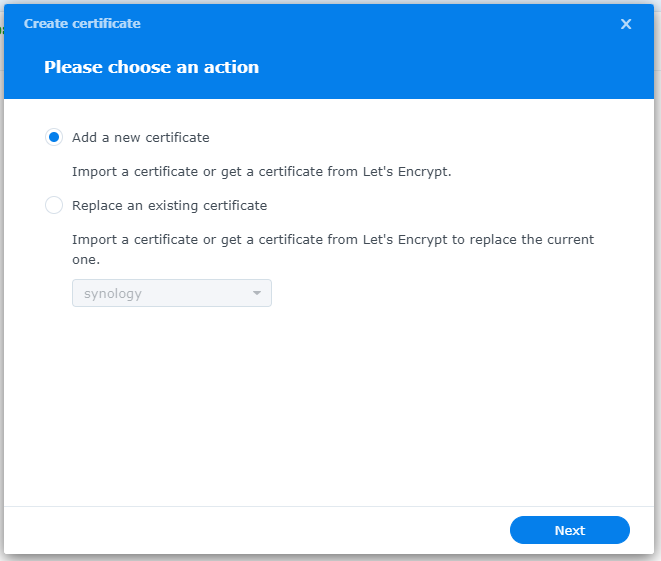
Click on Add
Add new certificate
Click Next
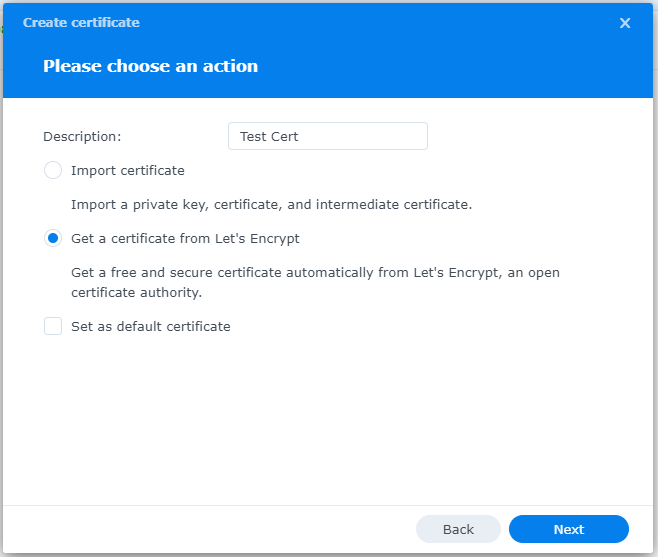
Create description
Get a certificate from Let’s Encrypt
Click Next
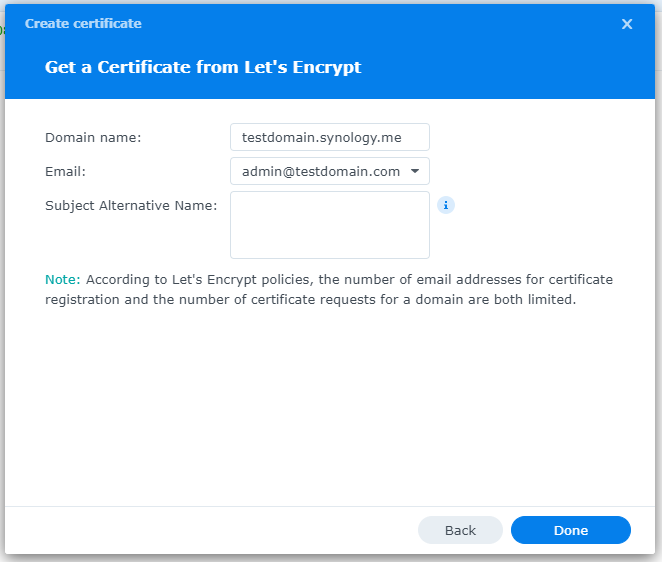
Add needed certificate information
Click Done
Click Settings button and choose appropriate LDAP server certificate
If your company has highly customized setup requirements that you need consulting for, then contact us for assistance.
And God will generously provide all you need. Then you will always have everything you need and plenty left over to share with others. As the Scriptures say,
“They share freely and give generously to the poor. Their good deeds will be remembered forever.”
For God is the one who provides seed for the farmer and then bread to eat. In the same way, he will provide and increase your resources and then produce a great harvest of generosity in you. - 2 Corinthians 9:8-10
We use cookies to ensure that we give you the best experience on our website. If you continue to use this site we will assume that you are happy with it.