It never occurred to me that analog fax was still something used, but my kids’ optometrist asked me to fax in a copy of their insurance card. So I asked them if I could email it to them and they said that it would not be HIPAA compliant to do so to which I responded that I could send them an encrypted email – they were not amused. This interaction begged the question is HIPAA compliant analog fax possible. According to Frequently Asked Question (FAQ) section HHS.gov site:
Does the HIPAA Privacy Rule permit a doctor, laboratory, or other health care provider to share patient health information for treatment purposes by fax, e-mail, or over the phone?
Answer: Yes. The Privacy Rule allows covered health care providers to share protected health information for treatment purposes without patient authorization, as long as they use reasonable safeguards when doing so. These treatment communications may occur orally or in writing, by phone, fax, e-mail, or otherwise.
The Privacy Rule requires that covered health care providers apply reasonable safeguards when making these communications to protect the information from inappropriate use or disclosure. These safeguards may vary depending on the mode of communication used. For example, when faxing protected health information to a telephone number that is not regularly used, a reasonable safeguard may involve a provider first confirming the fax number with the intended recipient. Similarly, a covered entity may pre-program frequently used numbers directly into the fax machine to avoid misdirecting the information. When discussing patient health information orally with another provider in proximity of others, a doctor may be able to reasonably safeguard the information by lowering his or her voice.
So the short answer is a surprising yes they can do HIPAA compliant analog fax with a standard old facsimile machine with the numbers pre-programmed in. If they have moved on the digital fax technology then similar safeguards to email must be put in place for the storage and transmission of that data.
Many have by now experienced the annoyance of the Get Windows 10 (GWX) notification icon down by the clock and the subsequent pop-ups asking to install this update. There have also been reports that the update for some has automatically started and without user intervention the update will install itself. I have found two tools that will help to remove the notification, its related files and block the update from happening automatically.
GRC – Never10
Never10 is a great little tool made by Steve Gibson to both disable the update but also remove the files. This is done in two easy clicks of the “Disable Win10 Upgrade” button and “Remove Win10 Files” buttons on the main program screen.
Ultimate Outsider – GWX Control Panel
GWX Control Panel is more in-depth tool that allows removal of every trace of the Get Windows 10 update. There are several buttons that will need to be pressed here to complete the removal process, so for you techie people this is the way to go.
If your company is having issues with the Get Windows 10 update or would like to proceed with a deployment of Windows 10 to your network, then contact us for assistance.
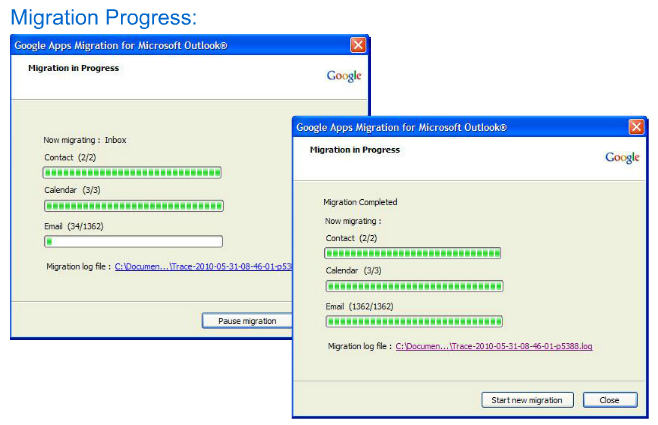
All good things must come to an end and all software will one day reach End-of-Life (EOL). Microsoft Office 2007 EOL is coming in October 2017 as per the Microsoft Support Lifecycle Site. This will mean that all patching and extended support for the product will end and anything new that goes wrong with the product is ignored by Microsoft. This allows malicious hackers to use these flaws to easily infect systems, encrypt data, exfiltrate data or basically have their way with your systems. Now is the time to consider updating your systems to Office 365 which includes the opportunity to use their fabulous new Exchange Online service along with many other useful cloud based services.
While marketing Farmhouse Networking to the city of Grants Pass via the old fashioned method of knocking on doors, I came across a local company that does SEO for website and social media management. They are called Moving Mountains and though based in Grants Pass, OR they are really a global presence thanks to social media and marketing via SEO on Google. While speaking to the owner of this company I was pointed in the direction of a WordPress migration for my blog and eventually my whole site. After some consideration, I decided to take the plunge and learned the basics of WordPress and SEO to bring my readers a better experience than the old Serendipity blog could offer.
Serendipity to WordPress Migration
Export the Current Serendipity Blog to RSS
Make the following change to the rss.php file in the Seredipity blog install directory:
Had a client with a simple peer-to-peer network of three machines that was using Quickbooks for their accounting and customer database. Their main bookkeeper’s workstation was the “file server” for their network with the rest as “client” workstations on their network. This allowed the secretary to access the customer data while scanning in contracts. Regularly these computers would become disconnected and their secretary was unable to connect properly. It would give a Quickbooks H202 error when trying to open across the network. This was causing multiple files to be created and their bookkeeper was often contacted to “fix” the problem. When I got an opportunity to work on their network there were several issues that needed addressing to properly fix the issue:
In a peer-to-peer environment, hosting should only be enabled on the hosting computer (file server).
On each workstation (not the file server), open QuickBooks and choose File Utilities.
If you see Host Multi-User Access on the list, this computer is not hosting the company file and you can go to the next computer. Note: Don’t change anything if you see Host Multi User Access at your workstation.
If you see Stop Hosting Multi-User Access, select that option.
Click Yes to confirm. In the Company File Must Be Closed window, click Yes.
Repeat steps 1-4 on each computer.
Verify QuickBooks Services
When working with QuickBooks in a multi-user mode, QuickBooks services need to be running on the file server computer.
Make sure the QuickBooksDBXX (XX represents the year of QuickBooks) and QBCFMonitorService services are started.
Click the WindowsStart button.
Press the Windows key + R to bring up the run box.
Type services.msc and press Enter.
In the services window, scroll down and look for the QuickBooksDBXX service. Note: XX represents the year of QuickBooks you are troubleshooting.
If you do not see the QuickBooksDBXX service, open QuickBooks, go to File– Utilities– and make sure hosting is enabled (it should say Stop Hosting Multi User access. If it says Host Multi User mode, click it to enable hosting on the server)
Double-click the QuickBooksDBXX service and make sure the Startup Type is set to Automatic and service status is Started.
Click the Recovery tab.
Click the drop-down menu for First failure and select Restart the Service. This will automatically restart the QuickBooksDB service if it fails. Do the same for Second failure and Subsequent failures:
Click OK to save the changes.
Repeat steps 1-6 above for the QBCFMonitorService.
Open QuickBooks in multi-user mode on each affected workstation. If the issue persists, try to make sure the QuickBooksDBXX service is a member of the administrator group and has the appropriate permissions.
Open the Network Ports QuickBooks Uses to Transmit Data
Perform the following on each computer:
Access Windows Firewall Settings
For Windows 8
Hover the mouse in the upper or lower right-hand corners and select Settings
Click on Control Panel and choose Windows Firewall
On the left, click on Advanced Settings
For Windows Vista/Windows 7/Windows Server 2008
Click the Start menu and enter firewall.
Click on Windows Firewall with Advanced Security.
On the left, right-click on Outbound Rules, and choose New Rule
Note (Windows Vista/Windows 7/Windows Server 2008): It’s a little tricky, you have to left-click Outbound Rules first to highlight it, then right-click on it.
Choose Ports and click Next.
Select TCP and in the specific local ports box, enter in the following ports:
QuickBooks 2016: 8019, 56726, 55368-55372
QuickBooks 2015: 8019, 56725, 55363-55367
QuickBooks 2014: 8019, 56724, 55358-55362
QuickBooks 2013: 8019, 56723, 55353-55357
Click Next and select Allow the Connection.
Click Next to enter a name in the name field (for example, “QuickBooks ports” ) and click Finish.
Repeat steps 1-5 for the Inbound Rules.
Open QuickBooks in multi-user mode.
If you have a third party antivirus/firewall program, you may need to configure any other firewall or antivirus software.
Note: For a temporary solution, you may disable the anti-virus/firewall program to identify it as a problem and make sure to re-enable it when you’re done with the test. If the error persists, continue to step 3 (Ping the Server Computer).
Once these three items are configured properly on each of the network workstations then there should be no problems with connectivity or get any further Quickbooks H202 errors – that is of course as long as the “file server” workstation is not turned off or allowed to go to sleep. Also the file cannot be switched to single user mode on any computer unless it is then set back to multi-user mode once advanced configuration is done. If your company is using Quickbooks for your accounting or customer database and need help getting the network connected to the file, then contact us for assistance.

Businesses have been using email, a cloud-based service, for decades. The recent push for compliance and security have given rise to various technology and services to provide encryption for sending / receiving messages especially through email. For most users Office 365 Encryption is the easiest and best way of sending encrypted email. This is done by purchasing licenses / configuring Azure Rights Management either through Enterprise Mobility Suite or Microsoft Azure Rights Management Premium in their Office 365 account. Once licensed the following setup procedure is needed to setup basic email encryption for all users:
Basic Office 365 Encryption Setup
Login to Office 365 portal as Global Administrator and click on the Admin tile.
In the left hand menu select Service Settings > Rights Management then click on the Manage link to the right.
On the Rights Management page click on the Activate button.
Now type in the following to configure the Rights Management Services (RMS) online key-sharing location in Exchange Online (This is North American companies only.):
To verify that you successfully configured IRM in Exchange Online to use the Azure Rights Management service, run the following:
Test-IRMConfiguration -RMSOnline
Run the following commands to disable IRM templates from being available in OWA and Outlook and then enable IRM for your cloud-based email organization to use IRM for Office 365 Message Encryption:
 
This completes the PowerShell portion. Make sure that all users who will be using Encryption have been given a license for the purchased service in the Office 365 portal.
In the Office 365 portal in the left hand menu click on Admin > Exchange.
In the Exchange Admin Center in the right hand side under Mail Flow click on Rules.
Click on the + symbol and choose “Create a New Rule…” option.
Give the Rule a name like “Message Encryption” then click on “More Options…”
Under “Apply this rule if…” select “The subject or body includes…” and add “Encrypt:” as the search term.
Under “Do the following…” select “Modify the message security…” then select “Apply Office 365 Message Encryption”
Leave the other options as default unless otherwise needed and click on Save button.
This then allows users of Outlook or OWA to add the work “Encrypt:” to the subject line of an email and have the message sent as encrypted. The recipient will receive and HTML document that details how to access the contents of the email securely via Microsoft login or one time access code sent to their email. If they are accessing email from their phones then there is an App for that too. If your organization needs any help with compliance of email encryption then don’t hesitate to contact us for support.
Administrators who have been using the tried and true DirSync utility from Microsoft will be pleasantly surprised by the upgrade / replacement by the Windows Azure AD Connect utility for password sync with Active Directory or Hybrid configurations. Here are the basics on an upgrade for a site with only password sync enabled:
Office 365 Azure AD Connect Upgrade
The way to see if your organization is ready for the upgrade is to check under Admin > Users > Active Users > Active Directory Synchronization > Manage in the Office 365 portal.
Click on the Upgrade link which will redirect to the download site for the Microsoft Azure Active Directory Connect utility.
Download and run the utility as administrator which will bring up the following welcome screen which requires agreement to continue the conversion process.
The tool will then examine the current DirSync setup for your organization.
Once done it will present you with the option to continue with the upgrade.
Enter your organization’s Office 365 global administrator credentials.
Enter local domain administrator credentials
Then there is the option to enable hybrid configuration or start a manual first sync. Choose the first sync and continue.
After much labor on the part of the tool it will finish successfully.
Finally a couple notes to make life easier. First is to add a shortcut to the Synchronization Service Manager on the desktop pointing to the following:
%systemdrive%\Program Files\Microsoft Azure AD Sync\UIShell\miisclient.exe
Second is to create a powershell script to start a manual sync as follows:
This will then begin to use the Azure AD Connect utility to run the password sync to Office 365 from local Active Directory domain. If you company needs any help with Office 365, Exchange or Active Directory then don’t hesitate to contact us for assistance.
Modern businesses are transitioning from break-fix computer repair to proactive IT management for stability, security, and growth.
You’re not imagining it: the computer repair industry is changing fast—but it’s not dying. It’s splitting. Traditional “fix my broken PC” walk-in work is declining, while managed IT services, cybersecurity, cloud support, and strategic consulting are growing.
Below is a concise, SEO-optimized guide to help you decide how to adapt.
Is the Computer Repair Industry Growing or Declining?
For break-fix computer repair (one-off repairs, virus removal, hardware swaps), demand is largely declining:
Hardware is cheaper and more disposable, especially laptops and consumer desktops.
Cloud and SaaS reduce local software issues.
Remote work and remote management tools mean many problems never reach a local shop.
However, the broader “computer support and IT services” industry is growing:
Global managed services market is projected to grow in the high single to low double digits annually over the next few years, driven by cybersecurity, cloud, and remote monitoring.
Cybersecurity demand continues to rise as attacks target small and mid-sized businesses, healthcare, and financial firms.
Compliance and data protection requirements are pushing organizations to formalize IT management rather than rely on ad-hoc repair.
In practice: the industry isn’t disappearing—it’s shifting from repair to proactive, managed, and strategic IT.
What This Means for Your Business
If your organization still thinks of IT as “call someone when the computer breaks,” you are operating in the declining part of the market.
To stay competitive, you and your IT team must:
Move from break-fix to proactive maintenance and monitoring.
Treat IT as a business function, not a cost center or emergency service.
Build resilience: backups, security, and business continuity.
This shift directly affects how you work with outside providers and how your internal IT department is structured.
Practical Action Steps for Owners and IT Departments
Here’s a focused roadmap to move from “computer repair” thinking to “managed IT” thinking.
Audit your current IT and risk exposure
List all critical systems: servers, workstations, line-of-business apps, cloud services.
Identify single points of failure (one server, one person, one outdated backup).
Review your last 12–24 months of issues: downtime, security problems, lost data, slow performance.
Quantify the business impact
Estimate the cost per hour of downtime: lost revenue, staff idle time, reputational damage.
Compare that cost against what you currently spend on one-off repairs or underpowered internal IT.
Use this data to justify a more robust, proactive IT model.
Implement proactive monitoring and maintenance
Deploy remote monitoring and management (RMM) tools across all endpoints.
Standardize patching schedules, antivirus/EDR, and firmware updates.
Establish regular health reports to leadership so you see trends before they become crises.
Upgrade your security posture
Enforce multi-factor authentication (MFA) on all critical systems and email.
Implement managed endpoint protection, email filtering, and DNS filtering.
Create and test an incident response plan so you know exactly what to do when—not if—an attack occurs.
Strengthen backup and disaster recovery
Move from “we think we have backups” to verified, automated, versioned backups.
Follow the 3-2-1 rule: 3 copies of data, on 2 different media, 1 offsite.
Test restore procedures quarterly and document recovery time objectives (RTOs).
Redefine your relationship with IT providers
Replace hourly, ticket-based “repair” work with a managed services agreement with clear SLAs.
Hold regular IT business reviews: security posture, risks, and upcoming technology needs.
Communicate the shift to your staff
Explain that IT is now about prevention, security, and productivity—not just repairs.
Train employees on security basics: phishing, password hygiene, remote work best practices.
Encourage staff to report issues early rather than wait until something is “completely broken.”
Common Client Questions (With Straight Answers)
Q1: “If hardware is cheaper, why not just replace instead of repair?” A: For many low-cost devices, replacement is more economical than component-level repair. The real value is in protecting data, uptime, and security, which is where managed IT, backup, and cybersecurity services matter far more than a one-time fix.
Q2: “Do we still need an internal IT person?” A: Often, a hybrid model works best. Your internal IT can focus on business processes, line-of-business apps, and staff support, while a managed services provider handles monitoring, security, infrastructure, and strategic planning. This reduces single-person risk and expands your capabilities.
Q3: “Can’t our cloud provider handle all of this?” A: Cloud providers secure their infrastructure, but you are still responsible for user access, configuration, data governance, and endpoint security. Most breaches happen at the user or configuration level, not in the cloud provider’s core systems.
Q4: “Isn’t proactive IT more expensive than calling for repairs?” A: On paper, a monthly fee can look higher than a few repair invoices. But when you factor in downtime, lost productivity, security incidents, and emergency project work, proactive IT usually lowers your total cost of ownership—and gives you predictability in your budget.
Q5: “How do we know if our current IT provider is still in ‘repair mode’?” A: Warning signs include: no regular reporting, no documented roadmap, no written security policies, mostly reactive ticket work, and limited visibility into your environment. A modern provider will talk business outcomes, not just fixes.
How Farmhouse Networking Helps You Move Beyond Repairs
Farmhouse Networking is built around the growing side of the “computer repair” industry: proactive, secure, business-focused managed IT.
Here’s how we can support your transition:
Environment and risk assessment We perform a detailed review of your current infrastructure, security, backups, and workflows, then deliver a clear, business-friendly risk report and prioritized remediation plan.
Managed IT and proactive monitoring We deploy RMM tools, automate patching, monitor endpoints and servers 24/7, and address issues before they impact your staff. You get consistent performance and fewer surprises.
Cybersecurity and compliance support We implement layered security (endpoint protection, MFA, email filtering, DNS filtering, and more) and help align your practices with industry expectations—especially important for healthcare, financial, and other regulated sectors.
Backup, disaster recovery, and business continuity We design and manage robust backup strategies, test restores regularly, and document realistic recovery times so leadership knows exactly what to expect in an incident.
Strategic IT guidance and roadmapping We partner with you on lifecycle planning, cloud adoption, budgeting, and technology alignment with your growth goals so IT stops being a headache and becomes a competitive advantage.
In short: instead of just fixing what’s broken, we help you build an IT foundation that is resilient, secure, and aligned with your business strategy.
Take the Next Step
If you’re concerned about whether you’re stuck in the declining “repair-only” world—or ready to move into proactive, modern IT management—Farmhouse Networking can guide that transition.
Email support@farmhousenetworking.com for more information about how Farmhouse Networking can help improve your business, reduce downtime, and turn IT into a strategic asset instead of a recurring problem.
Keep running into this issue at client sites where an on-premise Microsoft Exchange Server (especially from Microsoft SBS Server) to Office 365 migration has taken place. Client workstations are unable to connect to Office 365 servers via Autodiscover for their migrated email accounts. During Outlook first run it would pre-populate their email correctly but then try to connect to the old email server instead. If the DNS settings for the workstation were changed to non-domain external DNS servers then the email would not pre-populate but the setup would complete successfully. Checked the Autodiscover URL using NSLOOKUP to the Microsoft servers from local domain DNS servers successfully, so felt a little stumpled. Research pointed to the Service Connection Point (SCP) object in Active Directory which can be either deleted from the server or excluded on a per workstation basis, so both will be shown here. Starting with the server first:
Deleting SCP from Server after Office 365 Migration
Login to a server with Active Directory Domain Services installed as administrator
Launch ADSIedit from the Start Menu
Right click on the root of the console and choose “Connect to…”
Under “Select a well know Naming Context” choose Configuration
Navigate down through the tree as follows (these are always listed from the bottom up on other tech sites for some reason):
Add a 32-bit DWORD called ExcludeScpLookup with the value of 1 to enable
Reboot the workstation to effect the Registry changes and try to connect to Office 365 servers again
If your organization needs any help with troubleshooting issues with Office 365 or with migrating from on-premise Microsoft Exchange Server, then don’t hesitate to contact us for support.
Recently ran into an issue where a company wanted to use multiple types of VoIP phones that required seperate settings to download their configuration with a vendor – this is usually done in a homogeneous environment via DHCP option 66 settings. (Option 66 is part of IETF RFC 2132 which states that this option uses FQDN or IP address to point to a TFTP server.) In this particular setup only one VoIP phone vendor at a time could be specified in the option 66, so custom settings were going to be needed to make all the other vendors phones work properly. Found that this could be done via DHCP reservation on either their Windows Server 2012 R2 Standard or on their Cisco 871w router, but I am sure their are ways to do it on other vendors equipment (which is outside the scope of this article). So here is how to configure the
Windows Server DHCP Option 66 Reservation
Turn the phone on its back and record the MAC address of the device.
Start the DHCP administrative tool on the server.
Expand the tree into the IPv4 then into the Scope needing the reservation.
Right Click on Reservations and choose “New Reservation…”
Give the new reservation a name, specify IP address and MAC address previously recorded.
Right click on the new reservation and choose Configure Options.
In the Reservation options scroll down to 066 Boot Server Host Name and enter the URL or IP of the vendors configuration server.
Make sure the vendor has reset the authorization token and factory reset the phone to pull the new reservation and configuration files.
Cisco 800 Series DHCP Option 66 Reservation Setup
Something to remember is that each reservation is treated as its own DHCP pool by the router. (I recommend exporting the configuration file to a local workstation and manually editting if there are more than a couple edits to make.)
Login to router and enter configuration terminal mode:
Clear the current DHCP bindings to make sure the phone will grab the correct address:
Router#clear ip dhcp binding *
Make sure the vendor has reset the authorization token and factory reset the phone to pull the new reservation and configuration files.
That is all there is to it. Enjoy a multi-vendor VoIP environment. If you need help configuring your Windows Server or Cisco IOS based router please contact us for support.
And God will generously provide all you need. Then you will always have everything you need and plenty left over to share with others. As the Scriptures say,
“They share freely and give generously to the poor. Their good deeds will be remembered forever.”
For God is the one who provides seed for the farmer and then bread to eat. In the same way, he will provide and increase your resources and then produce a great harvest of generosity in you. - 2 Corinthians 9:8-10
We use cookies to ensure that we give you the best experience on our website. If you continue to use this site we will assume that you are happy with it.