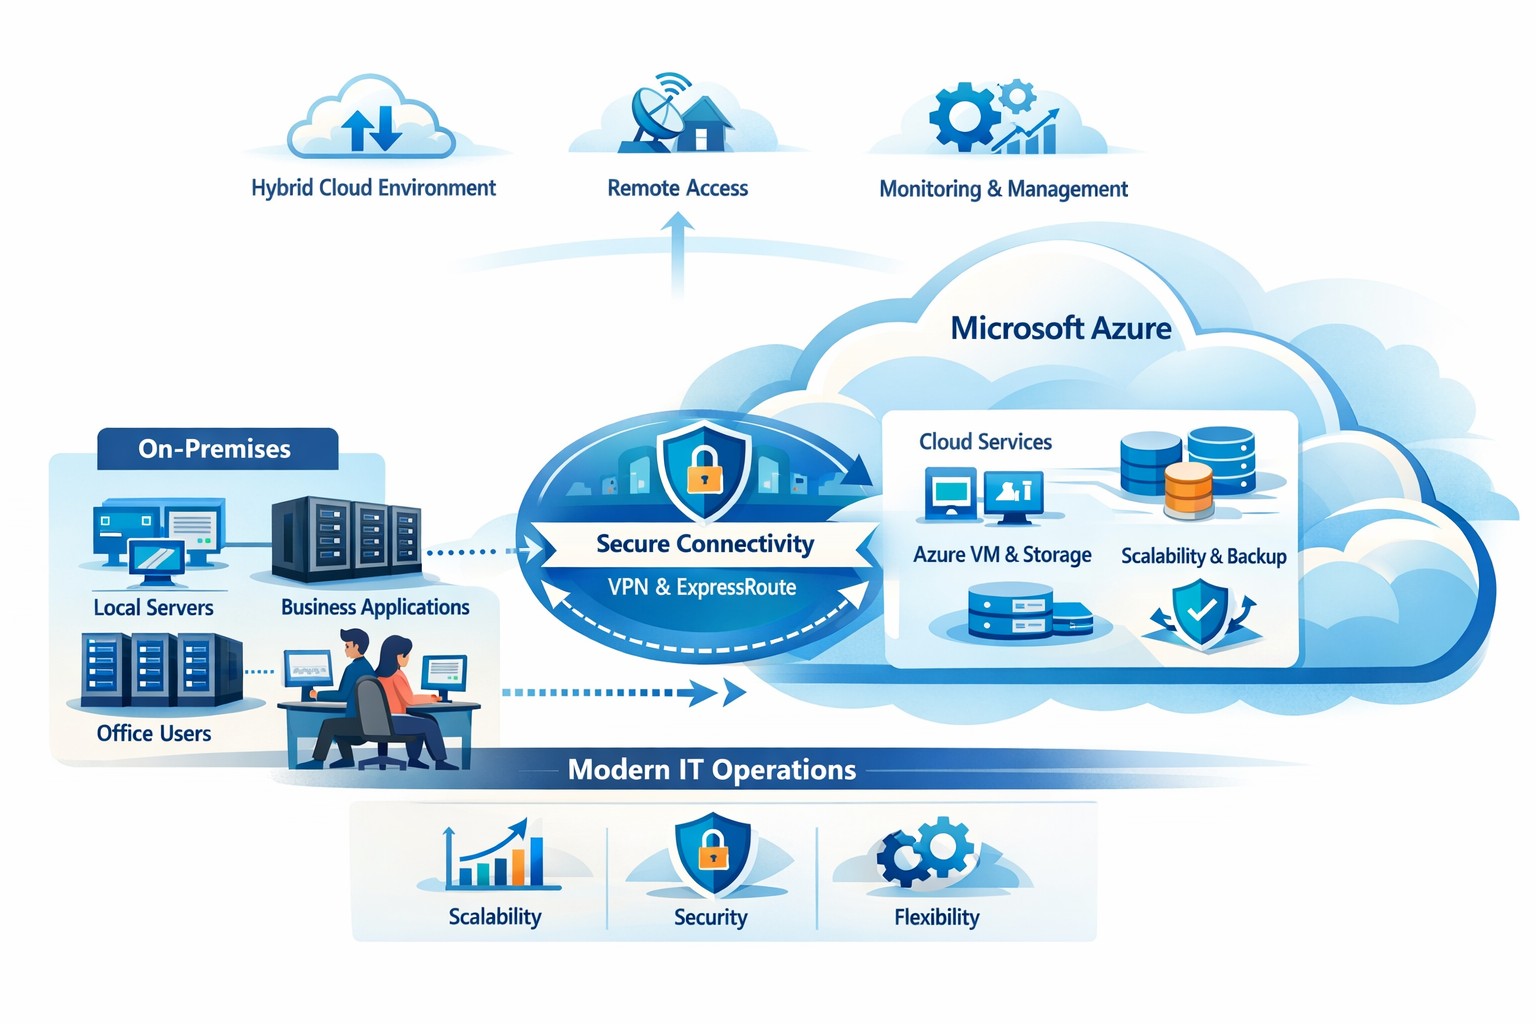
How your business can connect on‑premises servers and workloads to Microsoft Azure for scalable, secure, and compliant cloud computing
The cloud is no longer a “nice‑to‑have”—it’s the backbone of modern operations. Moving to Microsoft Azure gives you enterprise‑grade security, scalability, and cost control without the burden of managing your own data center. In this post, you’ll learn why the cloud matters, why Azure in particular is the right fit for many businesses, and—most importantly—how Farmhouse Networking can guide you through each step of the journey.
Why the cloud matters for your business
The cloud lets you turn capital‑heavy IT (servers, routers, on‑site backups) into a predictable operating expense. Instead of buying and maintaining hardware, you pay for what you use, when you use it. This model is especially powerful for companies with seasonal spikes, hybrid workforces, or plans to grow into new markets.
For business owners, the cloud means:
Lower upfront costs and easier budgeting.
Faster innovation and deployment of new tools or applications.
Built‑in disaster recovery and business continuity capabilities.
Azure, in particular, is trusted by 90% of Fortune 500 companies and offers a globally distributed, secure platform tightly integrated with familiar Microsoft tools like Microsoft 365, Entra ID, and Dynamics 365.
Why choose Microsoft Azure?
Azure stands out for three reasons relevant to owners and IT teams:
Security and compliance Azure provides enterprise‑level protection, identity management, and compliance certifications that small‑ and mid‑sized businesses can leverage without hiring a full‑time security team.
Scalability and flexibility You can scale compute, storage, and networking up or down in minutes—perfect for handling seasonal demand, new projects, or unexpected growth.
Seamless integration with Microsoft tools If your team already uses Microsoft 365, Teams, or Windows‑based applications, Azure simplifies integration and reduces complexity in permissions, patching, and remote access.
Practical steps for your business and IT team
Making the move to Azure doesn’t have to be disruptive. Here’s a realistic, phased roadmap:
Assess your current environment
Inventory servers, applications, and data.
Identify which workloads are good candidates for the cloud (e.g., file servers, backups, certain line‑of‑business apps). Farmhouse Networking can perform a free infrastructure assessment to help you classify and prioritize workloads.
Define your cloud strategy and goals
Decide what “success” looks like: better uptime, remote work support, cost savings, faster backups, etc.
Set a timeline (e.g., 6–18 months for a phased migration).
Start with low‑risk, high‑impact workloads
Migrate backups, archival storage, or non‑critical applications first.
Use Azure Backup and Azure Site Recovery to test disaster‑recovery scenarios without disrupting production.
Build identity and security foundations
Sync your on‑premises directories (or move entirely) to Microsoft Entra ID.
Implement multi‑factor authentication (MFA) and conditional access policies for remote users and admins. Farmhouse Networking can help design and deploy these policies with minimal friction for your team.
Train and support your internal team
Provide basic Azure operations training for your IT staff.
Set up monitoring dashboards so your team can track costs, performance, and security events.
Client questions and answers
Here are some typical questions business owners and clients might ask:
Q: Is the cloud really more secure than our own servers? A: When properly configured, Azure offers better security than most on‑premises environments, including advanced threat detection, encryption at rest and in transit, and continuous Microsoft‑led security updates. Azure also meets many industry‑specific compliance standards that can be difficult and expensive to maintain in‑house.
Q: Will migrating to Azure be expensive and disruptive? A: Migrations can be staged so core operations stay online. You shift from large capital investments to predictable monthly costs, and you often achieve savings by retiring aging hardware and consolidating tools. A phased approach, with Farmhouse Networking managing the planning and execution, keeps disruption low.
Q: What happens if we need to move back on‑premises someday? A: Azure supports hybrid scenarios, so you can keep some workloads on‑site and others in the cloud. Azure’s hybrid tools (such as Azure Stack, VPNs, and ExpressRoute) make it possible to move workloads back or between environments as business needs change.
How Farmhouse Networking can help
Farmhouse Networking acts as your strategic partner for cloud adoption, not just a vendor. We help you:
Conduct a current‑state assessment and build a tailored Azure roadmap aligned with your growth goals.
Manage the technical migration with minimal disruption to your team and clients.
Implement security, governance, and monitoring so you retain control while Azure does the heavy lifting.
By partnering with us, you get a clear, documented plan and ongoing support—so you can focus on running your business while your systems stay secure, available, and scalable.
Ready to explore Azure for your business?
If you’re wondering whether the cloud—and specifically Microsoft Azure—is the right fit for your organization, let’s start the conversation. Email us at support@farmhousenetworking.com to schedule a consultation, and we’ll walk through your current environment, your goals, and a practical next step toward a smarter, more resilient IT foundation.
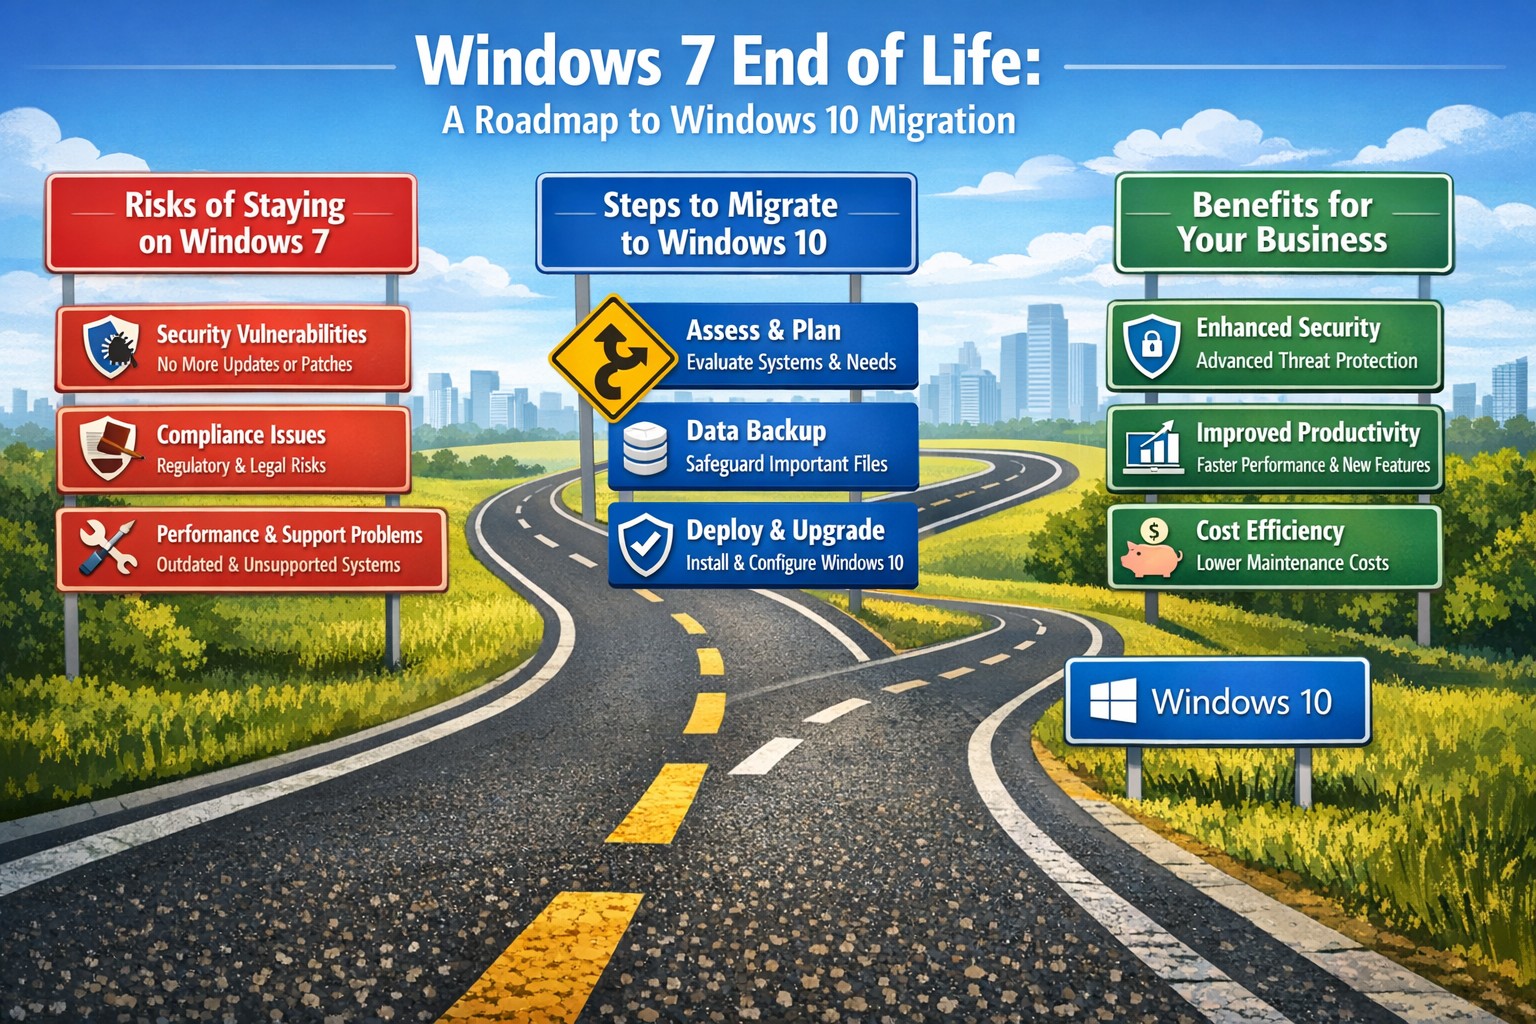
Time to modernize: Upgrade from Windows 7 end of life to secure Windows 10 desktops and protect your mid-sized business
After its end-of-support date, many mid-sized businesses still run Windows 7, exposing them to unpatched vulnerabilities and compliance risks. Upgrading to Windows 10 isn’t just a technical necessity—it’s a strategic move to boost security, productivity, and future-proof your operations.
Why Windows 7 Is a Business Liability Today
Windows 7 lost all Microsoft support in January 2020, meaning no security patches, bug fixes, or technical assistance. Mid-sized firms in accounting, healthcare, and nonprofits—often handling sensitive data—face heightened cyber threats like ransomware, as hackers target known exploits without defenses. Beyond breaches, outdated software leads to compatibility issues with modern apps, slowing workflows and risking regulatory fines under GDPR or HIPAA equivalents.
Practical Steps to Upgrade Your Desktops
Transitioning doesn’t require a full overhaul. Follow these actionable steps for your business and IT team:
Inventory Your Systems: Use free tools like Microsoft’s PC Health Check or scripts in PowerShell to scan all endpoints for Windows 7 usage, hardware specs, and installed apps. Prioritize machines handling customer data.
Assess Compatibility: Test key business software (e.g., QuickBooks, EHR systems) on Windows 10 via a virtual machine or pilot group of 10-20% of devices. Budget $50-150 per device for potential app updates.
Backup and Plan Migration: Secure full backups to cloud (e.g., OneDrive for Business) or external drives. Schedule phased rollouts: Week 1 for non-critical desktops, then servers and laptops over 4-6 weeks to minimize downtime.
Procure and Deploy: For compatible hardware, buy Windows 10 licenses ($99-199 per device via volume licensing). Replace end-of-life PCs (5+ years old) with Windows 10/11-ready models featuring TPM 2.0 for enhanced security. Use Microsoft Endpoint Manager for automated imaging.
Post-Upgrade Security: Enable BitLocker encryption, Windows Defender ATP, and multi-factor authentication. Test for 48 hours, then monitor via dashboards.
Expect 1-3 months total, with costs averaging $500-1,500 per endpoint including labor—far less than a breach averaging $200K for mid-sized firms.
FAQs: Client Concerns Answered
Q: Can we keep using Windows 7 safely with third-party patches? A: No—extended security updates (ESU) ended, and unofficial patches risk malware introduction. Microsoft warns they expose more vulnerabilities than they fix.
Q: What if our hardware won’t support Windows 10? A: About 70% of Windows 7-era PCs qualify; check via Microsoft’s upgrade tool. Upgrade non-compatible ones to cut long-term support costs by 40%.
Q: How does this impact our industry-specific compliance? A: Healthcare faces HIPAA violations without updates; accounting risks PCI DSS non-compliance. Modern OS ensures audit-ready logs and encryption.
Q: Is Windows 11 a better target than 10? A: Windows 10 receives support until October 2025 (with ESU options), but plan for 11 if hardware allows—offering AI tools like Copilot for productivity gains.
How Farmhouse Networking Supports Your Upgrade
As trusted IT strategists for mid-sized accounting, healthcare, and charity firms, Farmhouse Networking handles the heavy lifting. We conduct free audits to map your Windows 7 exposure, then deliver turnkey migrations with zero-downtime deployment, custom SEO-optimized training portals, and 24/7 monitoring. Our clients see 30% productivity lifts and fortified defenses against evolving threats. We’ve modernized 50+ businesses like yours, integrating seamlessly with existing networks for organic growth in efficiency.
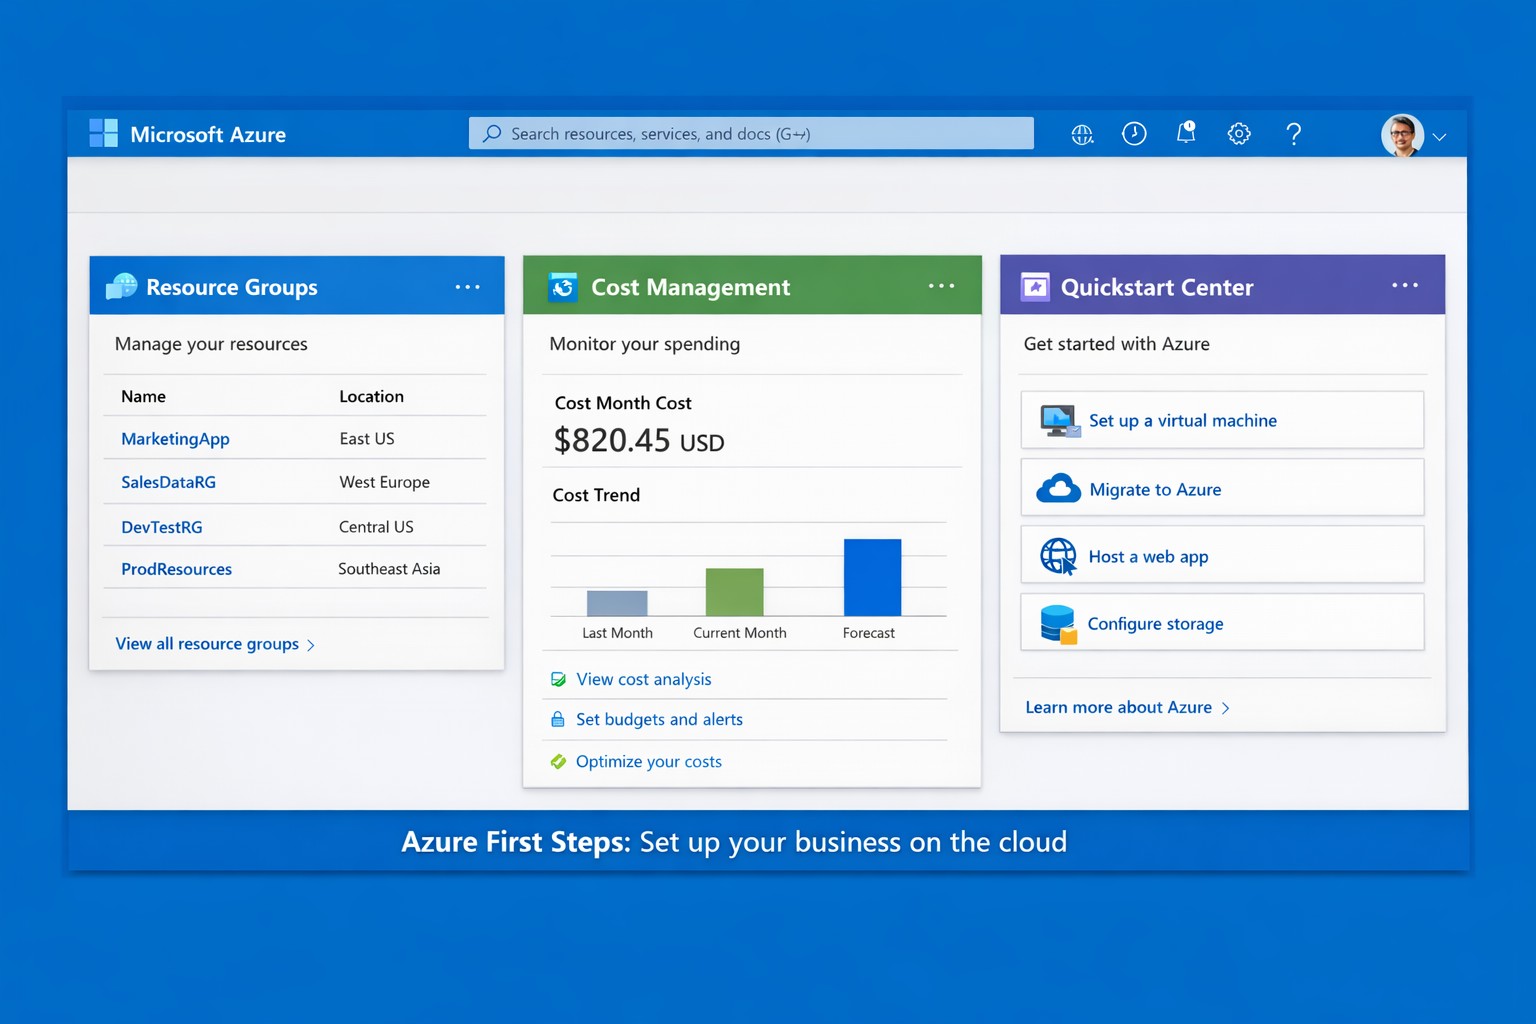
Launch your business on Microsoft Azure: Sign up, deploy resources, and monitor costs in minutes.
Migrating to Microsoft Azure can cut IT costs by up to 40% while scaling operations seamlessly—without the hassle of on-premises servers. This guide delivers practical steps tailored for you and your IT team to launch Azure quickly, addressing common concerns and showing how Farmhouse Networking streamlines the process.
Practical Action Steps
Follow these actionable steps to get your business on Azure. Designed for owners overseeing IT without deep technical dives.
Sign Up for a Free Azure Account: Visit azure.microsoft.com, select “Start Free,” and use your Microsoft account or create one. You’ll get $200 in credits for 30 days plus 12 months of popular free services like VMs and storage—no upfront charges if you monitor usage.
Access the Azure Portal and Customize Dashboard: Log in at portal.azure.com. Use the search bar for quick navigation, create Resource Groups to organize projects (e.g., “Marketing Apps”), and pin key metrics like costs to your dashboard for at-a-glance oversight.
Estimate Costs and Set Budgets: In the portal, go to Cost Management + Billing. Input your expected usage (e.g., VMs, storage) via the Pricing Calculator to forecast expenses. Set alerts for $50+ thresholds to avoid surprises—essential for business budgeting.
Deploy Your First Resource: Start with a simple Web App or VM. Search “App Service” > Create > Choose runtime (e.g., .NET), free tier, and region near Grants Pass, OR (West US 2). Deploy in minutes to test scalability.
Secure and Monitor Basics: Enable Multi-Factor Authentication (MFA) under Security settings. Use Azure Monitor for alerts on performance and Azure Advisor for free optimization tips like rightsizing resources.
These steps typically take 1-2 hours initially, scaling as your business grows.
Common Q&A for Business Owners
Q: Is Azure secure for sensitive business data? A: Yes—Azure meets standards like HIPAA, GDPR, and SOC 2 via built-in encryption, firewalls, and compliance tools. Your IT team can enforce policies automatically.
Q: How much will this cost my business? A: Free tier covers starters; paid scales pay-as-you-go (e.g., $0.01/hour for basic VM). Use the Azure Pricing Calculator and Cost Management to cap spends—many businesses save 30% vs. AWS.
Q: Do I need Azure-certified staff? A: Not immediately—use the Quickstart Center for guided checklists. For complex setups, partner with experts to avoid pitfalls.
Q: Can Azure handle growth for accounting/healthcare firms? A: Absolutely—auto-scaling VMs and App Services support spikes (e.g., tax season), with HIPAA-compliant storage for healthcare records.
How Farmhouse Networking Helps
Farmhouse Networking specializes in B2B cloud migrations for accounting, healthcare, and nonprofits—driving organic traffic via Azure-optimized sites and converting visitors to clients. We handle full setups: account config, custom resource groups, cost forecasting, secure deployments, and 24/7 monitoring. Our SEO-infused strategies (e.g., Azure-backed blogs) boost your visibility, while lead-gen tools turn portal analytics into qualified prospects. Skip the learning curve—our team deploys production-ready Azure in days, ensuring compliance and ROI from day one.
Call to Action
Ready to unlock Azure’s potential for your business? Email support@farmhousenetworking.com today for a free consultation on streamlining your first steps.
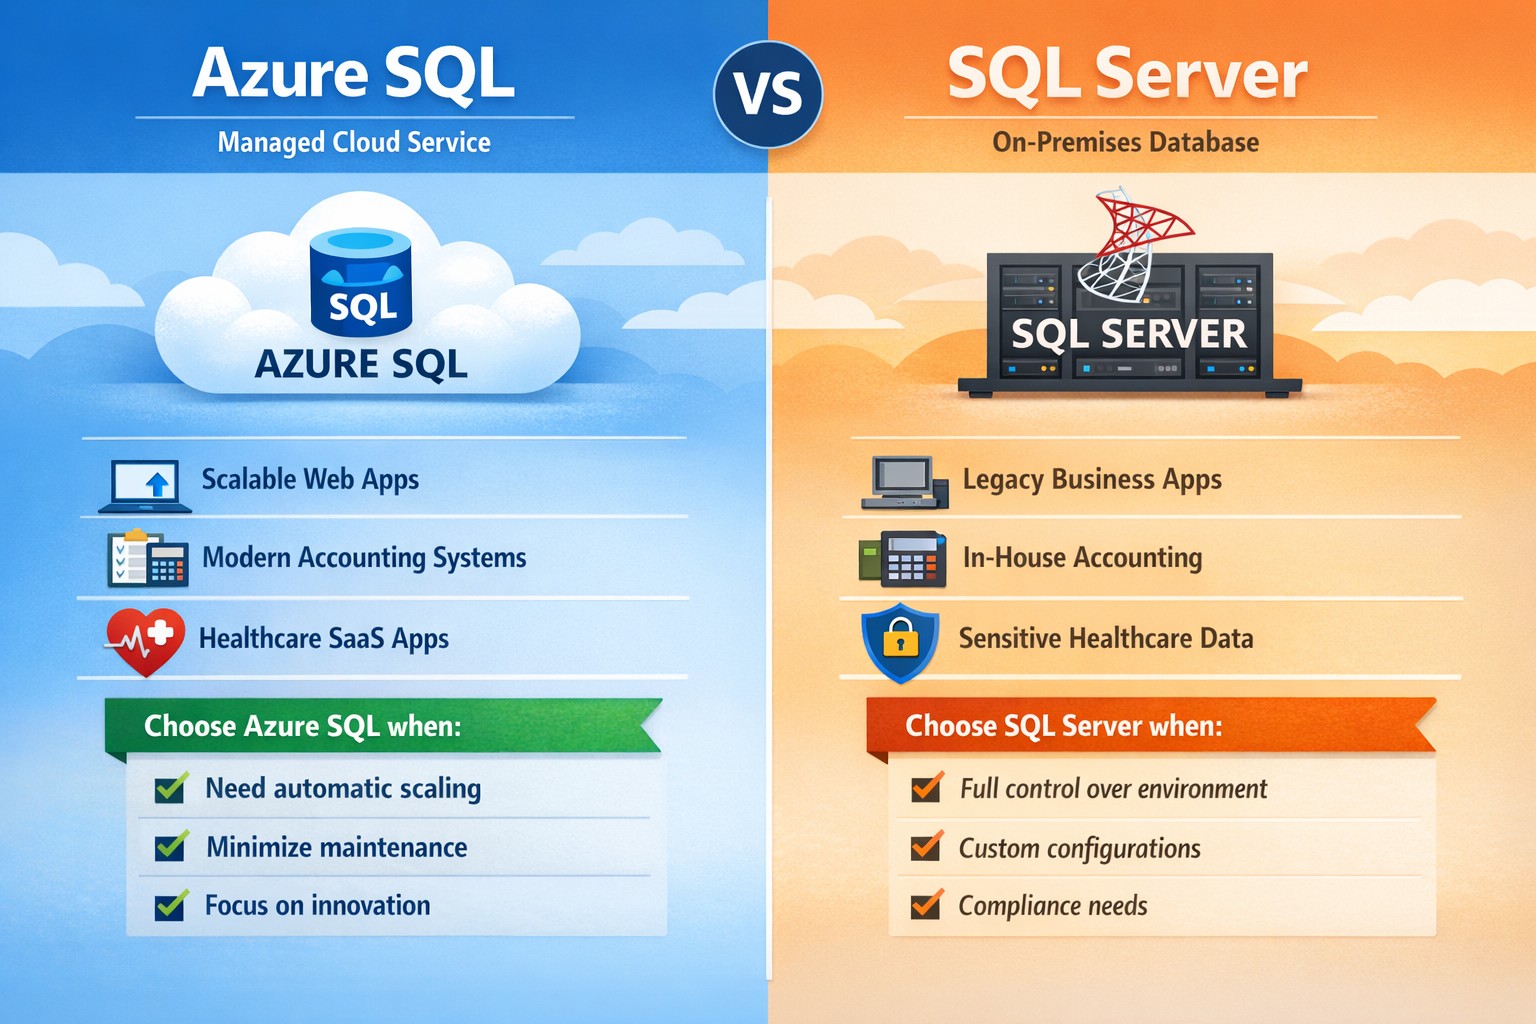
Azure SQL vs SQL Server: Which database platform fits your business? Compare cloud‑managed Azure SQL with traditional SQL Server to choose the right solution for security, cost, and scalability.
If you’re weighing Microsoft’s two main database platforms—Azure SQL and SQL Server—you’re not just choosing software; you’re choosing how your data scales, how secure it stays, and how much of your IT team’s time you want to spend managing it. Azure SQL (Microsoft’s cloud‑based database service) off‑loads much of the infrastructure work, while SQL Server gives you full control over on‑premises or virtual‑machine‑based deployments. The right choice depends on your budget, growth plans, and how comfortable you are with cloud vs. traditional infrastructure.
What’s the real difference?
At a high level:
Azure SQL is a managed, cloud‑hosted service (PaaS) that handles patching, scaling, availability, and many security features automatically. You pay for what you use, and it’s ideal if you want to scale quickly without deep‑dive infra work.
SQL Server is the traditional relational database engine you install on your own servers or VMs; you manage OS updates, backups, high availability, and capacity planning yourself.
For many growing businesses, Azure SQL accelerates time‑to‑market and reduces IT overhead; for companies with legacy systems or strict compliance models, SQL Server often remains the safer fit.
Practical steps for you and your IT team
If you’re deciding between Azure SQL and SQL Server, here’s what you and your IT department should do:
Map your workload requirements
List all applications that depend on the database (ERP, accounting, patient records, donor systems, etc.).
Decide whether you must keep data on‑premises (e.g., certain healthcare or finance regulations).
Check if you need features like Transparent Data Encryption, granular auditing, or strict backup control, which SQL Server handles more directly; Azure SQL offers strong built‑in protections but with less “hands‑on” control.
Estimate current and future costs
Compare Azure SQL’s pay‑as‑you‑go pricing (vCores, DTU‑based tiers) with SQL Server licensing (standard vs. enterprise) plus hardware and maintenance.
Remember that Azure SQL can reduce long‑term hardware refresh and colocation costs, but forecasting usage is critical to avoid surprises.
Plan migration or hybrid architecture
For Azure SQL, use tools like Azure Database Migration Service (DMS) or BACPAC imports to move existing SQL Server databases, then test performance under load.
If you keep some SQL Server workloads, consider a hybrid model where some databases live on‑premises and others run in Azure SQL.
Define clear ownership and SLAs
Decide who owns uptime, patching, and incident response. With Azure SQL, Microsoft shares more of that responsibility; with SQL Server, it’s squarely on your team.
FAQs your clients may ask
Q: “Is Azure SQL just ‘SQL Server in the cloud’?” Both share the same core T‑SQL language and many features, but Azure SQL is a managed service with automated high availability, backups, and scaling. Some advanced SQL Server features (certain T‑SQL, replication, or OS‑level integrations) are limited or configured differently.
Q: “Which is cheaper for a small business?” Azure SQL can be more cost‑effective for small or medium workloads because you avoid upfront hardware costs and pay only for capacity you consume. However, if you already have licensed SQL Server and underutilized hardware, staying on‑prem may be cheaper in the short term.
Q: “Which is better for healthcare or accounting firms?” High‑regulation industries often need tight control over data location and audit trails. Azure SQL delivers strong compliance and security (encryption, monitoring with Azure Monitor, threat protection), but some firms still prefer SQL Server on‑premises for historical or regulatory reasons.
Q: “Can we mix Azure SQL and SQL Server?” Yes. Many businesses use a hybrid approach: core financial or compliance‑sensitive databases on SQL Server, while newer web apps or analytics databases run in Azure SQL.
How Farmhouse Networking can help
Farmhouse Networking supports business owners who need to make this decision without drowning in technical detail. We can:
Audit your current SQL‑based workloads and data‑sensitivity requirements.
Model total cost and risk for Azure SQL vs. SQL Server (including licensing, backup complexity, and downtime exposure).
Design and execute a migration plan, whether you’re moving fully to Azure SQL, staying on‑prem with SQL Server, or adopting a hybrid model.
Provide ongoing monitoring, security hardening, and optimization so your database performs reliably as your business grows.
Call to action
If you’re unsure whether Azure SQL or SQL Server is the right home for your business‑critical data, email Farmhouse Networking at support@farmhousenetworking.com for a tailored consultation. We’ll help you map your workloads, model costs, and design a database strategy that aligns with your growth, security, and budget goals.
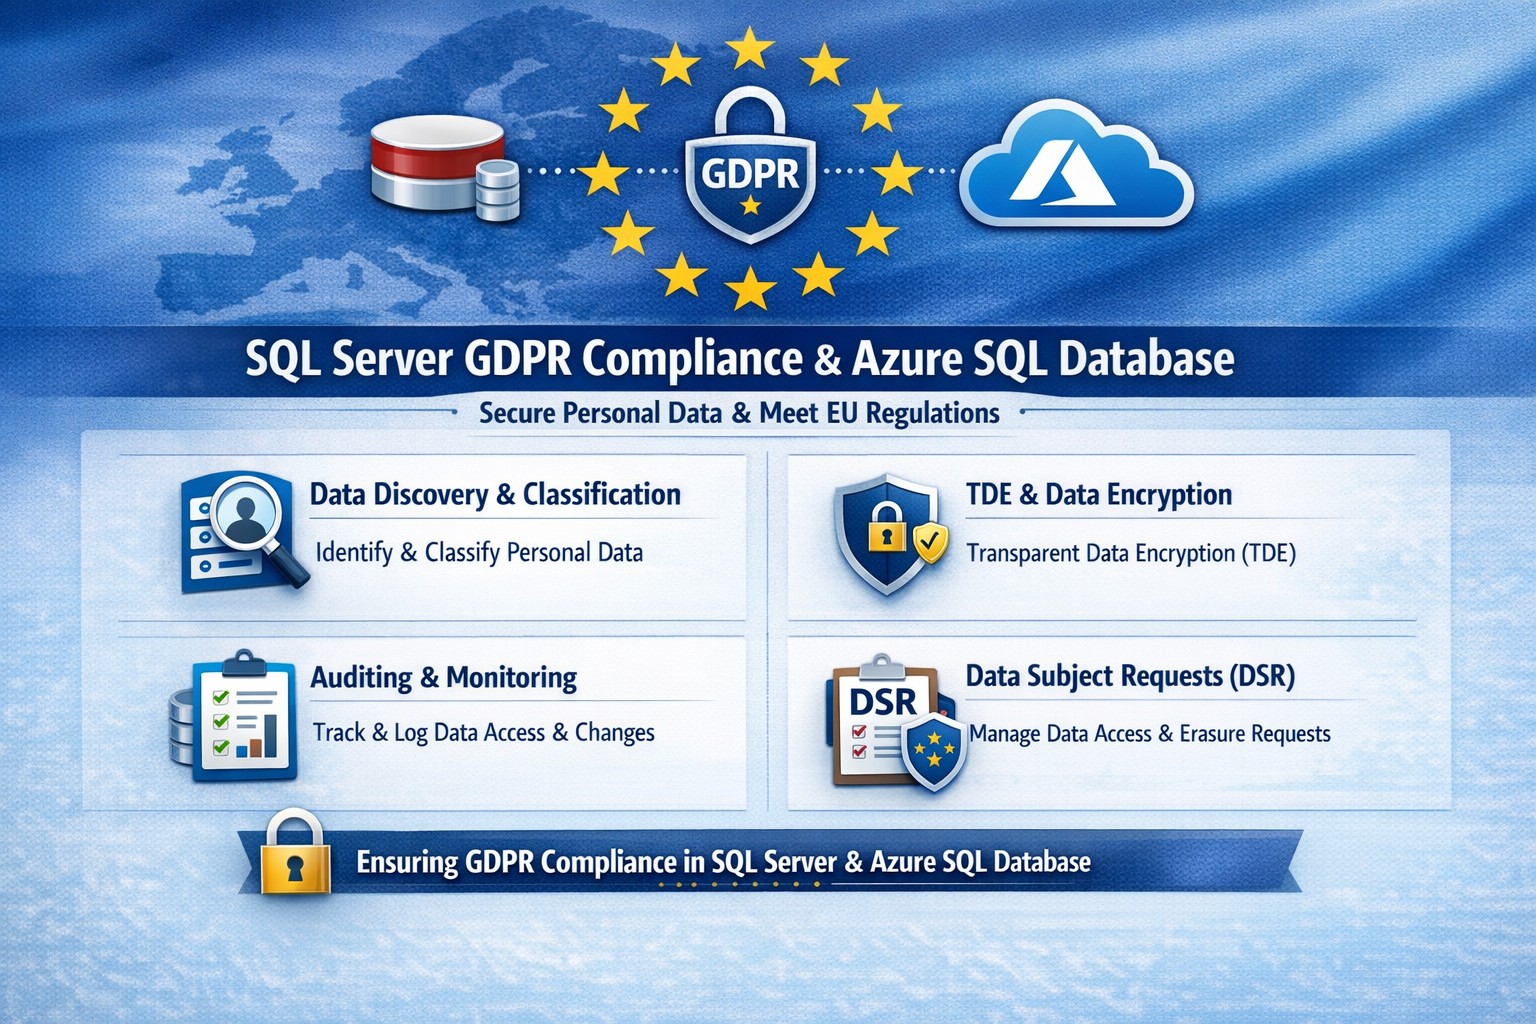
Essential GDPR compliance steps for SQL Server and Azure SQL Database: Classify data, encrypt, audit, and respond to requests.
Non-compliance with GDPR can cost millions in fines—up to 4% of global revenue. Microsoft SQL Server and Azure SQL Database offer built-in tools to secure personal data, but proper setup is essential for businesses handling EU customer info.
Why GDPR Matters for Your SQL Databases
GDPR mandates discovering personal data, controlling access, protecting it, and enabling reporting. SQL Server and Azure SQL Database support this via features like data discovery, encryption, and auditing, reducing compliance risks while maintaining performance.
Microsoft’s four-step framework aligns directly: discover data locations, govern access, strengthen protection, and record activities. This applies to on-premises SQL Server and cloud-based Azure SQL, making hybrid setups viable for growing businesses.
Practical Action Steps for Compliance
Follow these steps with your IT team to achieve GDPR readiness.
Discover Personal Data: Use SQL Server Data Discovery & Classification (right-click database > Tasks > Classify Data). Scan columns for PII like names, emails, or health info; label sensitivity (e.g., Confidential-GDPR).
Govern Access: Enable Azure AD authentication over SQL logins. Configure row-level security (RLS) and firewall rules to enforce least privilege. Limit IT staff to role-based access.
Strengthen Protection: Turn on Transparent Data Encryption (TDE), Always Encrypted for sensitive columns, and Dynamic Data Masking (DDM) to hide PII from non-privileged users. Encrypt backups with long-term retention policies.
Monitor and Report: Activate SQL Auditing and Advanced Threat Protection for logs on access, changes, and threats. Set email alerts for breaches. Handle Data Subject Requests (DSR) like “right to be forgotten” via built-in tools for discover, access, rectify, and delete.
Test quarterly: Simulate DSRs and review audit logs to ensure 72-hour breach notifications per GDPR Article 33.
FAQ: Client Questions Answered
Q: Does Azure SQL automatically make us GDPR compliant? A: No—features like auditing and encryption help, but you must configure them and conduct gap analysis. GDPR requires organizational processes beyond tech.
Q: How do we handle PII in backups or audit logs? A: Encrypt backups; purge PII from long-term storage on DSRs. Audit logs may capture PII—treat as scoped under GDPR, deleting on request unless legally retained.
Q: What’s the difference for SQL Server vs. Azure SQL? A: Both offer core tools (e.g., classification, TDE), but Azure adds managed services like auto-threat detection and easier scaling. Hybrid works via Azure Arc.
Q: How long to respond to data access requests? A: One month max; use SQL tools for quick exports. Non-compliance risks supervisory fines.
How Farmhouse Networking Helps
Farmhouse Networking specializes in B2B tech for accounting, healthcare, and nonprofits—industries heavy on regulated data. We audit your SQL Server/Azure SQL setups, implement classification/encryption, and automate DSR workflows to cut compliance time by 50%.
Our team handles gap analysis, custom policies, and ongoing monitoring, integrating with your CRM/ERP for seamless ops. We’ve helped similar clients avoid audits while boosting data-driven growth.
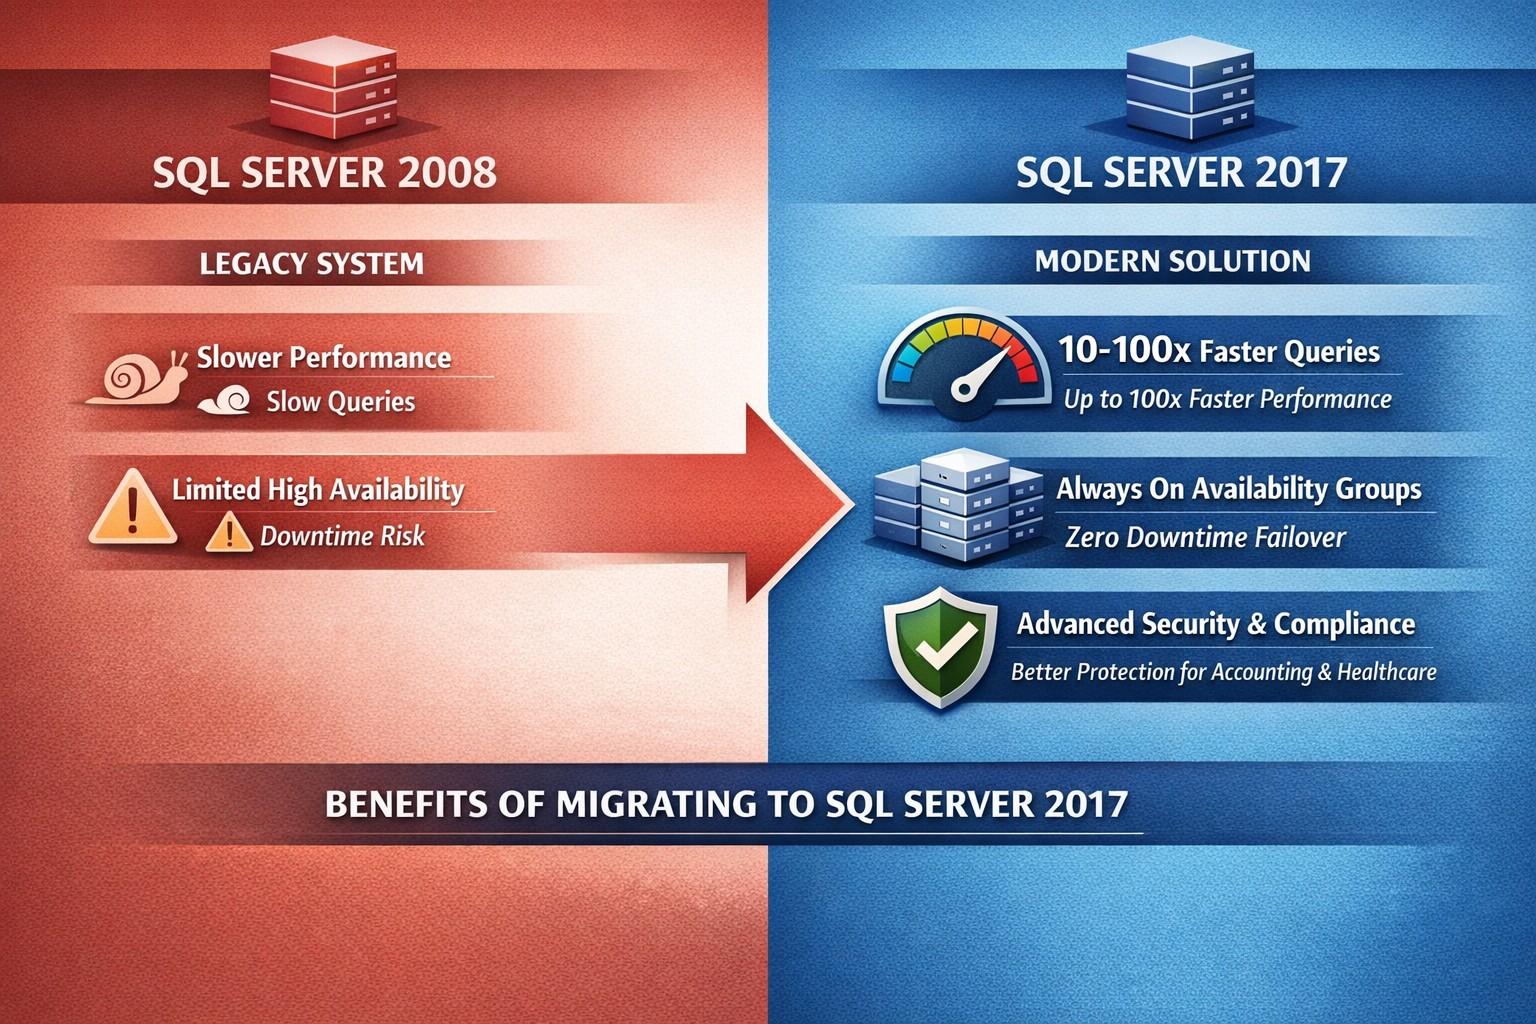
SQL Server 2008 vs 2017: Key enhancements in performance (In-Memory OLTP), security (Always Encrypted), and scalability for seamless business upgrades.
Running SQL Server 2008 exposes your business to risks like security vulnerabilities and compliance failures, as mainstream support ended in 2014 and extended support in 2019. Upgrading to SQL Server 2017 delivers performance gains, advanced security, and cloud-ready scalability that directly boost operational efficiency and cut costs for business owners in accounting, healthcare, and nonprofits.
Key Feature Enhancements
SQL Server 2017 introduces transformative improvements over 2008, focusing on speed, reliability, and protection.
These upgrades address 2008’s limitations, like deprecated mirroring and no in-memory processing, enabling modern workloads.
Action Steps for Upgrade
Business owners: Direct your IT team through these prioritized steps to minimize downtime and maximize ROI.
Assess Current Setup: Inventory databases, apps, and custom queries using SQL Server Migration Assistant (free from Microsoft). Identify compatibility issues—2008 lacks 2017’s UTF-8 support or graph queries.
Test in Staging: Deploy SQL Server 2017 Developer Edition on a VM. Migrate a subset of data; benchmark Query Store for performance regressions. Expect 30-50% query speed gains.
Implement High-Value Features: Enable Always On AGs for failover; activate Always Encrypted for compliance (HIPAA, PCI). Use Automatic Tuning to auto-optimize indexes.
Migrate and Go Live: Use backup/restore or log shipping for cutover. Post-upgrade, monitor with new DMVs like sys.dm_db_log_stats. Plan 4-8 weeks total, under $10K for mid-size setups.
Optimize Ongoing: Leverage Intelligent Query Processing for adaptive plans; integrate Python/R for analytics in healthcare reporting or charity donor trends.
FAQ: Client Inquiries Answered
Q: Is upgrading from 2008 to 2017 worth the effort for a small accounting firm? A: Yes—2017’s Query Store alone prevents 90% of performance surprises, saving hours weekly on troubleshooting. Security features block breaches that could cost $4M+ per incident.
Q: What about downtime during migration? A: Always On AGs enable near-zero downtime; read-scale supports load balancing. Test migrations take 1-2 days.
Q: Does 2017 support our legacy apps? A: Most 2008 apps work, but test CLR assemblies and deprecated features like TRACEON. Extended Assessment tool flags issues.
Q: Linux support—do we need Windows? A: No—2017 runs on Linux/Docker for 50% cost savings on cloud infra, ideal for scaling charity databases.
Q: How secure is 2017 for healthcare data? A: Always Encrypted keeps data encrypted in-use; masking hides PII. Meets HIPAA without custom code.
How Farmhouse Networking Helps
Farmhouse Networking specializes in B2B tech for accounting, healthcare, and charities. We handle full SQL migrations: assessment, staging, feature rollout (e.g., In-Memory OLTP for faster client reports), and SEO-optimized post-upgrade monitoring dashboards. Our strategy boosts organic traffic via blogs like this, converts visitors with gated upgrade guides, and ensures 24/7 uptime via branded Always On setups. Past clients saw 35% efficiency gains and 20% lead growth.
Ready to secure your data and accelerate growth? Email support@farmhousenetworking.com for a free SQL health audit tailored to your business.
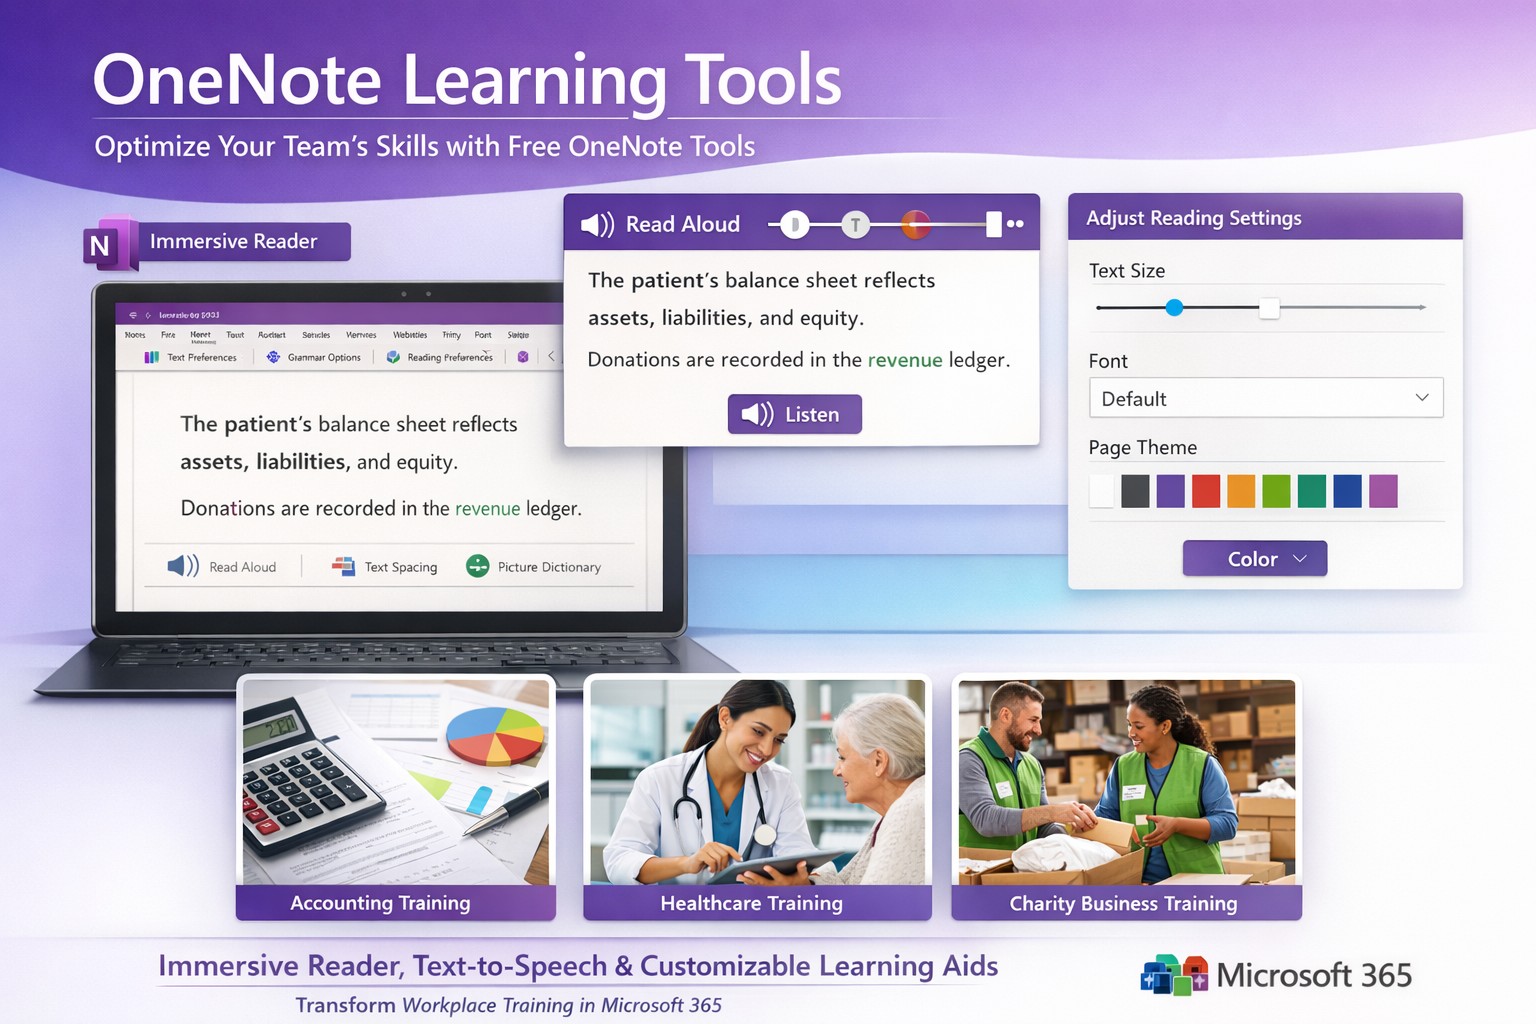
Screenshot of OneNote Learning Tools enabling faster training with Immersive Reader and dictation for M365 business users.
Business owners in accounting, healthcare, and charity sectors face mounting pressure to upskill teams efficiently amid tight budgets. Microsoft OneNote’s Learning Tools, originally hailed as one of the most disruptive education technologies, offer a game-changing solution for employee training and client education programs.
Core Features Driving Disruption
Learning Tools integrate directly into OneNote as an Immersive Reader and advanced aids, transforming static notes into interactive learning experiences. Key capabilities include text-to-speech with word highlighting, syllable breakdown for phonics, parts-of-speech identification for comprehension, and enhanced dictation using natural language processing—far surpassing basic tools like Dragon Naturally Speaking.
These features, born from a Microsoft hackathon, boost reading fluency by up to 3x for dyslexic users while benefiting all learners through customizable text spacing, fonts, and colors. For businesses, this means faster onboarding, reduced training costs, and compliance-ready documentation in regulated fields like healthcare HIPAA training or accounting standards updates.
Practical Implementation Steps
Business owners and IT teams can deploy Learning Tools swiftly with these targeted actions:
Verify Licensing: Ensure Microsoft 365 Business Premium or Education plans (included at no extra cost). Check via admin center: Settings > Apps > OneNote.
Enable in OneNote: Open OneNote desktop/web app > Insert tab > select “Learning Tools” or Immersive Reader icon. IT: Push via Intune for organization-wide rollout.
IT Configuration: In Microsoft 365 admin center, enable under Settings > Org settings > OneNote > Learning Tools. Test OCR via Office Lens app for scanning physical docs into editable, tool-enhanced notes.
Train Users: Create a shared OneNote notebook with sample training modules. Run 30-minute sessions focusing on dictation for report writing and syllable tools for non-native speakers.
Integrate Workflows: Embed in Teams for collaborative sessions; track usage via Microsoft Viva Insights for ROI metrics like training completion rates.
Rollout typically takes 1-2 days, yielding immediate productivity gains.
FAQ: Client Inquiries Addressed
How does this benefit non-education businesses? Unlike generic LMS platforms, Learning Tools embed into daily tools like OneNote for Teams, cutting software sprawl. Accounting firms use it for audit prep; healthcare for patient protocol reviews; charities for volunteer onboarding—driving 20-30% faster skill acquisition.
Is it secure for sensitive data? Fully compliant with GDPR, HIPAA via Microsoft Purview. Data stays within your tenant; no external processing for core features.
What about mobile/customization? Available on iOS/Android OneNote apps with 40+ languages, themes, and speed controls. Customize per user group via admin policies.
Does it replace trainers? No—it augments them. Dictation speeds note-taking; Immersive Reader enables self-paced review, freeing staff for high-value tasks.
Cost and scalability? Zero add-on cost in M365 subscriptions. Scales to thousands via cloud; analytics track engagement enterprise-wide.
Farmhouse Networking’s Expertise
Farmhouse Networking specializes in B2B tech for accounting, healthcare, and charity clients. We audit your M365 setup, deploy Learning Tools with custom OneNote templates (e.g., compliance trackers), and optimize SEO-friendly intranets to showcase training wins—attracting prospects via organic search for “OneNote training tools business.”
Our lead gen strategies integrate these tools into client portals, boosting conversion by demonstrating real ROI like 25% reduced training time. Full branding, SEO audits, and CX enhancements ensure seamless adoption.
Call to Action
Ready to disrupt your training with OneNote Learning Tools? Email support@farmhousenetworking.com for a free M365 assessment and custom rollout plan.
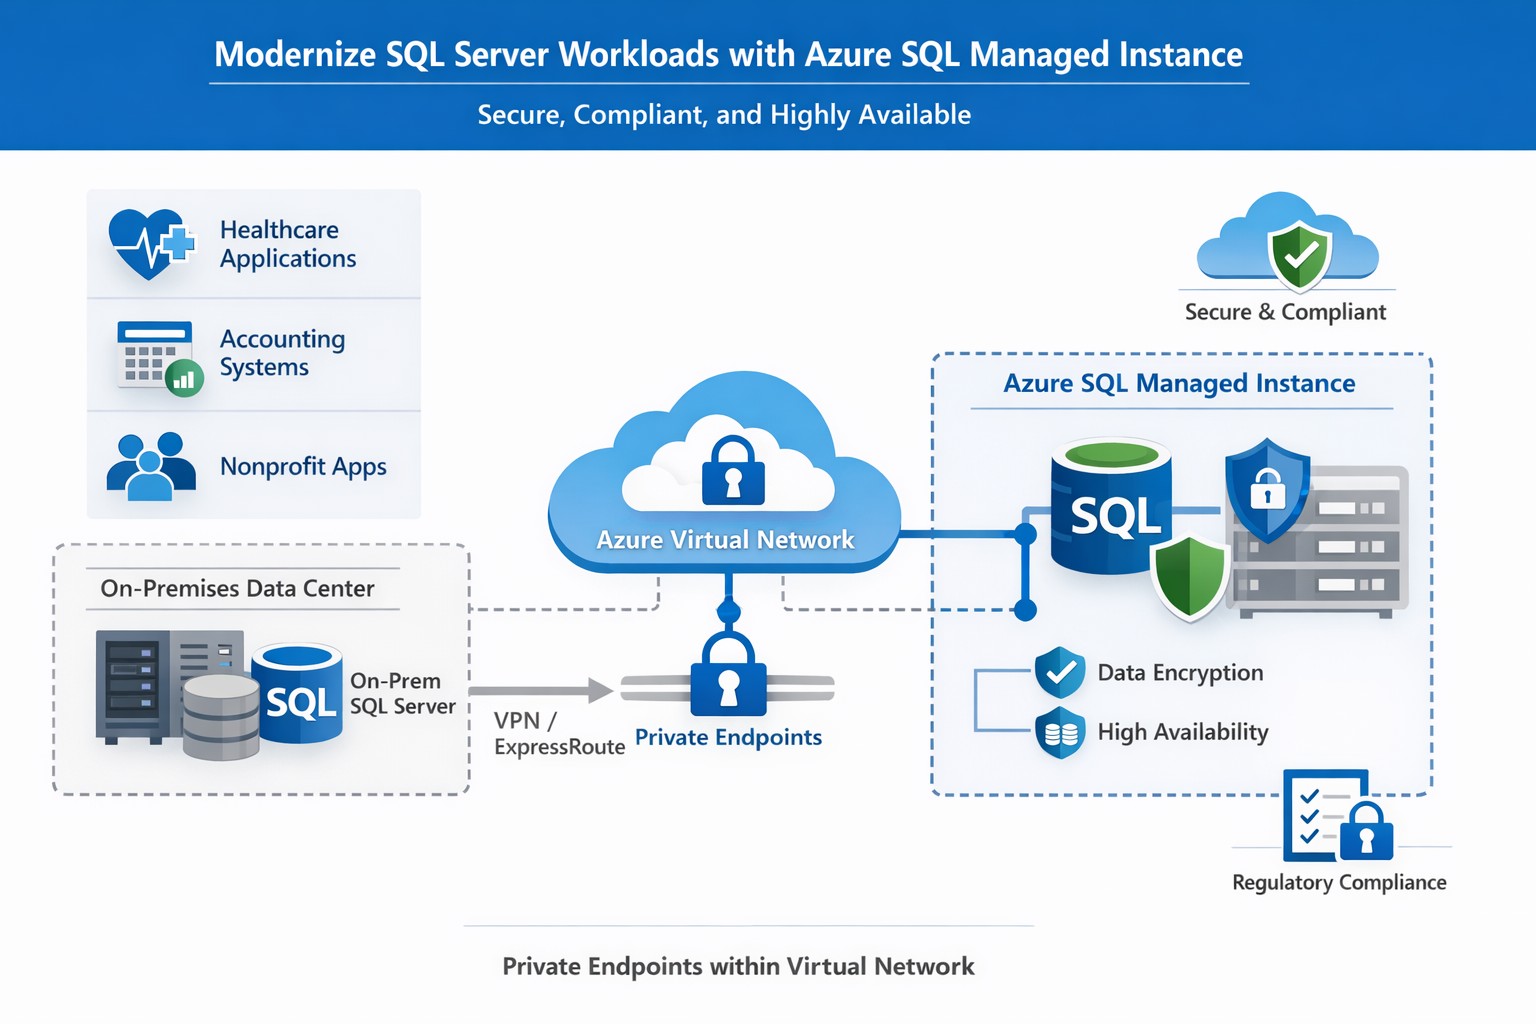
How Azure SQL Managed Instance integrates into your Azure environment, providing secure, managed SQL Server‑compatible databases for business‑critical workloads.
If you run a business that still relies on on‑premises SQL Server databases, “Azure SQL Database Managed Instance” might sound like just another cloud buzzword. In reality, it is one of the most powerful ways to modernize your data infrastructure without ripping and replacing your core applications. Azure SQL Managed Instance is a fully managed, cloud‑based SQL Server environment that gives you near‑complete compatibility with your existing SQL Server workloads, while off‑loading backups, patching, high‑availability setup, and security overhead to Microsoft.
For a business owner, this means lower operational risk, reduced IT labor, and a more predictable, scalable database platform that can grow as your customers, transactions, and data do.
What Azure SQL Managed Instance Really Is
Azure SQL Managed Instance is a Platform‑as‑a‑Service (PaaS) offering that sits between traditional on‑premises SQL Server and the more locked‑down Azure SQL Database. It runs on the latest stable version of the SQL Server Database Engine, with automatic patching and 99.99% built‑in high availability, while staying inside your own virtual network (VNet) for security and isolation.
Key things it gives you out‑of‑the‑box:
Near‑100% feature compatibility with SQL Server Enterprise Edition (including cross‑database queries, linked servers, SQL Server Agent, and many advanced security features).
Automated backups, point‑in‑time restore, and disaster‑recovery options backed by Azure’s global infrastructure.
Managed high availability and maintenance, so your team spends less time on patching and downtime coordination.
For a business owner, this translates to fewer “SQL Server emergencies,” lower total cost of ownership, and a smoother path to cloud‑based applications and analytics.
Why This Matters to Your Business
If your accounting, healthcare, or nonprofit systems depend on complex SQL Server features (multi‑tenant SaaS, reporting servers, integration services, or legacy apps), a simple lift‑and‑shift to Azure SQL Managed Instance is often the safest and most cost‑effective upgrade.
Benefits you can communicate internally:
Lower IT overhead: Microsoft handles engine and OS updates; your staff focuses on business‑specific reporting, compliance, and optimization.
Stronger security and compliance: Managed Instance supports Microsoft Entra ID, Transparent Data Encryption (TDE), Always Encrypted, auditing, and dynamic data‑masking—critical for healthcare and finance.
Better scalability and uptime: You can scale compute and storage without major re‑architecting, and rely on built‑in 99.99% availability for mission‑critical workloads.
Practical Steps for Your Business and IT Team
Here is a realistic, step‑by‑step path a business owner can ask their IT team (or a partner like Farmhouse Networking) to execute:
Inventory and prioritize databases
Document all SQL Server instances, databases, and applications that depend on them.
Identify which systems are mission‑critical (patient records, financial data, donor systems) and which can be migrated first.
Assess compatibility and readiness
Use Microsoft’s compatibility assessment tools and check which SQL Server features your workloads depend on (linked servers, SQL Agent jobs, cross‑database transactions, etc.).
Map databases to the two main service tiers:
General Purpose: typical web apps and reporting.
Business Critical: low‑latency, high‑availability needs (core transactional systems).
Design networking and security
Create a dedicated Azure Virtual Network (VNet) and subnet for SQL Managed Instances.
Configure private endpoints so databases are not exposed to the public internet.
Integrate with your existing identity provider (Microsoft Entra ID or on‑prem Active Directory via hybrid connectivity).
Plan and execute migration
For many on‑prem SQL Server workloads, use the Managed Instance link or Azure Database Migration Service to perform low‑downtime, near‑online migrations.
Start with a non‑production environment to validate performance, security, and connectivity.
Gradually shift production workloads once testing passes.
Establish monitoring and governance
Enable Azure Monitor, SQL‑level auditing, and alerts for latency, storage, and failover events.
Define backup retention, geo‑backup policies, and RPO/RTO targets for key workloads.
Train and document
Ensure your IT team knows how to use the Azure portal, SQL Server Management Studio (SSMS), and PowerShell/CLI for ongoing management.
Common Questions Business Owners Ask
Below are likely questions from your stakeholders, phrased in owner‑friendly language.
Q: Is this “just another cloud database,” or is it really the same SQL Server we already use? Azure SQL Managed Instance uses the same SQL Server Database Engine as on‑prem SQL Server, with near‑complete compatibility of enterprise features such as cross‑database queries, SQL Agent, and many security controls. In practice, many existing applications can be moved with minimal code changes.
Q: How does this improve security and compliance? Managed Instance runs inside your own virtual network, with private endpoints and deep integration with Azure security tools. It supports encryption‑at‑rest and‑in‑transit, auditing, and role‑based access, which simplifies HIPAA, financial, and nonprofit compliance requirements.
Q: What happens to backups and disaster recovery? Azure automatically manages backups, including long‑term retention and geo‑backups if you choose. You can restore to any point‑in‑time within your retention window, and failover to another region for disaster recovery.
Q: How much will this cost us monthly? Costs depend on compute (vCores), storage, and service tier (General Purpose vs. Business Critical). While you trade some licensing cost for Azure subscription fees, you often reduce spending on hardware, on‑prem licenses, and operational labor.
How Farmhouse Networking Can Help
Farmhouse Networking specializes in helping accountants, healthcare providers, and charities successfully migrate and manage Azure‑based data platforms without disrupting day‑to‑day operations. For Azure SQL Managed Instance, we can:
Assess your current SQL Server environment and identify which databases and apps are best suited for Managed Instance.
Design secure, compliant architectures that meet your industry’s regulatory needs (e.g., HIPAA‑aligned designs for clinics, FERPA‑friendly setups for nonprofits).
Plan and execute low‑downtime migrations using Microsoft’s recommended tools and best practices.
Train your internal IT team on monitoring, governance, and cost‑management so you retain control while reducing risk.
Your Next Step
If you’re ready to explore whether Azure SQL Managed Instance is the right fit for your business, reach out to Farmhouse Networking today. Email support@farmhousenetworking.com with a brief overview of your current database environment, and we’ll schedule a consultation to walk through your options, costs, and migration roadmap tailored to your accounting, healthcare, or nonprofit workload.
After rounding the year 2 mark on their Personalized Learning Initiative, Fresno Unified School District has gained new insights into what exactly has made the initiative so exceptional in its ability to transform learning outcomes for students. Take a look at their findings in this article.
What is the economic impact of switching from an on-premises SQL Server to Azure? Microsoft asked Forrester to find out. Four client interviews later, the results are in: See how you can save by switching to Azure!
And God will generously provide all you need. Then you will always have everything you need and plenty left over to share with others. As the Scriptures say, “They share freely and give generously to the poor. Their good deeds will be remembered forever.” For God is the one who provides seed for the farmer and then bread to eat. In the same way, he will provide and increase your resources and then produce a great harvest of generosity in you. - 2 Corinthians 9:8-10
We use cookies to ensure that we give you the best experience on our website. If you continue to use this site we will assume that you are happy with it.