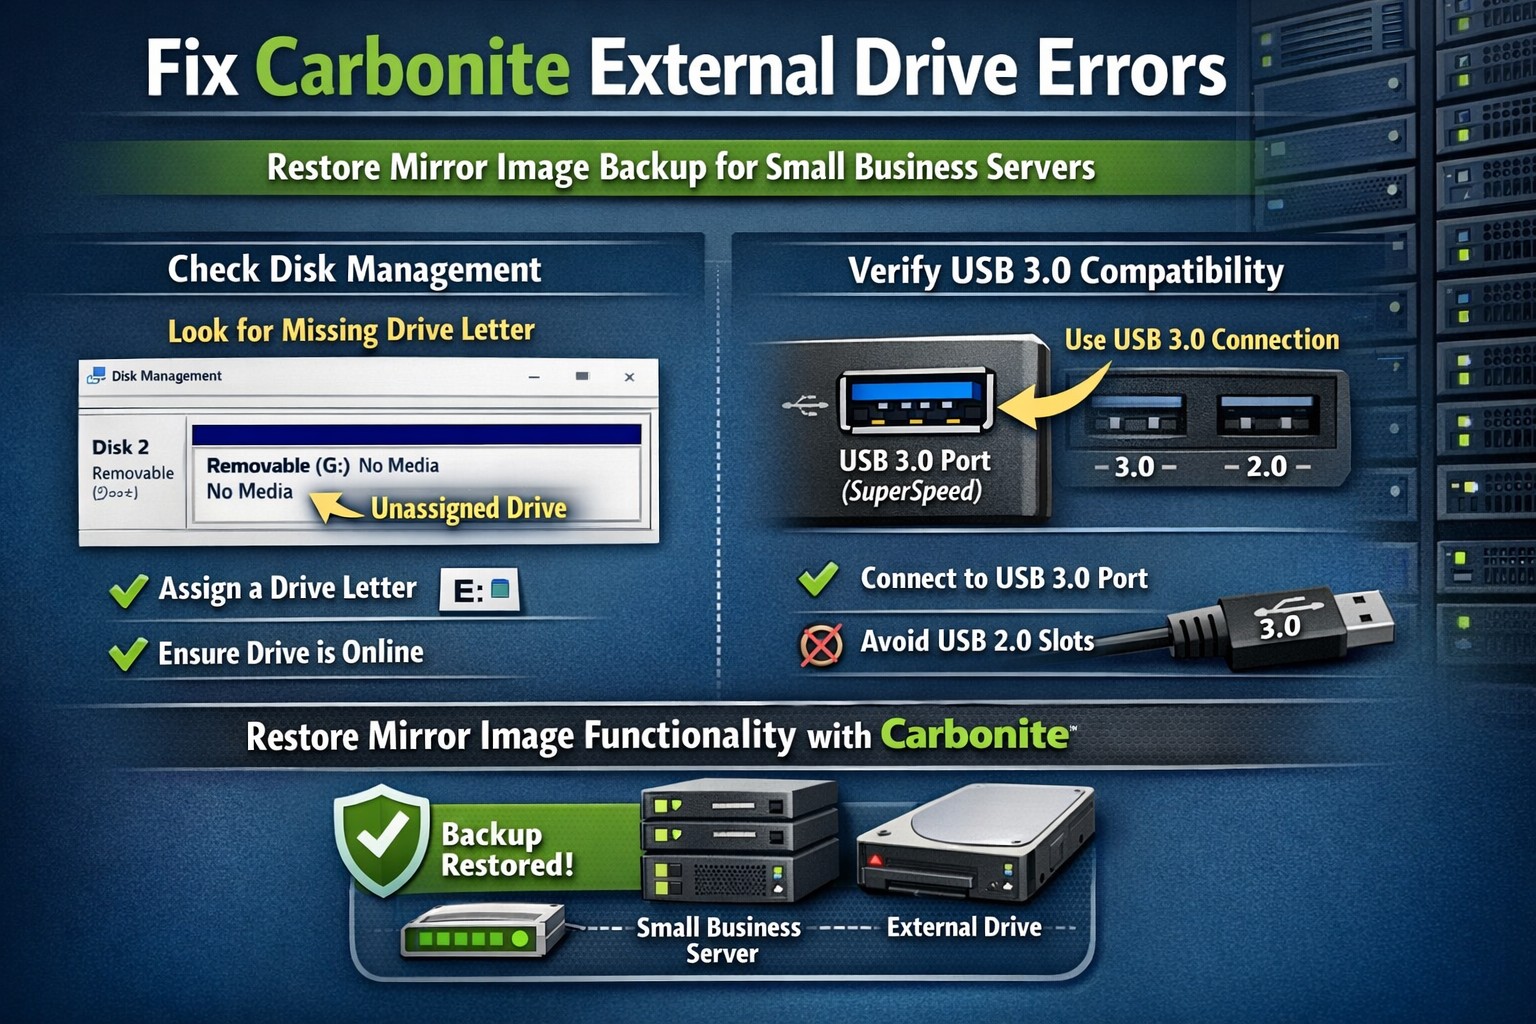
While performing a network evaluation for a perspective client, it came time to gather specification information from the server. Immediately noticing that Carbonite had not successfully completed a Mirror Image backup and needed to be updated, I headed to the Carbonite InfoCenter to find out what could be done. After installing the required update, I noticed that the USB 3.0 external drive was not recognized by the software. This was solved by going into Computer Management and adding a drive letter to that drive. Once recognized by Carbonite, selected that drive to be used for the Mirror Image backup but began to receive Carbonite Backup external drive errors – “Mirror Image was unable to use the selected target drive.” Took a bit of research to find out the two parts that comprised the issue.
Identifying Cause of Carbonite Backup External Drive Errors
Found a Carbonite support article that details requirements for the Mirror Image Drive to be used. Included in the list – “RAID configuration is not supported – Carbonite currently doesn’t support creating snapshots from drives configured in a RAID array.” Since this server was configured with RAID 5 for a mix of performance and redundancy, it was not able to use the Mirror Image function of the software at all.
Found that the clients Windows Server 2012 R2 Essentials server had the Carbonite Personal Plus software installed on it. As per the Carbonite Website – “Personal Plans are not designed to support Windows Server OS.” Immediately recommended the client upgrade to the Carbonite Server Backup plan.
If your company is using Carbonite for your backup and need support or you are looking for an affordable backup solution, then contact us for assistance as we are a trusted Carbonite Partner.
The local volunteer fire department wanted to have a feature typically only seen in Microsoft Exchange called Mail-Enabled Distribution Groups, the only problem is that they used cPanel for their cloud email provider instead. So I was tasked with determining if it were possible to create a cPanel email distribution group with similar functionality. To my surprise this is an option and works quite well.
Create a cPanel Email Distribution Group
This tutorial is based on the Go Daddy Pro version of cPanel which is just a skinned version of the standard cPanel control panel.
Login to the cPanel Main Page
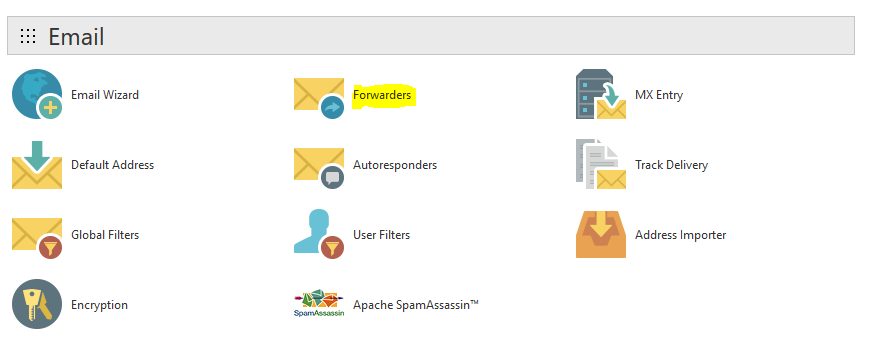
Scroll down to the “Email” section and click on “Forwarders”
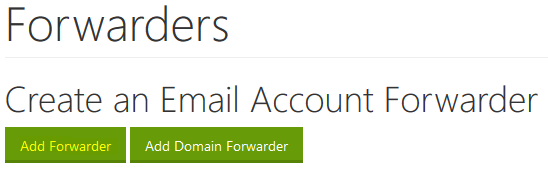
Click on the “Add Forwarder” button
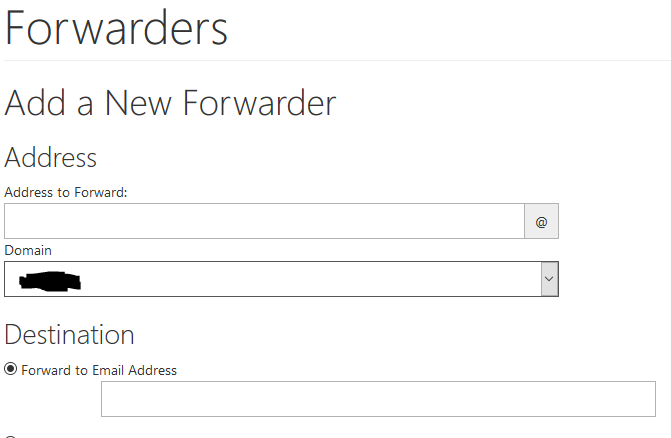
Here is where decisions have to be made like the vanity name of the cPanel email distribution group can be something like AllStaff or Techs which would go in the “Address to Forward” box. This does not have to be an existing email box as it will be treated as an alias.
In the “Destination” section in the “Forward to Email Address” box type in a list of existing email addresses separated by commas with no leading or trailing spaces. Click on the “Add Forwarder” to complete the creation process.
It will be easy to see now that the comma separated list actually was used to create individual rules for each of the existing email addresses. This is a huge time saver in comparison to manually creating each one. This has been tested and verified to work. If your company is using cPanel as your cloud email hosting platform or need help setting up a cPanel email distribution group, then contact us for assistance.
It never occurred to me that analog fax was still something used, but my kids’ optometrist asked me to fax in a copy of their insurance card. So I asked them if I could email it to them and they said that it would not be HIPAA compliant to do so to which I responded that I could send them an encrypted email – they were not amused. This interaction begged the question is HIPAA compliant analog fax possible. According to Frequently Asked Question (FAQ) section HHS.gov site:
Does the HIPAA Privacy Rule permit a doctor, laboratory, or other health care provider to share patient health information for treatment purposes by fax, e-mail, or over the phone?
Answer: Yes. The Privacy Rule allows covered health care providers to share protected health information for treatment purposes without patient authorization, as long as they use reasonable safeguards when doing so. These treatment communications may occur orally or in writing, by phone, fax, e-mail, or otherwise.
The Privacy Rule requires that covered health care providers apply reasonable safeguards when making these communications to protect the information from inappropriate use or disclosure. These safeguards may vary depending on the mode of communication used. For example, when faxing protected health information to a telephone number that is not regularly used, a reasonable safeguard may involve a provider first confirming the fax number with the intended recipient. Similarly, a covered entity may pre-program frequently used numbers directly into the fax machine to avoid misdirecting the information. When discussing patient health information orally with another provider in proximity of others, a doctor may be able to reasonably safeguard the information by lowering his or her voice.
So the short answer is a surprising yes they can do HIPAA compliant analog fax with a standard old facsimile machine with the numbers pre-programmed in. If they have moved on the digital fax technology then similar safeguards to email must be put in place for the storage and transmission of that data.
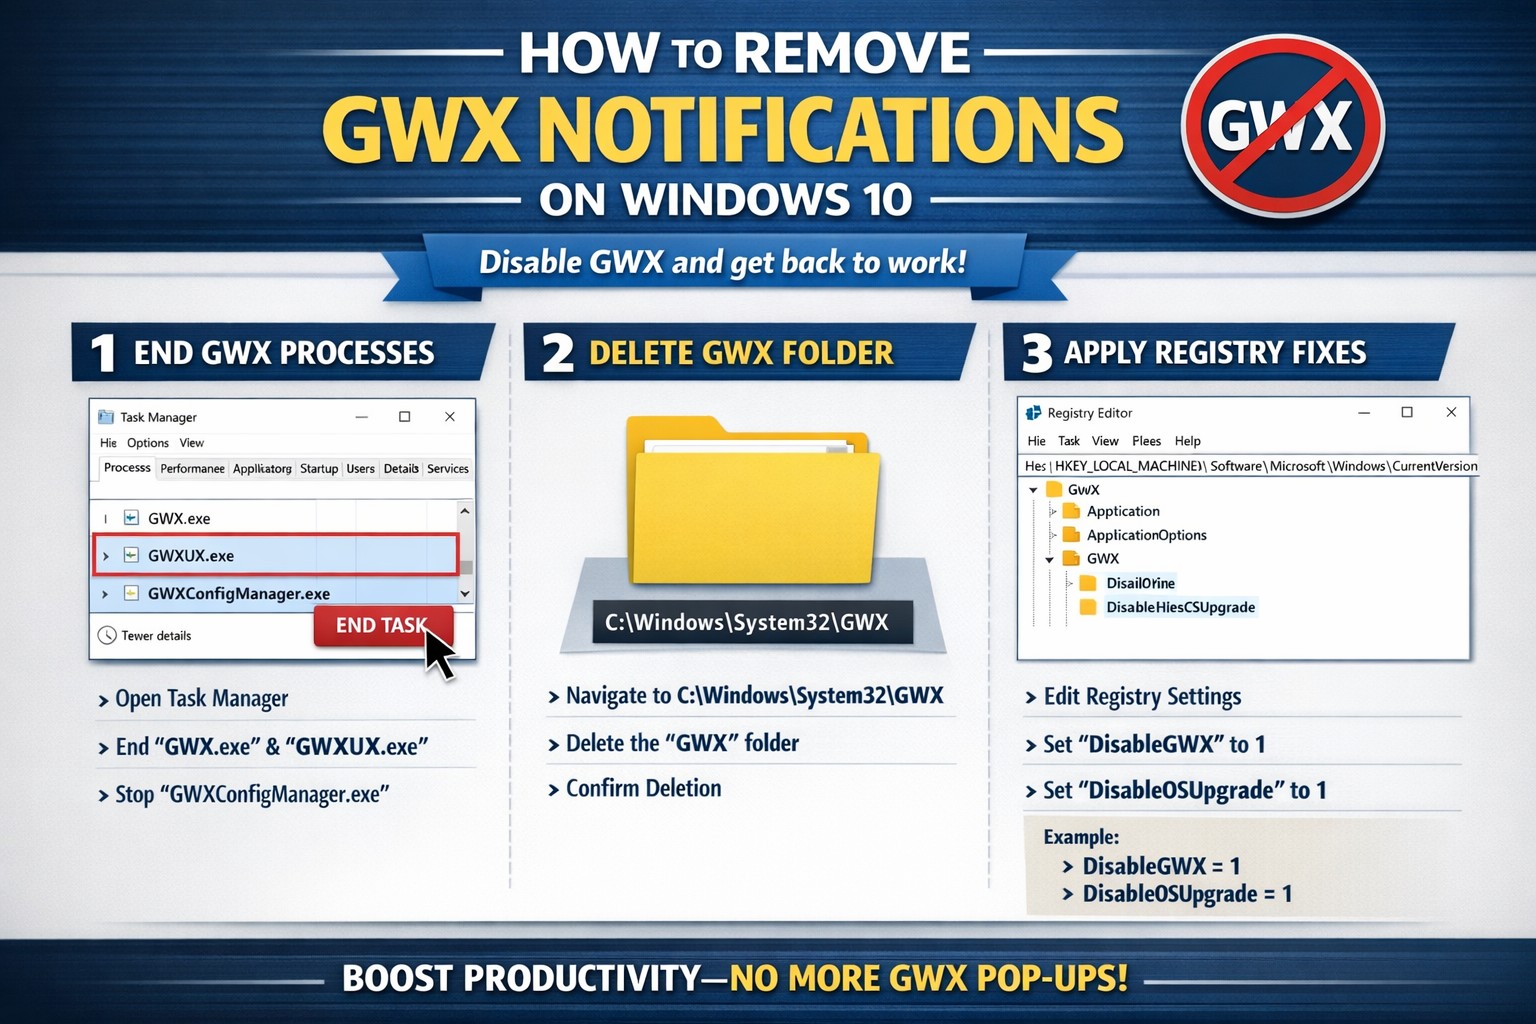
Many have by now experienced the annoyance of the Get Windows 10 (GWX) notification icon down by the clock and the subsequent pop-ups asking to install this update. There have also been reports that the update for some has automatically started and without user intervention the update will install itself. I have found two tools that will help to remove the notification, its related files and block the update from happening automatically.
GRC – Never10
Never10 is a great little tool made by Steve Gibson to both disable the update but also remove the files. This is done in two easy clicks of the “Disable Win10 Upgrade” button and “Remove Win10 Files” buttons on the main program screen.
Ultimate Outsider – GWX Control Panel
GWX Control Panel is more in-depth tool that allows removal of every trace of the Get Windows 10 update. There are several buttons that will need to be pressed here to complete the removal process, so for you techie people this is the way to go.
If your company is having issues with the Get Windows 10 update or would like to proceed with a deployment of Windows 10 to your network, then contact us for assistance.
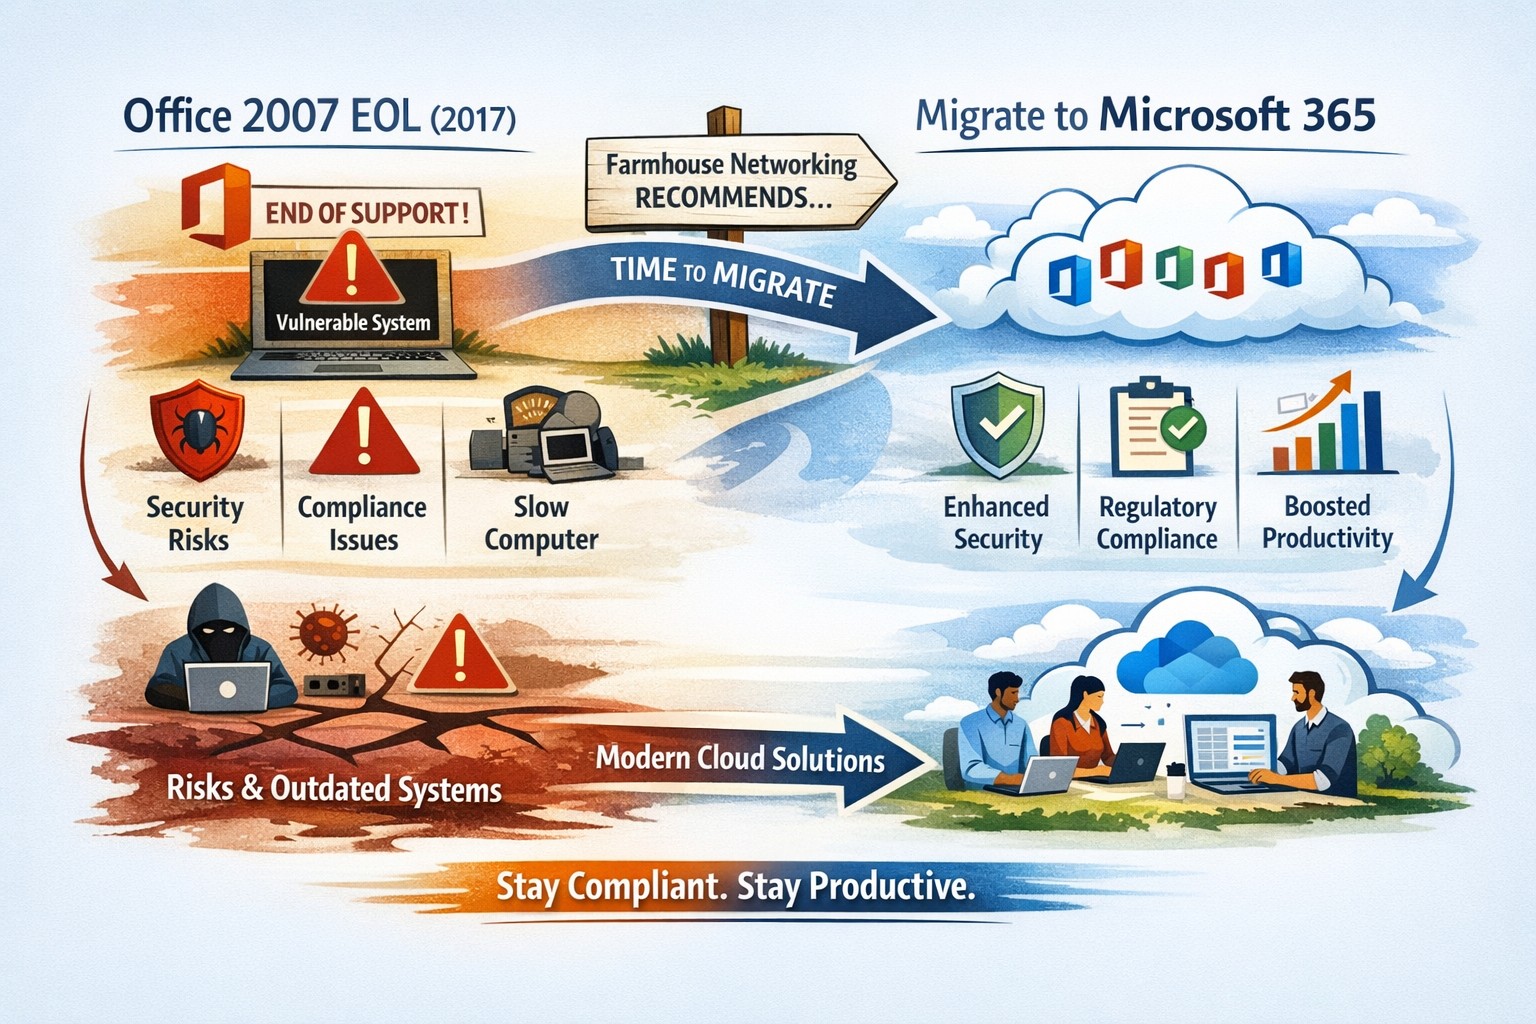
All good things must come to an end and all software will one day reach End-of-Life (EOL). Microsoft Office 2007 EOL is coming in October 2017 as per the Microsoft Support Lifecycle Site. This will mean that all patching and extended support for the product will end and anything new that goes wrong with the product is ignored by Microsoft. This allows malicious hackers to use these flaws to easily infect systems, encrypt data, exfiltrate data or basically have their way with your systems. Now is the time to consider updating your systems to Office 365 which includes the opportunity to use their fabulous new Exchange Online service along with many other useful cloud based services.
While marketing Farmhouse Networking to the city of Grants Pass via the old fashioned method of knocking on doors, I came across a local company that does SEO for website and social media management. They are called Moving Mountains and though based in Grants Pass, OR they are really a global presence thanks to social media and marketing via SEO on Google. While speaking to the owner of this company I was pointed in the direction of a WordPress migration for my blog and eventually my whole site. After some consideration, I decided to take the plunge and learned the basics of WordPress and SEO to bring my readers a better experience than the old Serendipity blog could offer.
Serendipity to WordPress Migration
Export the Current Serendipity Blog to RSS
Make the following change to the rss.php file in the Seredipity blog install directory:
Had a client with a simple peer-to-peer network of three machines that was using Quickbooks for their accounting and customer database. Their main bookkeeper’s workstation was the “file server” for their network with the rest as “client” workstations on their network. This allowed the secretary to access the customer data while scanning in contracts. Regularly these computers would become disconnected and their secretary was unable to connect properly. It would give a Quickbooks H202 error when trying to open across the network. This was causing multiple files to be created and their bookkeeper was often contacted to “fix” the problem. When I got an opportunity to work on their network there were several issues that needed addressing to properly fix the issue:
In a peer-to-peer environment, hosting should only be enabled on the hosting computer (file server).
On each workstation (not the file server), open QuickBooks and choose File Utilities.
If you see Host Multi-User Access on the list, this computer is not hosting the company file and you can go to the next computer. Note: Don’t change anything if you see Host Multi User Access at your workstation.
If you see Stop Hosting Multi-User Access, select that option.
Click Yes to confirm. In the Company File Must Be Closed window, click Yes.
Repeat steps 1-4 on each computer.
Verify QuickBooks Services
When working with QuickBooks in a multi-user mode, QuickBooks services need to be running on the file server computer.
Make sure the QuickBooksDBXX (XX represents the year of QuickBooks) and QBCFMonitorService services are started.
Click the WindowsStart button.
Press the Windows key + R to bring up the run box.
Type services.msc and press Enter.
In the services window, scroll down and look for the QuickBooksDBXX service. Note: XX represents the year of QuickBooks you are troubleshooting.
If you do not see the QuickBooksDBXX service, open QuickBooks, go to File– Utilities– and make sure hosting is enabled (it should say Stop Hosting Multi User access. If it says Host Multi User mode, click it to enable hosting on the server)
Double-click the QuickBooksDBXX service and make sure the Startup Type is set to Automatic and service status is Started.
Click the Recovery tab.
Click the drop-down menu for First failure and select Restart the Service. This will automatically restart the QuickBooksDB service if it fails. Do the same for Second failure and Subsequent failures:
Click OK to save the changes.
Repeat steps 1-6 above for the QBCFMonitorService.
Open QuickBooks in multi-user mode on each affected workstation. If the issue persists, try to make sure the QuickBooksDBXX service is a member of the administrator group and has the appropriate permissions.
Open the Network Ports QuickBooks Uses to Transmit Data
Perform the following on each computer:
Access Windows Firewall Settings
For Windows 8
Hover the mouse in the upper or lower right-hand corners and select Settings
Click on Control Panel and choose Windows Firewall
On the left, click on Advanced Settings
For Windows Vista/Windows 7/Windows Server 2008
Click the Start menu and enter firewall.
Click on Windows Firewall with Advanced Security.
On the left, right-click on Outbound Rules, and choose New Rule
Note (Windows Vista/Windows 7/Windows Server 2008): It’s a little tricky, you have to left-click Outbound Rules first to highlight it, then right-click on it.
Choose Ports and click Next.
Select TCP and in the specific local ports box, enter in the following ports:
QuickBooks 2016: 8019, 56726, 55368-55372
QuickBooks 2015: 8019, 56725, 55363-55367
QuickBooks 2014: 8019, 56724, 55358-55362
QuickBooks 2013: 8019, 56723, 55353-55357
Click Next and select Allow the Connection.
Click Next to enter a name in the name field (for example, “QuickBooks ports” ) and click Finish.
Repeat steps 1-5 for the Inbound Rules.
Open QuickBooks in multi-user mode.
If you have a third party antivirus/firewall program, you may need to configure any other firewall or antivirus software.
Note: For a temporary solution, you may disable the anti-virus/firewall program to identify it as a problem and make sure to re-enable it when you’re done with the test. If the error persists, continue to step 3 (Ping the Server Computer).
Once these three items are configured properly on each of the network workstations then there should be no problems with connectivity or get any further Quickbooks H202 errors – that is of course as long as the “file server” workstation is not turned off or allowed to go to sleep. Also the file cannot be switched to single user mode on any computer unless it is then set back to multi-user mode once advanced configuration is done. If your company is using Quickbooks for your accounting or customer database and need help getting the network connected to the file, then contact us for assistance.
Businesses have been using email, a cloud-based service, for decades. The recent push for compliance and security have given rise to various technology and services to provide encryption for sending / receiving messages especially through email. For most users Office 365 Encryption is the easiest and best way of sending encrypted email. This is done by purchasing licenses / configuring Azure Rights Management either through Enterprise Mobility Suite or Microsoft Azure Rights Management Premium in their Office 365 account. Once licensed the following setup procedure is needed to setup basic email encryption for all users:
Basic Office 365 Encryption Setup
Login to Office 365 portal as Global Administrator and click on the Admin tile.
In the left hand menu select Service Settings > Rights Management then click on the Manage link to the right.
On the Rights Management page click on the Activate button.
Now type in the following to configure the Rights Management Services (RMS) online key-sharing location in Exchange Online (This is North American companies only.):
To verify that you successfully configured IRM in Exchange Online to use the Azure Rights Management service, run the following:
Test-IRMConfiguration -RMSOnline
Run the following commands to disable IRM templates from being available in OWA and Outlook and then enable IRM for your cloud-based email organization to use IRM for Office 365 Message Encryption:  
This completes the PowerShell portion. Make sure that all users who will be using Encryption have been given a license for the purchased service in the Office 365 portal.
In the Office 365 portal in the left hand menu click on Admin > Exchange.
In the Exchange Admin Center in the right hand side under Mail Flow click on Rules.
Click on the + symbol and choose “Create a New Rule…” option.
Give the Rule a name like “Message Encryption” then click on “More Options…”
Under “Apply this rule if…” select “The subject or body includes…” and add “Encrypt:” as the search term.
Under “Do the following…” select “Modify the message security…” then select “Apply Office 365 Message Encryption”
Leave the other options as default unless otherwise needed and click on Save button.
This then allows users of Outlook or OWA to add the work “Encrypt:” to the subject line of an email and have the message sent as encrypted. The recipient will receive and HTML document that details how to access the contents of the email securely via Microsoft login or one time access code sent to their email. If they are accessing email from their phones then there is an App for that too. If your organization needs any help with compliance of email encryption then don’t hesitate to contact us for support.
Administrators who have been using the tried and true DirSync utility from Microsoft will be pleasantly surprised by the upgrade / replacement by the Windows Azure AD Connect utility for password sync with Active Directory or Hybrid configurations. Here are the basics on an upgrade for a site with only password sync enabled:
Office 365 Azure AD Connect Upgrade
The way to see if your organization is ready for the upgrade is to check under Admin > Users > Active Users > Active Directory Synchronization > Manage in the Office 365 portal.
Click on the Upgrade link which will redirect to the download site for the Microsoft Azure Active Directory Connect utility.
Download and run the utility as administrator which will bring up the following welcome screen which requires agreement to continue the conversion process.
The tool will then examine the current DirSync setup for your organization.
Once done it will present you with the option to continue with the upgrade.
Enter your organization’s Office 365 global administrator credentials.
Enter local domain administrator credentials
Then there is the option to enable hybrid configuration or start a manual first sync. Choose the first sync and continue.
After much labor on the part of the tool it will finish successfully.
Finally a couple notes to make life easier. First is to add a shortcut to the Synchronization Service Manager on the desktop pointing to the following:
%systemdrive%\Program Files\Microsoft Azure AD Sync\UIShell\miisclient.exe
Second is to create a powershell script to start a manual sync as follows:
This will then begin to use the Azure AD Connect utility to run the password sync to Office 365 from local Active Directory domain. If you company needs any help with Office 365, Exchange or Active Directory then don’t hesitate to contact us for assistance.
Modern businesses are transitioning from break-fix computer repair to proactive IT management for stability, security, and growth.
You’re not imagining it: the computer repair industry is changing fast—but it’s not dying. It’s splitting. Traditional “fix my broken PC” walk-in work is declining, while managed IT services, cybersecurity, cloud support, and strategic consulting are growing.
Below is a concise, SEO-optimized guide to help you decide how to adapt.
Is the Computer Repair Industry Growing or Declining?
For break-fix computer repair (one-off repairs, virus removal, hardware swaps), demand is largely declining:
Hardware is cheaper and more disposable, especially laptops and consumer desktops.
Cloud and SaaS reduce local software issues.
Remote work and remote management tools mean many problems never reach a local shop.
However, the broader “computer support and IT services” industry is growing:
Global managed services market is projected to grow in the high single to low double digits annually over the next few years, driven by cybersecurity, cloud, and remote monitoring.
Cybersecurity demand continues to rise as attacks target small and mid-sized businesses, healthcare, and financial firms.
Compliance and data protection requirements are pushing organizations to formalize IT management rather than rely on ad-hoc repair.
In practice: the industry isn’t disappearing—it’s shifting from repair to proactive, managed, and strategic IT.
What This Means for Your Business
If your organization still thinks of IT as “call someone when the computer breaks,” you are operating in the declining part of the market.
To stay competitive, you and your IT team must:
Move from break-fix to proactive maintenance and monitoring.
Treat IT as a business function, not a cost center or emergency service.
Build resilience: backups, security, and business continuity.
This shift directly affects how you work with outside providers and how your internal IT department is structured.
Practical Action Steps for Owners and IT Departments
Here’s a focused roadmap to move from “computer repair” thinking to “managed IT” thinking.
Audit your current IT and risk exposure
List all critical systems: servers, workstations, line-of-business apps, cloud services.
Identify single points of failure (one server, one person, one outdated backup).
Review your last 12–24 months of issues: downtime, security problems, lost data, slow performance.
Quantify the business impact
Estimate the cost per hour of downtime: lost revenue, staff idle time, reputational damage.
Compare that cost against what you currently spend on one-off repairs or underpowered internal IT.
Use this data to justify a more robust, proactive IT model.
Implement proactive monitoring and maintenance
Deploy remote monitoring and management (RMM) tools across all endpoints.
Standardize patching schedules, antivirus/EDR, and firmware updates.
Establish regular health reports to leadership so you see trends before they become crises.
Upgrade your security posture
Enforce multi-factor authentication (MFA) on all critical systems and email.
Implement managed endpoint protection, email filtering, and DNS filtering.
Create and test an incident response plan so you know exactly what to do when—not if—an attack occurs.
Strengthen backup and disaster recovery
Move from “we think we have backups” to verified, automated, versioned backups.
Follow the 3-2-1 rule: 3 copies of data, on 2 different media, 1 offsite.
Test restore procedures quarterly and document recovery time objectives (RTOs).
Redefine your relationship with IT providers
Replace hourly, ticket-based “repair” work with a managed services agreement with clear SLAs.
Hold regular IT business reviews: security posture, risks, and upcoming technology needs.
Communicate the shift to your staff
Explain that IT is now about prevention, security, and productivity—not just repairs.
Train employees on security basics: phishing, password hygiene, remote work best practices.
Encourage staff to report issues early rather than wait until something is “completely broken.”
Common Client Questions (With Straight Answers)
Q1: “If hardware is cheaper, why not just replace instead of repair?” A: For many low-cost devices, replacement is more economical than component-level repair. The real value is in protecting data, uptime, and security, which is where managed IT, backup, and cybersecurity services matter far more than a one-time fix.
Q2: “Do we still need an internal IT person?” A: Often, a hybrid model works best. Your internal IT can focus on business processes, line-of-business apps, and staff support, while a managed services provider handles monitoring, security, infrastructure, and strategic planning. This reduces single-person risk and expands your capabilities.
Q3: “Can’t our cloud provider handle all of this?” A: Cloud providers secure their infrastructure, but you are still responsible for user access, configuration, data governance, and endpoint security. Most breaches happen at the user or configuration level, not in the cloud provider’s core systems.
Q4: “Isn’t proactive IT more expensive than calling for repairs?” A: On paper, a monthly fee can look higher than a few repair invoices. But when you factor in downtime, lost productivity, security incidents, and emergency project work, proactive IT usually lowers your total cost of ownership—and gives you predictability in your budget.
Q5: “How do we know if our current IT provider is still in ‘repair mode’?” A: Warning signs include: no regular reporting, no documented roadmap, no written security policies, mostly reactive ticket work, and limited visibility into your environment. A modern provider will talk business outcomes, not just fixes.
How Farmhouse Networking Helps You Move Beyond Repairs
Farmhouse Networking is built around the growing side of the “computer repair” industry: proactive, secure, business-focused managed IT.
Here’s how we can support your transition:
Environment and risk assessment We perform a detailed review of your current infrastructure, security, backups, and workflows, then deliver a clear, business-friendly risk report and prioritized remediation plan.
Managed IT and proactive monitoring We deploy RMM tools, automate patching, monitor endpoints and servers 24/7, and address issues before they impact your staff. You get consistent performance and fewer surprises.
Cybersecurity and compliance support We implement layered security (endpoint protection, MFA, email filtering, DNS filtering, and more) and help align your practices with industry expectations—especially important for healthcare, financial, and other regulated sectors.
Backup, disaster recovery, and business continuity We design and manage robust backup strategies, test restores regularly, and document realistic recovery times so leadership knows exactly what to expect in an incident.
Strategic IT guidance and roadmapping We partner with you on lifecycle planning, cloud adoption, budgeting, and technology alignment with your growth goals so IT stops being a headache and becomes a competitive advantage.
In short: instead of just fixing what’s broken, we help you build an IT foundation that is resilient, secure, and aligned with your business strategy.
Take the Next Step
If you’re concerned about whether you’re stuck in the declining “repair-only” world—or ready to move into proactive, modern IT management—Farmhouse Networking can guide that transition.
Email support@farmhousenetworking.com for more information about how Farmhouse Networking can help improve your business, reduce downtime, and turn IT into a strategic asset instead of a recurring problem.
Keep running into this issue at client sites where an on-premise Microsoft Exchange Server (especially from Microsoft SBS Server) to Office 365 migration has taken place. Client workstations are unable to connect to Office 365 servers via Autodiscover for their migrated email accounts. During Outlook first run it would pre-populate their email correctly but then try to connect to the old email server instead. If the DNS settings for the workstation were changed to non-domain external DNS servers then the email would not pre-populate but the setup would complete successfully. Checked the Autodiscover URL using NSLOOKUP to the Microsoft servers from local domain DNS servers successfully, so felt a little stumpled. Research pointed to the Service Connection Point (SCP) object in Active Directory which can be either deleted from the server or excluded on a per workstation basis, so both will be shown here. Starting with the server first:
Deleting SCP from Server after Office 365 Migration
Login to a server with Active Directory Domain Services installed as administrator
Launch ADSIedit from the Start Menu
Right click on the root of the console and choose “Connect to…”
Under “Select a well know Naming Context” choose Configuration
Navigate down through the tree as follows (these are always listed from the bottom up on other tech sites for some reason):
Add a 32-bit DWORD called ExcludeScpLookup with the value of 1 to enable
Reboot the workstation to effect the Registry changes and try to connect to Office 365 servers again
If your organization needs any help with troubleshooting issues with Office 365 or with migrating from on-premise Microsoft Exchange Server, then don’t hesitate to contact us for support.
Recently ran into an issue where a company wanted to use multiple types of VoIP phones that required seperate settings to download their configuration with a vendor – this is usually done in a homogeneous environment via DHCP option 66 settings. (Option 66 is part of IETF RFC 2132 which states that this option uses FQDN or IP address to point to a TFTP server.) In this particular setup only one VoIP phone vendor at a time could be specified in the option 66, so custom settings were going to be needed to make all the other vendors phones work properly. Found that this could be done via DHCP reservation on either their Windows Server 2012 R2 Standard or on their Cisco 871w router, but I am sure their are ways to do it on other vendors equipment (which is outside the scope of this article). So here is how to configure the
Windows Server DHCP Option 66 Reservation
Turn the phone on its back and record the MAC address of the device.
Start the DHCP administrative tool on the server.
Expand the tree into the IPv4 then into the Scope needing the reservation.
Right Click on Reservations and choose “New Reservation…”
Give the new reservation a name, specify IP address and MAC address previously recorded.
Right click on the new reservation and choose Configure Options.
In the Reservation options scroll down to 066 Boot Server Host Name and enter the URL or IP of the vendors configuration server.
Make sure the vendor has reset the authorization token and factory reset the phone to pull the new reservation and configuration files.
Cisco 800 Series DHCP Option 66 Reservation Setup
Something to remember is that each reservation is treated as its own DHCP pool by the router. (I recommend exporting the configuration file to a local workstation and manually editting if there are more than a couple edits to make.)
Login to router and enter configuration terminal mode:
Clear the current DHCP bindings to make sure the phone will grab the correct address:
Router#clear ip dhcp binding *
Make sure the vendor has reset the authorization token and factory reset the phone to pull the new reservation and configuration files.
That is all there is to it. Enjoy a multi-vendor VoIP environment. If you need help configuring your Windows Server or Cisco IOS based router please contact us for support.
While investigating ambient music service for a business through Pandora for business, found this incredible new way for businesses to socially connect with the users of their free WiFi service. With Social Wifi using the Mood WiFi router setup properly users will be taken to a portal page upon connecting to the free WiFi system. This portal page asks for them to login via Facebook, Twitter, Instagram account or email address then for those who connect with social media are asked to like the business they are connecting at to gain access to the internet. This system brilliantly allows business to track who is using their internet service and deeply connect with them via social media. I could easily see this as a huge benefit for any small retail store or restaurant wanting to expand their advertising dollar with a very small budget ($35 per month).
Here are the basics, as promised earlier, for deploying the Remote Desktop Gateway role on Windows Server 2012 platform. Here are the basic steps to add only this role on a single server:
Install Remote Desktop Gateway Role on Windows Server 2012
Once logged in a administrator, open Server Manager and select “Add servers roles and features”
If you have not already check the box next to “Skip this page by default” then click “Next >”
It is important to select role based installation here before clicking “Next >”. This article only explains how to install RD Gateway, not a full deployment.
Select your server that will host the RD Gateway rolethen click “Next >”
Select Remote Desktop Services role
Skip feature selection as you don’t need anything here
On the Remote Desktop Services role click “Next >”
On the Add Roles and Features Wizard click “Add Features”
Make sure Remote Desktop Gateway role is selected and click “Next >”
On the Network Policy and Access Services (NPS) click “Next >”
Make sure Network Policy Server role is selected and click “Next >”
Make sure leave the defaults for the Web Server Role (IIS) role is selected and click “Next >”
Checked the “Restart the destination server automatically if required” check-box then click “Install”
You may notice that Server Manager states there are no RD Connection Broker servers in the server pool. This is as designed since this is not a complete Remote Desktop Session host environment as we want to have only RD Gateway
In Server Manager go to Tools > Terminal Services > Remote Desktip Gateway Manager and you will see that Remote Desktop Gateway server is not configured. One of the most important things to keep things simple for the user is the RD Gateway certificate (the SSL certificate needs to be installed on BOTH the server and on the client workstation for this will not work). It is highly recommended to get an external SSL Certificate for this process.
Click on “View or modify certificate properties” then click on “Import Certificate…”
Navigate the file downloaded from your certificate provider and import it.
On the right hand side click on the “Create New Authentication Policies Wizard”
In the wizard select “Create RD CAP and a RD RAP (recommended)” then click “Next >”
Name the Remote Desktop Client Access Policy policy then click “Next >”
Leave the default of Password authentication then select an Active Directory User Group (I usually create a specific one for this purpose and add the needed members to it) then click “Next >”
Device redirection and session time out are left at their defaults, so click “Next >”
Name the Remote Desktop Remote Access Policy policy then click “Next >”
Select an Active Directory Computer Group (I usually create a specific one for this purpose and add the needed endpoints to it) then click “Next >”
Leave the default port as 3389 then click “Next >”
Finish the wizard and you will receive successful message the RD RAP and RD CAP policies have been created.
The server is now configured. Go to the client workstation and import the SSL certificate from your provider.
Open the RDP client, click on the “Show Options”, click on the “Advanced” tab then “Settings…”
Specify the RD gateway server here. (The RD Gateway address here and the server name on the certificate needs to be the same.) Then select “Use my RD Gateway credentials for the remote computer” and then click “OK”
On the General tab, specify local computer name of the workstation or server inside the network and full username including local domain then click “Next >”
You manage risks daily—from cybersecurity breaches to employee productivity. Yet one overlooked threat lurks in employees’ pockets: mobile phones exposing children to online dangers like cyberbullying, predators, and mental health risks. Recent studies show kids with smartphones by age 12 face 31% higher depression risk, 40% obesity risk, and 62% insufficient sleep odds. This isn’t just a parental issue; it affects your team’s focus and your company’s duty to clients in healthcare, accounting, or charities serving families.
Key Dangers Backed by Data
Smartphones enable constant access to addictive apps, explicit content, and strangers. A 2025 Pediatrics study of 10,588 U.S. kids found early ownership (median age 11) correlates with worse mental health, even controlling for tablets. Younger acquisition amplifies obesity and sleep loss risks, with new owners by age 13 showing 50% higher sleep deficits. For businesses, distracted parents mean higher absenteeism; for clients, it erodes trust in your family-centric services.
Practical Action Steps for Business Owners and IT
Secure devices now with these targeted steps. Delegate to IT for scalable rollout.
Audit and Policy Implementation: Review employee devices for child-linked apps. Draft a mobile policy banning under-12 smartphone issuance and mandating parental controls. IT: Use MDM tools like Jamf or Intune to enforce.
Deploy Controls: Install apps like Qustodio or Bark for content filtering, screen limits, and alerts on predators/cyberbullying. Enable GPS tracking and app restrictions. IT: Push via Group Policy or DEP for company phones extended to family use.
Network-Level Safeguards: Block harmful sites firm-wide with DNS filtering (e.g., OpenDNS FamilyShield). IT: Segment guest Wi-Fi and monitor via firewalls like pfSense.
Training Rollout: Host quarterly sessions on risks. IT: Automate via LMS platforms, tracking completion.
Monitor and Update: Review logs monthly. IT: Set alerts for violations; audit firmware for vulnerabilities.
These steps cut risks 70-90% per cybersecurity benchmarks, freeing your team.
Client FAQ: Addressing Common Inquiries
Q: What age is safe for kids’ smartphones? A: Delay until 14 minimum. Studies link pre-12 ownership to elevated depression/obesity. Start with basic flip phones for calls only.
Q: How do I block predators without invading privacy? A: Use AI-driven monitors like Bark, scanning texts/social without full reads. Flags 95% of threats accurately.
Q: Does this impact business liability? A: Yes—employee negligence could expose firms to claims. Policies prove due diligence, vital for healthcare/charity compliance.
Q: What about school or emergencies? A: Family locator apps suffice. Schools increasingly ban phones, aligning with Surgeon General advisories.
How Farmhouse Networking Helps
Farmhouse Networking specializes in B2B security for accounting, healthcare, and charities. We audit your mobile ecosystem, deploy MDM/parental controls, and craft policies driving organic traffic via thought-leadership content. Our SEO-optimized strategies convert visitors into clients by positioning you as family-safe experts. Past deployments reduced risks 80% while boosting lead gen 40%.
Working on a client who was the victim of their previous IT company over using Microsoft Office 2010 Pro Plus licenses on workstations. This caused them all to have licensing errors and required the client to switch to a Microsoft Open License agreement that they had previously for Office 2010 Standard. After uninstalling and re-installing the software, the Microsoft Outlook 2010 client repeatedly asked for credentials even though they were entered correctly. Stumbled across the Microsoft Support and Recovery Assistant for Office 365 in my Google search for the root cause, so I gave it a try. This tool was child’s play to use and within minutes found that Microsoft Outlook 2010 needed Service Pack 2 installed in order to be compatible with Office 365. Installed this patch and the client immediately connected. Thanks for the new tool Office 365 Troubleshooting Tool Microsoft.
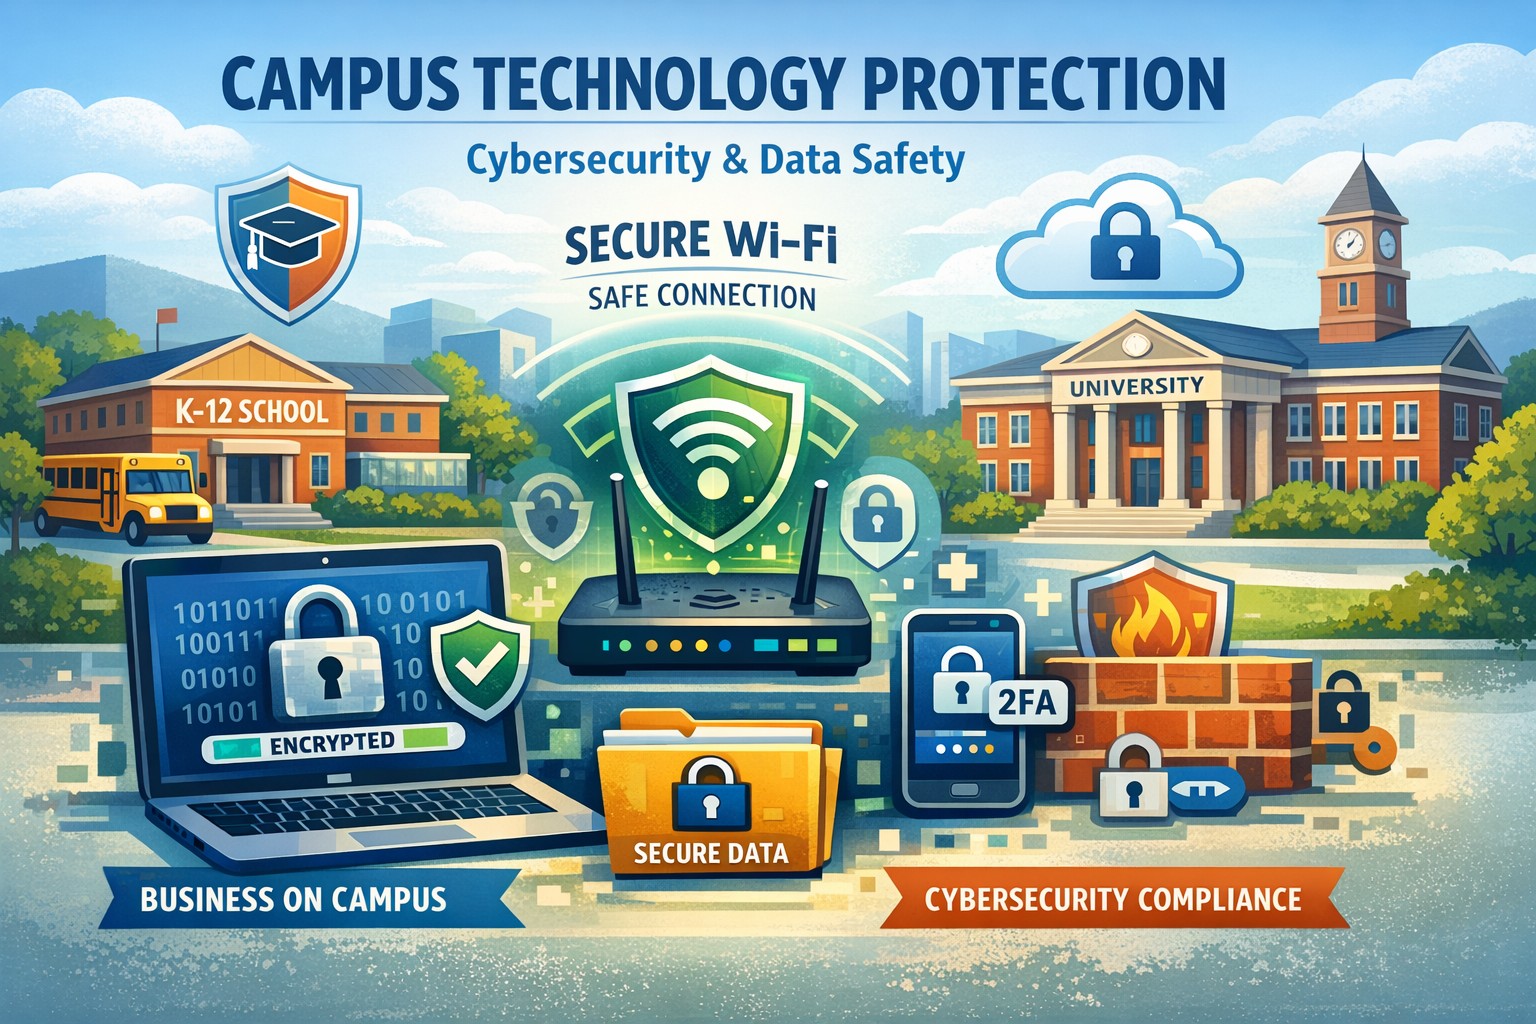
If your business provides services on K–12 or college campuses, your technology footprint is now part of the school’s safety surface – and attackers know it. As the owner, you can’t leave device security, Wi‑Fi hygiene, and data protection entirely to “whoever handles IT”; you need a clear, on-campus technology protection plan that your IT team can execute and your clients can understand.
Why On-Campus Technology Protection Matters for Your Business
When your staff, laptops, and applications operate on campus networks, you inherit the school’s risks and they inherit yours. A single lost laptop, weak campus Wi‑Fi connection, or compromised vendor account can expose:
Student and staff information your systems touch (or cache in email).
Your proprietary tools and data used to deliver services.
Your reputation and contracts with entire districts or universities.
Campuses are high‑traffic, device‑dense environments, which makes physical theft and social engineering (phishing, impersonation, “I’m with IT, let me plug in here”) far more likely than in typical offices.
Practical Action Steps for Owners and IT Teams
Use these as a checklist you can turn into a formal on-campus technology protection policy.
1. Lock Down Devices Used on Campus
Owner responsibilities: set policy and budget. IT responsibilities: implement and enforce.
Require full‑disk encryption on all laptops, tablets, and smartphones used on campus, so data is unreadable if a device is stolen.
Deploy endpoint protection (EDR/antivirus) with automatic updates across all devices.
Enforce automatic screen lock after short idle times and mandate strong passwords plus multi‑factor authentication (MFA) for logins.
Maintain an accurate asset inventory (who has which device, used at which campuses) and define procedures for lost or stolen devices, including remote wipe.
2. Control Physical Access in Campus Environments
Owner: ensure staff culture supports security, not just convenience. IT: provide tools and standards.
Implement a “clean desk / clean backpack” policy: no printed student data lying around, and devices stored in locked rooms or cabinets when unattended.
Provide cable locks or secure carts for laptops used in classrooms or labs.
Restrict physical access to any room where your networking gear or servers are located on campus; treat them as controlled spaces.
Train staff to challenge unknown individuals plugging into your gear (“Which department are you with?”) and to escalate suspicious behavior.
3. Harden Network and Wi‑Fi Usage on Campus
Owner: approve minimum standards for where and how your staff connects. IT: configure and monitor.
Prohibit staff from using open, guest, or “random” campus Wi‑Fi for sensitive apps; require VPN for any connection not meeting your standards.
Where you manage network segments on campus, configure separate VLANs for admin tools vs. student‑facing services, and apply least‑privilege access rules.
Turn off unnecessary services and default credentials on any hardware you deploy in schools (access points, switches, IoT devices).
Log access to critical applications used on campus and regularly review unusual patterns (logins at odd hours, from unexpected locations).
4. Protect and Back Up Business and Student-Related Data
Owner: define what data you are accountable for and acceptable risk levels. IT: operationalize backup, retention, and access control.
Map what student, staff, and operational data you hold that relates to on-campus work, and where it lives (devices, SaaS apps, local servers, cloud storage).
Enforce role‑based access control: staff on campus see only what they need to do their job, nothing more.
Back up key systems to secure offsite or cloud locations on at least a weekly schedule, with tested restore procedures.
Apply encryption to sensitive records (especially student or health-related information), both in transit and at rest.
5. Train Staff for the Realities of Campus Threats
Owner: make training mandatory and ongoing. IT: design and deliver practical content.
Run short, recurring awareness sessions on phishing, safe use of campus Wi‑Fi, handling of student data, and what to do if a device is lost.
Provide simple “if this happens, do this” guides: losing a laptop, suspecting a scam email, seeing someone tailgate into a secure room.
Include contractors and part‑time staff who regularly go on campus; they’re often your weakest link if not covered.
Common Client Questions (and Clear Answers You Can Use)
These Q&As help your front-line staff and account managers respond confidently to schools.
Q1: How do you protect our students’ data when working on campus? A: We use encrypted devices, VPN-secured connections, and strict access controls so staff only see the minimum data required. Lost devices can be remotely locked or wiped to prevent data exposure.
Q2: What happens if one of your laptops is stolen from our campus? A: All laptops are encrypted, protected with MFA, and set to auto-lock. We immediately disable accounts, attempt remote wipe, and review access logs to confirm no unauthorized use.
Q3: Do your staff use our guest Wi‑Fi? A: We only connect to networks that meet our security standards, and we always tunnel sensitive traffic through a secure VPN. When possible, we work with your IT team to use a dedicated, segmented network for our systems.
Q4: How often do you review your security controls? A: We perform regular access audits, update security software automatically, and review backup and incident response procedures at defined intervals to keep pace with evolving threats.
You can adapt these answers into a one‑page “on‑campus security posture” sheet for schools.
How Farmhouse Networking Helps You Execute This
Farmhouse Networking can turn these principles into a concrete, managed program tailored to how your business actually works on campus.
Policy and risk workshop: We help you define clear on‑campus device, network, and data policies that align with your specific school clients and compliance requirements.
Secure device and identity management: We deploy and manage encryption, endpoint protection, MFA, and asset tracking across all staff who visit campuses.
Network and Wi‑Fi hardening: We work with both your team and school IT to segment traffic, configure secure VPN access, and monitor critical systems for suspicious behavior.
Backup, recovery, and incident response: We establish reliable backup schedules, test restores, and documented response playbooks for lost devices or suspected breaches tied to campus activity.
Staff training and client‑facing materials: We deliver concise, practical training for your team and help you create security summaries that reassure school decision‑makers.
The result is a repeatable security posture you can show every new campus client instead of starting from scratch each time.
Call to Action
If you want a practical, on-campus technology protection plan that your IT team can manage and your school clients will trust, Farmhouse Networking can help you design and implement it end to end. Email support@farmhousenetworking.com for more information about how Farmhouse Networking can help improve your business.
Recently converted a client’s Windows Standard 2012 R2 terminal server into a Remote Desktop Protocol (RDP) Gateway server so that remote users could connect to their workstations inside the corporate network. (The details of how to do this properly will follow soon in another post.) Once the setup was completed it was time to test the connectivity as follows:
Testing RDP Connectivity
Log into a remote workstation
Open Microsoft Terminal Services Client (MSTSC)
Type in the Computer name and User name into the General tab:
Click on the Advanced tab and then on the Settings… button.
Choose Use these RD Gateway server settings then type in the external URL of the RDP Gateway
Choose Bypass RD Gateway server for local addresses
Choose Use my RD Gateway credentials for the remote computer then click OK
Should then be able to click Connect to tunnel into that workstation
Issues with NULL SID as follows:
Getting errors during login process about inability to connect, noticed that it allowed for credentials at RDP Gateway but then failed when trying to login to local worksations.
Attempted to connect from machines without the KB2592687 and KB2830477 installed, but same errors occurred.
Checked the event logs for the local workstation and found Event ID #4625 NULL SID errors. Which should have pointed to issues with authentication.
Tested NTLMv2 login issues via changing the following registry entry:
[HKEY_LOCAL_MACHINE\SYSTEM\CurrentControlSet\Control\Lsa] – LMCompatibilityLevel set above 3
Did the same thing via Group Policy using the following setting:
Computer Configuration > Windows Settings > Security Settings > Local Policies > Security Options – “Network security: LAN Manager authentication level” set to Send NTLMv2 response only
Finally narrowed it down to NTP settings on the router not being set and mismatch of time.
“What’s the best browser?” sounds like a simple IT question, but it’s really a strategic decision about security, productivity, and supportability. The right answer is not one perfect browser for everyone, but a deliberate choice based on your tools, risk profile, and how your team actually works.
Why “Best Browser” Is the Wrong Question
Instead of asking “Which browser is best?”, it’s more useful to ask “Which browser is best for our stack and our security model?” Key factors include:
Existing ecosystem:
Microsoft 365 / Windows-centric shops often gain the most from Microsoft Edge because of tight integration and management tooling.
Google Workspace organizations often benefit from Chrome’s deep integration and extension ecosystem.
Security and compliance:
Enterprise features like centralized policy management, password monitoring, tracking protection, and secure profiles are now standard expectations, not bonuses.
Hardware and performance:
Older workstations may perform better with leaner browsers like Firefox or optimized Chromium-based builds.
In practice, most modern businesses standardize on one primary browser, with one backup for special use cases (e.g., legacy apps).
Practical Action Steps for Owners and IT
Here’s a concrete, owner-level plan you can hand to your IT team.
Define your browser strategy in plain language
Decide: “We will standardize on Browser X, with Browser Y as backup for legacy/edge cases.”
Align that choice with your core platform (Microsoft 365 vs Google Workspace vs mixed).
Inventory your current reality
Ask IT to audit:
Which browsers are currently installed
Which line-of-business apps require specific browsers (including any that still need “Internet Explorer mode”)
Add-ons and extensions in use, especially anything touching passwords or sensitive data.
Evaluate security and management capabilities Have IT compare your candidate browsers on:
Preconfigured favorites/portals for key business apps
Profile separation (e.g., work profile vs personal) where supported
Remove or deprecate unused/unsupported browsers to reduce attack surface.
Optimize for productivity
Have IT:
Pre-load extensions that actually improve work (password managers, SSO helpers, approved collaboration tools).
Configure PDF handling, “new tab” layouts, and default search engines to match how your team works.
Train your staff
Short, focused training on:
Which browser to use for what
How to spot dangerous extensions and phishing warnings
How to use profiles or sign-in correctly for business accounts
Review annually
At least once a year, have IT re-check: security features, management capabilities, and compatibility with your evolving app stack.
Common Client Questions (with Owner-Friendly Answers)
Q1: Why can’t staff just use whatever browser they like? A: Uncontrolled browser choice complicates security, support, and compliance. Standardizing gives IT one set of policies, one update path, and a predictable user experience to support.
Q2: Is Chrome always the safest choice because it’s popular? A: Chrome is powerful and widely used, but popularity doesn’t automatically mean “safest.” Enterprise security depends more on how the browser is managed, what ecosystem you’re in, and which controls are enforced.
Q3: We’re a Microsoft 365 shop. Should we switch to Edge? A: Edge often makes sense in a Microsoft-first environment because it integrates tightly with Windows, Microsoft 365, and endpoint management tools, and even supports Internet Explorer mode for legacy apps.
Q4: We use Google Workspace. Do we have to use Chrome? A: You don’t have to, but Chrome typically delivers the smoothest experience and strongest management story in a Google-centric stack. Other browsers can work, but may lack some admin or integration capabilities.
Q5: Is it okay to run multiple browsers? A: Yes—but with intent. Many businesses standardize on one browser for daily work and keep a second, controlled browser for specialized or legacy applications, with clear rules about when to use each.
How Farmhouse Networking Can Help
Farmhouse Networking can guide you from “random browser chaos” to a secure, documented browser strategy that matches your infrastructure and risk profile.
Here’s how we support owners and their IT teams:
Browser strategy & selection
Analyze your environment (Windows vs macOS, Microsoft 365 vs Google Workspace, on-prem vs cloud apps) and recommend a primary and secondary browser strategy.
Hardened configuration & deployment
Design and implement secure, centrally managed browser configurations: policies, extensions, update channels, and integration with your identity and endpoint management tools.
Legacy and line-of-business app support
Identify applications that require specific engines or “IE mode” and ensure they are handled cleanly without weakening the overall security posture.
Staff training and documentation
Create simple, branded “Which browser do I use?” guides and short trainings so your team knows exactly what to do, reducing tickets and confusion.
Ongoing monitoring and review
Periodic checkups to adjust policies as browsers evolve, new threats emerge, or your stack changes.
If you’re ready to turn browser choice from an ad-hoc habit into a secure, productive standard for your business, Farmhouse Networking can lead the process and support your IT team end to end. Email support@farmhousenetworking.com for more information about how Farmhouse Networking can help improve your business.
Recently wrestled with a Juniper SRX 220 router that a client needed help with securing RingCentral on. This entailed creating port forwarding rules for specific secure port ranges for TLS transport and linking those with rules for specific IP ranges belonging to RingCentral servers. Here are the specific lines of code that were used to make this connection possible (I am also throwing in the CoS settings used to shape traffic for good measure):
security policies from-zone Internet to-zone LAN policy RingCentral_IP1_NAT match source-address RingCentral_IP1 security policies from-zone Internet to-zone LAN policy RingCentral_IP1_NAT match destination-address any security policies from-zone Internet to-zone LAN policy RingCentral_IP1_NAT match application RingCentral security policies from-zone Internet to-zone LAN policy RingCentral_IP1_NAT then permit
security policies from-zone Internet to-zone LAN policy RingCentral_IP2_NAT match source-address RingCentral_IP2 security policies from-zone Internet to-zone LAN policy RingCentral_IP2_NAT match destination-address any security policies from-zone Internet to-zone LAN policy RingCentral_IP2_NAT match application RingCentral security policies from-zone Internet to-zone LAN policy RingCentral_IP2_NAT then permit
security zones security-zone Internet address-book address RingCentral_IP1 199.255.120.0/22 security zones security-zone Internet address-book address RingCentral_IP2 199.68.212.0/22
applications application RingCentral term Mobile_App_Media destination-port 4000-5000 protocol udp applications application RingCentral term Phone_Registration_UDP destination-port 5060-6000 protocol udp applications application RingCentral term Phone_Registration_TCP destination-port 5060-6000 protocol tcp applications application RingCentral term RTP_SRTP_Softphone1 destination-port 8000-8200 protocol udp applications application RingCentral term RC_Meeting_Signaling_UDP destination-port 8801-8802 protocol udp applications application RingCentral term RC_Meeting_Signaling_TCP destination-port 8801-8802 protocol tcp applications application RingCentral term RTP_SRTP_Deskphone destination-port 16384-16482 protocol udp applications application RingCentral term RTP_SRTP_Softphone2 destination-port 20000-60000 protocol udp
This should be everything unless you have custom firewall filters to lock down management access or something else like that. Please feel free to contact us if you need any help configuring either your RingCentral account or Juniper routers or switches.
And God will generously provide all you need. Then you will always have everything you need and plenty left over to share with others. As the Scriptures say, “They share freely and give generously to the poor. Their good deeds will be remembered forever.” For God is the one who provides seed for the farmer and then bread to eat. In the same way, he will provide and increase your resources and then produce a great harvest of generosity in you. - 2 Corinthians 9:8-10
We use cookies to ensure that we give you the best experience on our website. If you continue to use this site we will assume that you are happy with it.